Nothing brings the magic of autumn to life like the brilliant reds and oranges of leaves in the landscape. It’s what everyone eagerly waits for each year. It’s easy to bring a little of that autumn magic home with the right shrub! Check out these five easy-to-grow stunners that all perform well in Colorado gardens.
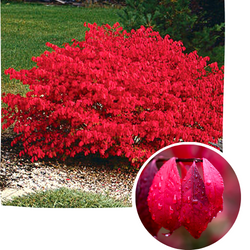
BURNING BUSH Euonymus Alatus Compacta Zone 4 / Elevation to 7500 ft. Mature size: 6′-8′ high & wide
The best of the best in fall color! Introduced to the United States in 1860, this striking shrub quickly became popular for its fiery scarlet foliage throughout the autumn season. It has a natural, open form that shows well in borders, beds, and foundation plantings. Stunning when used as a specimen planting, screen, or hedge. This one will create a statement wherever you plant it! It’s low maintenance and exceptionally easy to grow. Will grow best in full to part sun (at least 4-6 hrs. of full sun per day). It’s adaptable to moist or dry soil, and easily pruned for shape when needed.
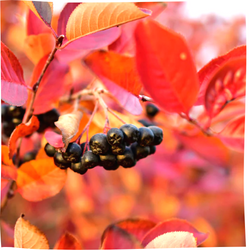
VIKING CHOKEBERRY Aronia Melanocarpa “Viking” Zone 3 / Elevation to 8000 ft. Mature size: 6′-7′ high / 3′-5′ wide
Glorious red-orange foliage in the autumn is accented by an abundance of glossy, black berries! This low-maintenance shrub doesn’t require a lot of attention and boasts the added benefit of being exceptionally pest and disease resistant. Berries are high in flavinoids and antioxidants as well as vitamins and minerals. Good for juice, jelly, and jams. Grows best in full sun — that’s at least six hours of direct sun per day. With this shrub, you’ll have the most striking autumn color in the neighborhood, as well as the best tasting homemade preserves and desserts!
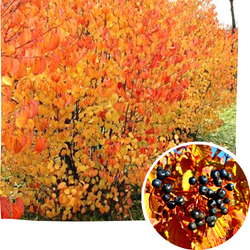
AUTUMN JAZZ VIBURNUM Viburnum Dentatum Zone 4 / Elevation to 7,000 ft. Mature size: 10′ high / 8′-10′ wide
This beauty has an upright-oval habit with an impressive kaleidoscope of yellow, orange, red, and burgundy fall color. Ornamental (non-edible) blue-black berries accent the bright colors nicely. This low-maintenance deciduous shrub exhibits an excellent adaptability to a broad spectrum of soil types. Beautiful used as a border, tall hedge, or background planting.
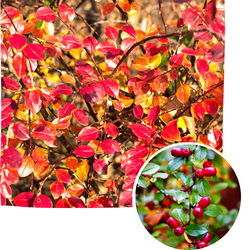
SPREADING COTONEASTER Cotoneaster Divaricatus Zone 2 / Elevation to 8,500 ft. Mature size: 4′-6′ high / 6′-8′ wide
This graceful shrub features arching branches that provide gorgeous autumn color ranging from orange to red to purple. Dark red berries dot the branches and persist into winter. Its informal shape creates a beautiful accent as a hedge, border, or foundation planting. It adapts well to most soil conditions and tolerates wind well. Grows best in full sun to part sun.
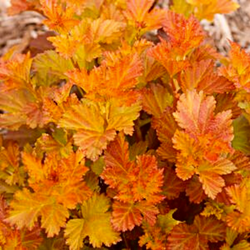
AMBER JUBILEE NINEBARK Physocarpus Opulifollus Zone 3 / Elevation to 8,000 ft. Mature size: 5′-6′ high / 4′ wide
A standout variety in the garden, with dramatic foliage color throughout the year! It’s colorful foliage emerges as orange, yellow and red, progresses to green, then deepens into amazing harvest tones of reds and purples in the autumn. Multi-lobed, textured edges contribute to the dramatic look and feel of the leaves. In winter, the older stems have that classic Ninebark peeling bark for added textural interest. This is a great choice to create a focal point in your landscape or grow it as a hedge or foundation planting. Grows best in full sun for optimum leaf color.
If you’re not quite sure what would work best in your home landscape, stop by and talk to one of our nursery experts. They’ll help you plant a little autumn magic that you’ll enjoy for years to come.
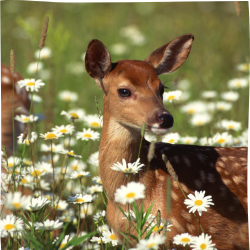
Use this handy list to help you choose plants that deer usually don’t find appetizing in the landscape.
Keep in mind: No plant is absolutely guaranteed to be deer proof! If deer are hungry enough, they’ll eat anything — even plants they don’t like — especially in the winter when food sources are scarce. The plants below are not usually a deer’s top choice.
Make sure you’re not planting a buffet of deer favorites in your landscape! Deer show a particular preference for narrow-leafed evergreens, especially arborvitae and fir. They also love tender, green plants like hostas, daylilies, and English ivy. You might also want to employ some other strategiesin addition to deer-resistant plant choices.
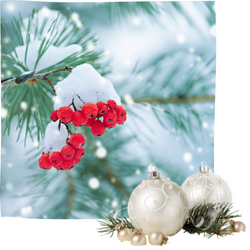
When purchasing your fresh Christmas tree, be sure to bring a blanket or tarp to cover the tree if you are tying it to the top of your car. This will protect your tree from drying out on the way home.
Cut 1 to 2 inches off the trunk of your tree and immediately place it in water. Add some tree preservative to the water. Check the water level daily. A tree may “drink” a gallon or more of water each day. If the water reservoir gets dry, even once, the tree cut will seal and may not take up water again.
Place the tree away from heat sources, including fireplaces, wood stoves, heat vents and direct sunlight. Always turn tree lights off when leaving home or going to sleep.
Don’t forget the wonderful fragrance fresh wreaths, greens, and garlands to add to the traditional holiday atmosphere. A spray of Wilt Stop will prolong the freshness of your greens and your Christmas tree.
After Christmas, cut the branches from your Christmas tree and lay them over your perennials as added protection from cold and wind.
Put your leftover Christmas tree outside and decorate it with strings of popcorn and cranberries to feed the birds. Add pine cones which have been spread with peanut butter and rolled in bird seed. The birds will love you.
Poinsettias
The colorful “flowers” of poinsettias are actually modified leaves called “bracts.” Poinsettias grow well in moist soil and temperatures between 65 and 70 degrees F.
Poinsettias prefer a bright area away from cold drafts and heat vents. Keep them out of direct sun. Never allow the soil of your poinsettias to dry out completely, but be sure they are not constantly wet or sitting in water inside the foil wrap.
Water the plant when the soil surface feels dry to a light touch, or pot feels lightweight when lifted. Never allow poinsettias to get so dry that they wilt. Remove from decorative foil or outer pot before watering.
Be careful of locations where the hot afternoon sun may shine directly on the colorful bracts and cause the color to fade. Temperatures ideally should not exceed 70° during the day, or fall below 65° at night.
Cyclamen
Cyclamen are great plants for brightening your home during the holidays. They prefer a cool dry and bright place. The pink, red, white or maroon flowers will continue for weeks.
Your cyclamen needs a cool, bright spot to thrive. Keep away from direct sunlight. Keep the soil moist but do not overwater – this is a common way to kill cyclamen. If you want your plant to flower again the following autumn, you will need to let it go dormant over the summer, reducing watering.
Holiday Cacti
With their colorful pink, red, or white flowers, holiday cacti are a beautiful addition to holiday décor. To ensure flowers for Christmas, keep your plant in a room with bright daylight hours and no light after sunset. They prefer cooler rooms.
Keep the soil on the dry side in November. Flower buds should set and the plants will be in flower by late December. Stop in and pick up our care sheet for year-long care of your holiday cactus.
Amaryllis
Amaryllis bulbs will bloom 7-10 weeks after planting. Choose a pot about 2″ wider than the bulb and one that is heavy enough to keep from tipping. Fill the pot part way with potting mix. Set the bulb so that the top 1/3 of the bulb will be above the top of the soil when you fill the pot to 1″ below the top edge of the pot.
Give the plant about 4 hours of bright light a day. Plant every 2 weeks for a spectacular color show all winter.
Paperwhites
Paperwhites are bulbs that can be planted indoors every two weeks for continuous flowering through the holidays. Paperwhites come in white or yellow and are wonderfully fragrant.
Paperwhites will bloom approximately six weeks after planting. To ensure strong healthy plants, paperwhites are best grown in bright, indirect light and in temperatures around 65° – 70°F. Add water as needed as the stems begin to appear. Stems grow tall and straight, with flower heads appearing when they reach 12 – 18 inches.
Norfolk Island Pines
Norfolk Island pines make great living Christmas trees and wonderful houseplants after the holidays. Be sure you use very lightweight ornaments and cool burning twinkle lights when you decorate these beautiful trees. Keep these plants away from drafts and heating vents.
Norfolk Pine prefers bright indirect light to direct sunlight. It will appreciate a boost in humidity during the winter months. You can increase humidity by using a pebble tray, placing a humidifier nearby, or grouping it near other plants.
Holiday Fragrance
To bring extra fragrance into your home during the holidays don’t forget herbs! Rosemary, lavender and thyme, along with many other herbs, will add a delightful aroma to the home.
Echter’s Plant Doctors are available during store hours seven days a week to answer your gardening questions. For accurate diagnosis, it helps to bring in a sample.
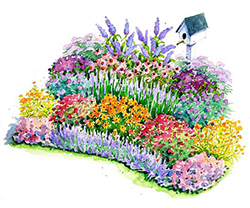
It’s every gardener’s dream: a beautiful landscape that’s big on color & texture and low on maintenance. Perennial gardens fit the bill beautifully! Filled with plants that return faithfully year after year, perennials are an easy way to grow a long-lived landscape that will bloom throughout the entire growing season. One afternoon spent planting a well-designed perennial bed will give you years of colorful, low-maintenance enjoyment. Let’s get growing!
Start with a Plan
Smart gardeners always begin with a well-thought-out plan. It’s easier to erase a mistake on paper than it will be later on in the garden with a shovel. Begin by measuring your area, then sketch in permanent structures like fences or porches. Next, take note of how many hours of sun your new perennial bed will receive in various seasons. That way, when it’s time to choose your plants, you can begin with a palette of plants that will naturally thrive in the conditions where they’ll be planted.
Continue by roughly drawing in your desired plant choices. You’ll want to plan your perennial beds with a variety of differing heights, textures, and bloom times. This helps ensure there will be color in your garden from early spring right through to late autumn. You might even consider adding some evergreens and ornamental grasses for winter interest. Use our handy Plant Finder Tool to help you research and choose.
Pay Attention to Plant Height
Choose tall, dramatic plants for the background, medium-sized plants to provide mass in the center section, and shorter plants for the front. When planning your plant locations, be sure to draw in plants at their final, mature size. This will ensure your plants will have plenty of room when they reach full size and avoid overcrowding in years to come. Overcrowding reduces the ability of air to circulate, which can lead to disease and pest problems.
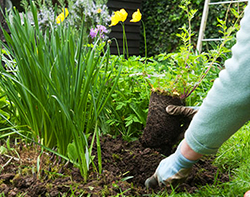
Get Ready to Plant
Before you plant, the single most important thing you can do to get your dream garden off to a strong start is to give your plants good healthy soil to grow in! You’ll want to add plenty of organic material to the native soil. The organic materials will help loosen heavy clay soils and add bulk to sandy soils, allowing them to retain moisture better. Layer 2″ of compost, peat, or composted manure onto the planting area. Blend this with existing soil to a depth of 4-6 inches. This works out to about four cubic yards of organic amendments per 1,000 square feet of native soil. Once your soil is prepared, you’re ready to plant.
Now for the fun part — stop by Echter’s, choose your plants, and bring them home! Spring is a wonderful time to get started on a perennial garden. Planting in the cooler temperatures helps those new perennials get off to a healthy start before the heat of summer comes on. Once you have your plants in place, give your garden a finished look by adding a layer of mulch. It will help control weeds while also acting to conserve water.
That’s it! With just a little elbow grease, you’ll be able to sit back and enjoy the beauty of your very own perennial garden. These long-lived plants will keep pumping out beautiful flowers year after year.
Stop in and see us! We have hundreds of different types of perennial plants for every landscaping fantasy, and our knowledgeable experts can help make your garden dreams a reality!
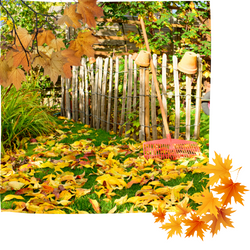
Fall is not the end of the gardening year. It is the start of next year’s growing season.”
~ Thalassa Cruso
Flower Gardens
Mums are frost hardy and are a great value for the spectacular show of color they provide. After the foliage freezes on your gladioli, cannas, dahlias, begonias and other tender summer-blooming bulbs dig them up, brush the dirt off, let them dry for a few days, then store them in vermiculite or peat moss and keep the medium moist throughout the winter.
Planting large pots of garden mums, asters, or flowering kale as you remove annuals from beds and borders gives you a spectacular show of color immediately.
Make notes on the past growing season’s gardening successes or disappointments while the details are still fresh in your mind. If you had problems, come in and we will try to help you turn them into successes.
Bulbs
October is the best month to plant your spring-flowering bulbs. Fertilize with bulb food, super phosphate or bone meal when you plant the bulbs. Water them in thoroughly after planting.When planting bulbs the pointed end of the bulb is positioned upward.
Plant small, early-flowering bulbs where they can be seen from indoors, since they bloom when it is usually too cold to enjoy them outside. Plant small, early flowering bulbs where they can be seen from indoors, since they bloom when it is usually too cold to enjoy them outside.
Perennials & Roses
Plant perennials at the same time you plant bulbs. You’ll be able to place perennial plants between your bulb groupings for color from spring to fall.
Many perennials and ornamental grasses add seasonal interest to the garden with attractive seed heads and plumes. Choose what you would like to remain intact and tidy up others by cutting back tall stems to the base foliage.
As the soil cools, apply mulch around perennial plants, especially those that have been recently planted.
Water roses less frequently and stop fertilizing to prepare them for winter dormancy.
Don’t forget to water monthly during the winter if there is no natural snow or rain.
Remove any foliage with fungal diseases such as powdery mildew and rust. Discard in the trash. Cleaning up now will help prevent a recurrence of the problem next year.
Cut back perennials leaving a 6 inch stub above the ground. Leave those with attractive seed heads for winter interest, such as coneflower and yarrow.
Leave the fronds of your outdoor ferns on the plant to protect the crowns. Prune out the old fronds in the spring when new shoots show in the spring.
Lawns
Green Thumb Winterizer should be applied in mid October. Your lawn will be nice and green in the spring.
As leaves fall, rake them from lawns and add to compost or shred them and dig directly into your vegetable garden. Soggy mats of leaves on turf can lead to disease problems.
Leave your grass at a height of 2 ½” for the final mowing of the season. Continue to water as long as the temperatures remain above freezing. Give your lawn a good watering before you drain your sprinkler systems. Drain the system before the temperatures drop into the low twenties, to avoid freeze damage to the lines and sprinkler heads. Insulate and protect the vacuum breaker that is above ground before the first freezing weather.
Trees
In October, deep water trees and shrubs every three weeks thoroughly.
Do not fertilize trees now. If you had insect problems on your trees and shrubs, spray a dormant oil spray on the trunks and limbs to suffocate those insects that are overwintering in the cracks and crevices of the bark.
October is the best month to select trees and shrubs with fall color. Genetically, plants may differ in their fall beauty, so what you see in the nursery is what you’ll have in your yard.
If you see browning needles in your pines and spruces, do not panic. It is a normal phenomenon. In the fall these plants lose their oldest needles and keep three or four years of their newest growth.
Rake up all aspen leaves to reduce the chance of revival of any leaf-related disease you may have experienced. Dispose of these leaves and do not add them to your compost pile or incorporate them into your vegetable garden.
Vegetable Gardens
Prepare your vegetable garden soil this fall following your harvest because amending soil in the spring can be delayed if wet conditions prevail. Add Premier sphagnum peat moss, manure and Nature’s Yield Compost now. It will age and decompose over the winter and provide for earlier and easier planting next spring.
Rototill shredded leaves, garden debris, grass clippings and kitchen scraps, (excluding meat products) into your garden this fall. They will compost over the winter and greatly improve your garden soil next spring. Be sure the organic matter is insect and disease free.
Cut dead stalks of asparagus and trim raspberry canes which have borne fruit this year. Look for the leftover plugs at the top of the canes to tell which ones fruited this year. Divide rhubarb and transplant overcrowded roots after the first killing frost for improved production next year.
Indoor Plants
Holiday cactus need special care to get beautiful flowers this December. Buds will form for the holidays if you keep artificial light off them at night starting in mid October.
Your houseplants will benefit from a good leaching. Take them to your kitchen sink or bathtub and water twice or three times to remove built up soluble salts remaining from fertilizer or minerals from the water. If left, these salts can build up and burn the roots and browning the tips and margins of the leaves.
Amaryllis is the most majestic of all the holiday plants. To have blooms at Christmas, plant amaryllis bulbs 7-10 weeks earlier. Choose a pot about 2″ wider than the bulb and one that is heavy enough to keep from tipping. Fill the pot part way with potting mix. Set the bulb so that the top 1/3 of the bulb will be above the top of the soil when you fill the pot to 1″ below the top edge of the pot. Give the plant about 4 hours of bright light a day. Plant every 2 weeks for a spectacular color show all winter.
Feathered Friends
Feeding the birds outside during the winter is great fun for young and old alike. You do need to have the right foods for the birds you are trying to attract. Start early while there are plenty of birds around. Keep the feeding stations clean and full. Clean out bird houses and bird feeders to prevent the spread of diseases for next year’s families. Be sure to supply a water source for birds during the winter time.
Water Features
Get your pond ready for winter. Remove debris and clean the pond surface and filters. Remove old foliage and place plants into deeper water. Pond netting will keep fallen leaves and unwanted predators out of your pond.
October is the time to clean the organic matter from the bottom of your pond. Remember the yucky sludge from your pond makes an excellent addition to your compost pile.
Set up a deicer or aerator in your pond to ensure one area remains unfrozen and gasses can exchange for fish.
Empty fountains and remove pumps before freezing weather arrives. Cover fountains with fountain covers or bring them into the garage. Birdbaths must be coated with Thompson’s Water Sealant before winter if they are left outdoors. Use a birdbath heater to prevent the water from freezing.
After October 15, (or when the water temperature falls below 50º F) feed fish Tetra Pond Spring and Fall Diet. Stop feeding fish once you see ice along the edges of the water in the morning.
Miscellaneous
Be sure to rake your leaves in the fall, disposing of any diseased or insect-ridden leaves. Rake healthy leaves into a pile, chop them up with your lawn mower, and add the resulting mulch into your compost pile or rototill it into your garden.
It pays to have good quality tools and keep them in good condition because it causes the least amount of damage or stress to plants. It’s also easier on the gardener as your work will go faster.
Choose a pumpkin with a stem that is at least 2″ long. Pumpkins that are darker orange may last longer and are a bit tougher. When you get it home, clean it with soap and water to keep bacteria away. Protect from frost.
Stay warm while outside with a chimenea or fire pit. These outdoor “fireplaces” will keep you cozy warm while preparing your meal and entertaining outside.
Stop spiders, crickets, millipedes, earwigs and other bothersome bugs from coming into the house for the winter by spraying Green Thumb Home Pest Control around the foundation of your house and especially window wells.
Fall is a great time to relax, enjoy your patio and cook outdoors. Try adding apple, hickory or mesquite chips to your grill for a unique flavor.
Echter’s Plant Doctors are available during store hours seven days a week to answer your gardening questions. For accurate diagnosis, it helps to bring in a sample.
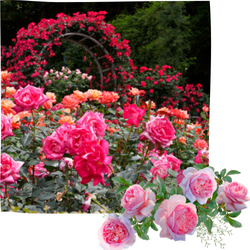
“It was June, and the world smelled of roses. The sunshine was like powdered gold over the grassy hillside.”
~ Maud Hart Lovelace
Flower Gardens
“Dead-head” (pinch off the spent blooms) on perennials, annuals and roses for longer flowering periods and more and larger blooms.
Want some color in a shaded area? Try begonias, impatiens, coleus, ivy geraniums, fuchsia, or lobelia. Watch for geranium budworm on geraniums and petunias. Besides the obvious destruction of the flowers, another telltale sign is tiny black droppings on leaves and the ground beneath the plants. The most effective treatment is to spray Eight insecticide every 10 days or treat organically with BT.
Shade your patio for late summer by planting annual vines, like morning glories, moon flowers, scarlet runner beans, or sweet peas.
Cut flowers for bouquets early in the morning and place the stems immediately into a bucket of water to keep them fresh until you are able to arrange them.
Stake your tall blooming flowers like gladioli, delphiniums, and cannas to keep the flowers showing and upright.
If you are going away on vacation this summer, water all your plants (indoors and out) thoroughly before you leave. A drip system with an automatic timer will assure you that your plants will be watered while you are gone.
Container Gardens
Container gardens and hanging baskets can need a lot of fertilizer in a short time. The only practical way to get enough fertilizer to them is with a water-soluble fertilizer like Jack’s Classic Blossom Booster.
Top off your planters and container gardens with a half-inch of Mini Nuggets bark mulch to help keep in the moisture.
Perennials & Roses
Prevent rose and perennial diseases like powdery mildew from taking hold by using a systemic fungicide before the problem appears. Once those diseases appear it is very difficult to control. Bee balm, phlox, columbines and lilacs are some of the plants prone to powdery mildew.
Fertilize your roses regularly for continuous, large and beautiful blooms. We also have rose fertilizer with a systemic insecticide for continuous insect control.
If you had rust or black spot on your roses last year, give them a good preventive spray to reduce the problem this year. You will have to repeat the spray according to the directions on the container.
Look for empty spaces where you could plant some bulbs this fall between perennials to add more color next spring. Our fall-planted bulbs arrive around Labor Day weekend.
Control grass in perennial flower gardens with Over the Top. It is unique in that it kills grass without damaging most perennials.
Shade your patio with perennial vines including trumpet, honeysuckle, clematis, Engelman ivy, wisteria and silver lace vine. Even grape vines work well to create a shady spot.
Pinch back asters and mums until mid July to encourage branching, compact growth and extra flowers.
Too much shade? Echter’s has many shade-loving plants. For perennials try ferns, hosta, forget-me-nots, lamium, astilbe, violas, columbine, hellebores, bergenia, lily of the valley, and many more.
Plant baby’s breath in your rose garden. It’s a great addition for any of your flower arrangements.
Grass has a very hard time growing under spruces and pines. To solve this problem, we suggest either mulching or planting one of several ground covers. Vinca, purpleleaf wintercreeper, ajuga, sweet woodruff, plumbago, creeping mahonia, and kinnikinnik are just a few suggestions for those difficult situations.
Use Mini Nuggets mulch or red cedar mulch in your flower beds. They will retain moisture and retard weeds from emerging.
Vegetable Gardens
Avoid overhead watering when tomatoes, peppers, squash, cucumbers, corn and other vegetables that need pollination are in flower as the pollen may be washed away, resulting in fewer fruits.
Remove the Season Starters from around your tomatoes, peppers, etc. before the weather turns hot.
Watch for tiny holes in radish and bean leaves. Flea beetles are most likely the problem. Spray or dust with Eight to take care of those tiny problems.
Ross netting over your fruit trees and raspberries will help keep birds and squirrels out of your fruit crops. In addition, bird-repelling scare tape will be beneficial in protecting your fruit for a while.
A floating row cover “tent” over your cabbage, broccoli and cauliflower will help eliminate cabbage loopers. If they are already present, a dusting of Eight dust will take care of this insect.
Mulch your annual flowers and vegetable garden after the soil has warmed. Use Mini Nuggets bark mulch for the summer, and then till it into the ground this fall to improve the soil structure.
All vegetables should be harvested early in the morning when it is cool, especially lettuce, spinach, herbs, peas, and beans. Pick edible pod or sugar pod peas when the seeds are barely visible for best quality. Continue fertilizing with a high phosphorus (the second number) fertilizer. Corn is an exception; it prefers a bit higher nitrogen (the first number) in the analysis.
Trellis your vining cucumbers, squash and small gourds to make more room for other vegetables. Trellising also improves air circulation and keeps the fruit off the ground.
Use soaker hoses or drip irrigation systems to get water directly to the plants’ roots. You can either lay the hose on top of the mulch next to the plant or under the mulch. This is the most efficient way to water your gardens.
Plant bee-attracting flowers in and near your vegetable garden to draw these pollinators to your crops. If you have to use an insecticide, use it very early in the morning or late in the evening to protect the bees. Harvest broccoli when the buds are still tight and before any flowers open.
Lawn Care
Those impossible weeds like bindweed, dandelions and thistle in your lawn can be controlled with Ferti-lome’s Weed Out or Weed Free Zone. These are the most effective weed killers you can buy.
If you fed your lawn in April, it’s time to put on another application of fertilizer before the summer heat arrives. A slow release fertilizer is a must for this time of year.
You can use your grass clippings either as mulch in your garden or in your compost pile. Clippings have valuable nutrients. If you used a weed killer over your whole lawn, don’t reuse the clippings from the next mowing.
The best part of the day to water our lawns is early morning while it is still cool and use a low-angle sprinkler that puts out large water drops for your lawn watering. This will reduce water loss due to evaporation. Use a sprinkler that fits the area to be watered to avoid run-off onto the sidewalk, driveway or street.
Trees & Shrubs
Container-grown trees, shrubs, roses, and perennials can be planted anytime during the summer. Planting early in the morning or in the cool of the evening reduces the stress on both the plant and the planter.
Protect your trees and shrubs from grass trimmers. The best way to protect these plants is to eliminate the grass directly around the tree, encircle it with weed barrier fabric, and cover the fabric with bark or rock mulch.
Watch for wasps or yellow-jackets in and around your trees (especially aspens). This may be a sign that there are aphids on the leaves. By ridding your trees of the aphids, the yellow-jackets will go away.
Prune spring-flowering shrubs and ornamental trees after they have finished blooming. Prune only the spent flowers of lilacs. Lilacs set their flower buds for the next year very soon after flowering, so don’t prune into the branches.
Placing weed barrier around trees and shrubs with about 3″ of mulch on top will retain the moisture that you put on your plants. Cut to the edge to slide fabric into place around the plants. Cut a large “X” into the fabric where each plant is so you can fold back the fabric as the plant grows. Be sure to keep the weed barrier and mulch about 4″ away from the trunk of your trees and shrubs.
Don’t be alarmed if you find tiny fruit on the grounds under your fruit trees. Fruit trees automatically drop poorly pollinated fruit. This is a natural occurrence. You can also help your crop by thinning the small fruit on the tree to six to eight inches apart. Leave the largest and healthiest fruit. This will make it easier on the tree and improve the quality of the fruit. This will also ease the weight on the branches.
Watch for deformed or mottled leaves on honey locust. Leafhoppers and pod gall midge are common insects on these trees. A good systemic insecticide will help rid your trees of these pests.
Spray your ash trees for the ash sawfly and aphids. We have sprayers that reach 30 feet, and can take care of these pesky insects early. Prevent re-infestation for one year by applying Ferti-lome Tree and Shrub Systemic Insect Drench with a watering can. This will also protect your ash trees from the deadly emerald ash borer which reached Colorado in 2013.
If you suspect spider mites on any trees, shrub or evergreen, you can do this simple test. Take a piece of white paper and shake the branch onto the paper and examine the paper to see if anything is moving.
Water Gardening
Once the temperature of your pond reaches 65 degrees, it is safe to set out tropical water lilies. Place water lily fertilizer tablets into the soil of your pots.
Water hyacinths and water lettuce are nature’s floating filters. They help oxygenate the water and keep algae growth down. Algae can also be controlled by a floating barley straw bale in the pond.
If you don’t have room or don’t want to dig a hole in your ground, you can still have a water garden. Use a large non-draining ceramic pot to create a small water garden. Add a couple of water plants and you are all set.
Feed your pond fish on a regular basis, but only what they can eat in five minutes.
Houseplants
Aloe plants are not only decorative, but also practical. They have a wonderful healing sap for rashes, cuts, burns and sunburns. Just break a stalk open, squeeze and apply. Keep an aloe plant among your houseplants.
Wildlife
Change the water in your birdbaths weekly and clean your bird feeders to prevent diseases.
Home
To control mosquitoes, drain all standing water, no matter how small the amount, including rain gutters, plastic sheeting, pipes, drains, trash cans, saucers under pots, etc.
Change the water and clean your birdbaths and wading pools at least once a week to keep mosquitoes from laying eggs in stagnant water.
Use Quick Kill Mosquitoes or Mosquito Plunks in your ponds and fountains to kill the mosquito larvae. These controls do not harm fish, birds or water plants.
Before you treat or spray lawns, houseplants, trees, shrubs or flowers, be sure your problem is identified correctly. Bring a sample of any plant problem in to Echter’s plant doctors for a correct solution to the problem.
Echter’s Plant Doctors are available during store hours seven days a week to answer your gardening questions. For accurate diagnosis, it helps to bring in a sample.
“It was such a pleasure to sink one’s hands into the warm earth, to feel at one’s fingertips the possibilities of the new season.”
~ Kate Morton
You might think of the growing season as the time between spring’s last frost and autumn’s first frost, but all vegetable gardening doesn’t wait for warm weather to be in the forecast. Cool season vegetables are hardier varieties that tolerate — and even thrive — in the cold soil of early spring.
When Can You Plant? What’s really important is soil temperature — it must be in the 40°F range for cool season vegetable seeds to germinate. Simply go by the general rule that soil is warm enough when you can easily turn it with a shovel.
What Can You Plant? Cool-season crops include the salad vegetables: lettuces, kales, chard, onions, peas, and radishes. Everything in the cabbage family (cabbage, broccoli, cauliflower) also grows well in the cool spring air. In fact, their flavor often depend on harvesting before the heat of summer sets in.
Planning To get the most vegetables throughout the year, plan for two “shoulder” seasons of cool-season crops. Plant spring vegetables in April, then follow with warm-season veggies like tomatoes, peppers, and corn in the summer. Then you can plan on planting a second crop of cool-season vegetables in the autumn after the weather cools down.
Location For your cool-season beds, choose a well-drained spot that gets as much sun as possible. Add some organic matter such as compost or sphagnum peat moss and spade or till it into the soil. You can water less frequently in the cooler seasons since plants will dry slower in cooler temperatures.
Making the Transition from Greenhouse to Garden Many bare-root vegetables and cool-season crops can make the transition into the outdoor garden — but only after going through a process known as hardening off. This process reduces stress and is essential to the success of your tender plants.
Plants that start life in a greenhouse or under lights in your home spend their time in pampered comfort. The temperature is perfect, the wind doesn’t’ blow, water is always gently and carefully applied, the sun never scorches, and rain never pounds. To prepare them for the harsher realities of life outdoors, they’ll need to gradually acclimate.
For one to two weeks, move the plants outside during the day while temperatures are warm. Then bring them back inside at night when the temperatures chill down. Place them in an area that’s protected from sun and wind. The third week, as long as night temperatures aren’t going to drop below freezing, you can leave the plants in a protected area overnight. After this adjustment period, you should be able to safely leave your plants outside for the season.
Always be Prepared for Frosts Most cool-weather vegetables can tolerate a light frost, but you’ll want to keep the frost cloths handy for sudden cold snaps and those inconvenient late-spring and early autumn frosts.
You can also protect planted veggies with a Season Starter. These transparent “walls of water” are simple solar shelters that allow the soil to warm to a temperature suitable for plant growth.
Keep the Harvest Going You can keep the supply of spring veggies going with succession planting. Plant your fast-growing crops in two-week intervals to prolong the availability of lettuce, spinach, peas, and radishes. When the weather gets too warm for these vegetables, you can plant more of them in the shade of taller plants like pole beans and corn. This system is also good for gardeners with limited space.
Growing your own food has always been one of the healthiest (and tastiest!) ways to feed your family. If you can’t wait to get your hands dirty in the garden, give cool-season crops a try!
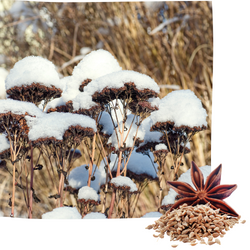
November comes, and November goes, With the last red berries And the first white snows.
The fires burn And the kettles sing, And earth sinks to rest Until next spring.
~Elizabeth Coatsworth
Flower Gardens
To store tender spring-blooming bulbs such as canna lilies, begonias, gladioli and dahlias, put in a crawl space or garage where temperatures stay between 35 to 50° F. Use an old Styrofoam cooler or cardboard box filled with vermiculite or perlite and keep moist, not wet.
There is still time to plant spring-flowering bulbs until the ground freezes. You’ll be happy you planted some extras when they bloom early next spring.
If you are cleaning out your annual pots, you can recycle both the old plants and the soil by either putting them right in your gardens or by putting them in your compost bin.
You can reduce the number of overwintering insect larvae by turning the soil in the flower beds now, especially where geraniums and petunias were grown last year.
Perennials & Roses
Cut any remaining debris down in the garden or flower bed. Cut back perennials to 5″. Tall stems left to blow in the wind can damage perennial crowns. Leave ornamental grasses to provide winter interest until spring.
Put Rose Collars around your roses in mid November. Fill with Mini Nuggets Bark Mulch.
Mulch your perennial and bulb beds after the ground freezes. Mulch conserves soil moisture and helps minimize freezing and thawing of the soil.
If you had powdery mildew, black spot or any other fungus diseases on your shrubs, roses, trees or perennials, be sure to clean up all leaves and debris and get rid of it – do not put this debris in your compost.
Lawns
If you haven’t already put your Green Thumb Winterizer on your lawn, do it by early November. Apply when the weather is warm and water well afterward.
Water your lawn once a month during warm and dry periods. Since the sprinkler systems are drained, you will need to do this with a hose and sprinkler. Pay particular attention to southern exposures. Disconnect your hose from the faucet and bring it inside before the temperatures drop below freezing in the evening.
Vegetable Gardens
Your spring crop of asparagus will benefit greatly from the addition of manure to the bed.
After the ferns have turned brown, you can cut them back to 5″. Let the leaves collect to help mulch the bed. Soil amendments that improve your gardens can be tilled or spaded now and worked in over the winter.
Trees & Shrubs
Knock down heavy snows from your shrubs and tree branches by gently pushing up with a broom.
It is very important to water your trees, shrubs, perennial and bulb beds every 4-6 weeks throughout the winter. If dry soil freezes, there is a good chance there will be root damage and the trees and shrubs will suffer. Your plants will better resist insect and disease problems next year .
Tree wrap is important winter protection for young trees that have not yet developed their bark. The purpose is to keep the tree’s bark temperature consistent. Start wrapping at the bottom and overlap up to the first set of branches. In Denver wrap about November 15 and remove the wrap around April 1.
Protect tender shrubs, like rhododendrons, azaleas, hollies, etc. during the winter months from drying winds by providing a barrier made from a frame wrapped in burlap and placed on the north and west sides of each shrub.
Make good use of our winter snow by shoveling the snow onto your shrubs, trees and perennial beds.
Are you having trouble getting your wisteria to bloom? These plants need a good shock. Try root pruning this fall. Use a spade to cut into the soil 1 ½ to two feet deep, three or four places around the roots of the plant about four feet away from the trunk.
Indoor Plants
Now that our windows and doors will be shut for the winter, houseplants in the home are a very important air cleaner. Plants remove air pollutants from our homes and offices.
Move houseplants away from heat vents if you have forced air heating. Houseplants will benefit from added humidity.
Humidifiers are great, but you can also use a pebble tray. Take an oversized saucer, add pebbles, and fill halfway with water. Then place your plant on the pebbles. As the water evaporates, add more, but don’t let the plant sit in water.
Be alert to cold drafts — especially for ficus, philodendron, begonias, and gardenias.
Shorter days mean less growth for houseplants. Water only when your plants require it, but water the same amount every time you water. Use fertilizer at half strength every other time you water until mid March. Try to let your plants receive as much light as possible during the darker winter days.
Birds
Echter’s offers many seed mixes for all types of birds who are seed eaters. Individual types of seed are also popular and there is a great selection to choose from. Sunflower seed, safflower seed, peanuts, and Nyjer seed are among the favorite choices. Be sure to thoroughly clean feeders once a month.
Insect-eating birds such as flickers and nuthatches have a taste for suet rather than seed. Suet is a great energy source for birds in cold weather.
Distract the squirrels from your bird feeders by offering them corn on the cob, peanuts and Squirrel Food. Let the birds have the seed.
Home & Patio
Clean wrought iron and aluminum furniture and protect your patio furniture and grills with appropriately-fitted covers.
Remove concrete birdbath tops to prevent freezing and thawing which results in cement cracking and chipping.
Disconnect all hoses from exterior faucets to prevent damage to pipes. Drain hoses and store in the garage.
Make sure there is an opening in the ice in your pond. A pond de-icer will keep an opening so gases can escape and your fish will stay healthy.
If the deer repellents you have been using aren’t working anymore, try switching products. Deer can become accustomed to one scent. Switching ingredients is more effective.
Echter’s Plant Doctors are available during store hours seven days a week to answer your gardening questions. For accurate diagnosis, it helps to bring in a sample.
“The world’s favorite season is the spring. All things seem possible in May.”
~ Edwin Way Teale
Echter’s Plant Doctors are available during store hours seven days a week to answer your gardening questions. For accurate diagnosis, it helps to bring in a sample.
Flower Gardens
Wait until danger of frost has passed before planting tender plants. Frost blankets can help protect your plants from unexpected late freezes. When is it safe to plant my flowers?
Pinch back your annuals at planting to promote stronger, bushier plants and more flower production.
Annuals, vegetable plants and roses, selected from inside our greenhouses should be “hardened off” before planting outdoors. This is done by exposing the plants to the hot sun and drying winds gradually until the plants are fully acclimated.
Use weed preventer to keep weeds from sprouting in your flower and vegetable gardens after you have set out your plants. Don’t use weed preventer where you are sowing seed until after it is up and growing.
Summer-blooming bulbs like dahlias, gladioli, cannas and lilies can be planted outside now. If you started these bulbs inside and they are now up and growing, keep your frost blanket handy to cover them if there is a hard freeze predicted.
Plant your hanging baskets and container gardens now to give them a good head start. By June they should be well established.
Keep an eye on the weather and bring your baskets and containers inside if the weather gets cold.
If your outdoor hanging baskets and planters have dried out too quickly in the past, mix granules of Soil Moist (a polymer) into the media of your container gardens and hanging baskets before you plant. This will help retain water for the plants to use as needed. We’ve added polymers to Echter’s Container Mix so you can reduce the frequency of watering.
Perennials & Roses
Prune back hybrid tea roses, floribundas and other everblooming roses to 10″ in early May. Also, prune out any dead, diseased or weak canes.
Do not do a heavy pruning on climbing roses. Prune only those canes which are broken or dead. Deadhead, (cut off the old flowers) on daffodils, tulips, hyacinths and other spring-blooming bulbs, but don’t remove foliage until after it turns yellow. The foliage is making nutrients for the bulbs for next year’s show of color.
Weeds take nutrients from the soil and away from your desirable plants. The smaller the weed, the easier it is to remove. Pulling them early will keep them from producing and spreading seeds.
Put up plant supports now for perennials that need to be staked, like delphiniums, peonies, yarrow, etc. Before you know it these plants will be too tall to do it easily.
Speed up the warming of the soil in your perennial and bulb beds by removing the mulch from around the plants.
Vegetable Gardens
Before rototilling your garden, be sure the soil is on the dry side. Then, add compost and/or peat moss to the garden and work it all in.
Make your list of the tomato varieties and pepper varieties you want to grow in your garden from these links. It’s easier if you know what you want before you go shopping.
Plan your vegetable garden so that specific plants, like tomatoes, peppers, squash, cucumbers, etc. are planted in a different spot than they were planted last year. Rotation of your crops is very important to prevent any diseases prone to that particular vegetable.
When planning your vegetable gardens, consider planting extra rows and donating the surplus to your local food bank.
Plant your corn when the soil temperature reaches 60 degrees. Plant in blocks to improve pollination by the wind. Ross netting over your strawberries will help keep birds and squirrels out of your fruit crops. In addition, Bird Scare tape will be beneficial in protecting your fruit.
Check the “When is it safe…” link, which will enable you to judge when to plant your vegetable starts. For anything that you plant outside early this month, make sure that you have a frost blanket handy for those sudden and unexpected cold snaps.
For fun try cherry tomatoes or strawberries in a hanging basket. Combine tomatoes with lettuce in a basket for color contrast in an edible combination.
Cedar barrels or large pots make great vegetable gardens. Plant a tomato plant in the middle and lettuce, spinach or herbs around the edge for the beginnings of a great salad. Patio Prize tomato can be grown without a support. Indeterminate (vining) tomato plants need a tall tomato cage to support them.
Plant your own cup of tea. Chamomile, lemon balm, catnip, spearmint and peppermint are just a few herbs that make delicious, healing teas.
Never cut rhubarb stalks off the plant. Instead, hold the stalk near the base and give it a slight twist as you pull it away. Rhubarb flowers may be pretty, but they take away nutrients from the stalks. As soon as these flower stalks appear, prune them to the ground.
Bees are very important in pollinating fruit and vegetable crops. Time the use of insecticides before plants bloom and your will spare these beneficial pollinators.
Lawn Care
Set your lawn mower blade to 2 ½ to 3″ to encourage deeper drought-resistant roots. The longer grass will keep the ground cooler and require less water. Mow your lawn during the day or early evening when the grass is dry. Never mow when there is moisture on the blades. This encourages the spread of disease and causes the clipping to clump. Leave your grass clippings on the lawn by using a mulching mower and reduce your need for fertilizer by 30 percent.
If you fed your lawn in April, put on another application of fertilizer before the summer heat arrives. The best part of the day to water your lawn is early in the morning while it is still cool. There will be a lot less moisture lost to evaporation and the grass will be more resistant to fungal disease.
Now is a great time to reseed the bare spots in your lawn. Rake the areas thoroughly, scatter the grass seed and water it in, so that the seed can settle into the loose soil. Keep the seed moist until it has germinated. Fertilize with New Lawn Starter. Do not use a fertilizer with weed preventer in the areas where you have seeded or it will prevent the grass seed from germinating. If you had disease problems in your lawn last year, apply Ferti-lome F-Stop as a preventive measure
Prune off old lilac flowers just below the flower right after they bloom. Trim out a couple of the thickest branches all the way to the base to help keep the lilac full and well shaped. Prune other early-flowering shrubs after their blooming time as well.
Watch for wasps or yellowjackets in and around your trees (especially aspens). This may be a sign that there are aphids on the leaves. By ridding your trees of the aphids, the yellowjackets will go away.
Did you have worms in your apples last year? Help prevent these nuisances by spraying your apple trees with Bonide Fruit Tree Spray. Spray your fruit trees as soon as the flowers fade to control insects early. Another preventive measure is to rake up weekly all the apples which fall to the ground.
Pines put out a thick shoot, (called a candle) from the end of the branch each spring. To control the height of mugo pines and have denser plants, use your fingers to break (do not cut) the candles in half before they turn green and the needles begin to separate. Do not remove the whole candle.
Spray plants with Bonide All Seasons Spray Oil to control oyster shell scale and other insects. This is a safe and effective insect control. If you had problems with mildew on your lilacs, a good spray of a preventive fungicide will help eliminate this problem. Read the label for the frequency of each spray.
Fertilize your trees and shrubs early in May. There are several ways to fertilize: 1) Use a Ross Root Feeder with the appropriate fertilizer pellet to get the solution right down to the roots. 2) Use a topical granular around the plants and water in. 3) Use slow-release fertilizer and work it into the soil around each plant. This feeds them for several months.
Water Gardening
Divide water lilies and other hardy pond plants this month. Place Aquatic Plant Tabs into the soil of your pots of water plants to fertilize them.
Water hyacinths and water lettuce are nature’s floating filters. They help oxygenate the water and keep algae growth down. Algae can also be controlled by a floating barley straw bale in the pond.
May is a good time to introduce new fish to your pond. Float the bag that’s holding the new fish on your pond to equalize the temperature of the water inside to the temperature of the pond. Then release the fish into the pond.
Wait to introduce the tropical water plants when the water temperature reaches and stabilizes at 70 degrees.
Take your camera when visiting public gardens or even your friends’ gardens. If you want to have a beautiful flower or shrub you’ve seen, bring in a picture or a sample and we can help identify it for you.
Indoor Plants
Move your houseplants out to the covered patio at the end of May. Keep them out of the wind and direct sunlight. Remember to check them for dryness, since they will dry out much faster than they did indoors.
Turn your houseplants a quarter turn periodically to keep the growth from leaning toward the window and the light. Fertilize your indoor plants twice a month with Jack’s Classic Houseplant Special. A good fertilizing program will help your houseplants get their good spurt of new growth this spring.
Wildlife
Plant a trumpet vine or honeysuckle to attract more hummingbirds. Stop by our customer service desk for a list of other plants which attract “hummers”.
When trying to lure butterflies to your garden, place the butterfly-attracting plants in a large grouping. A saucer full of wet sand will provide water for butterflies. Ask for a list of plants which will attract butterflies to your yard at our Plant Doctor desk.
Attract ladybugs to your yard by planting marigolds, angelica, roses, butterfly weed, yarrow and many other plants. You can start your “colony” with ladybugs from Echter’s. Remember to disperse them in late evening when it is calm and mist the plant on which you need control first.
General
Check your hoses and connections to make sure they don’t leak. Echter’s carries hose repair kits and replacements for old washers.
When you hand water, use a nozzle with a shut-off or trigger nozzle that stops the flow of water when released.
“Anyone who thinks that gardening begins in the spring and ends in the fall is missing the best part of the whole year — for gardening begins in January with the dream.”
~ Josephine Nuese
Flower Gardens
Don’t worry if you see evidence of leaves of your fall-planted bulbs popping up out of the ground. This is quite normal and there is no way to stop them. Keep the soil moist, which will cool it and keep the bulbs hydrated.
To prevent sparrows and finches from shredding crocus blossoms, place a piece of Bird Scare Tape tied to a stick every few feet among the flowers. The flashing will frighten away the birds.
Check your gladiolus, dahlia and canna bulbs you have stored to make sure the media in which they are stored is still moist.
Perennials & Roses
When planning your flower bed, whether it is planted in annuals or perennials, don’t overlook ornamental grasses for a beautiful contrasting texture.
Be sure that the winter mulch around your perennials, roses and bulb beds is still in place. Replace mulch that has been blown away by heavy winds.
Cut the seed heads from your ornamental grasses and use them to make very attractive dried flower arrangements in your house.
Cut back last year’s growth from ornamental grasses now before this year’s new growth begins.
Lawns
When snow and ice are gone from shady areas of lawn (especially on the north side of structures) rake the grass to prevent snow mold.
Water your lawn with a sprinkler during long stretches of mild dry weather. Be sure to disconnect the hose and put it away before the weather drops below freezing again.
If you see “trails” in your lawn, you may have voles, a common rodent in Colorado. We carry products to eliminate this pest. Voles have been known to chew on bark of trees and shrubs, especially junipers. You may notice dead branches on junipers later in the spring. Look deep inside the shrub and you will see where the bark is missing.
Vegetable Gardens
January is a good month for gardening, at least on paper, as you start planning for this year’s garden. Although you’ll want to include many of your family’s favorites, why not try something you’ve never grown before?
February is the best time to prune grape vines. By waiting until just before growth begins in spring, you can recognize and remove any dead or damaged wood.
Your spring crop of asparagus will benefit greatly from the addition of manure to the bed.
January and February are the best months to purchase your flower and vegetable seed. The best availability and selection is early.
Take inventory of your seed starting supplies, such as pots, soil, and flats. Sterilize any that you have used before or purchase new supplies. Be ready so that you will have everything you need for a successful project.
When starting seeds indoors, use a propagation mat. It keeps the soil in the trays at a constant warm temperature. You will get quicker germination, more seedlings and more uniformity.
Trees & Shrubs
Knock down heavy snows from your shrubs and tree branches by gently pushing up with a broom. Start with the lower branches and work your way up the tree or shrub.
It is very important to keep your lawns, trees, shrubs, perennial and bulb beds watered once a month throughout the winter as weather permits. You will reduce the chance of root damage on perennials, trees and shrubs and reduce insect population and disease problems in your lawn next year.
Get an early taste of spring. Prune branches of forsythia, quince, spirea, dogwood, viburnum, pussy willow and crabapple and plum trees. Bring them indoors to bloom. Cut the branches at an angle and place them in a vase of water. Change the water twice a week and in about 3 weeks the stems will bloom. Don’t prune the rest of the shrub until after they have flowered in spring.
Prune summer and fall blooming shrubs in February. This is the time to shape up your trees as well. Remove dead, dying, or unsightly parts of the tree. Your pruning arsenal should include bypass pruners, a compound action lopper, a tree saw and a pole pruner at minimum. Bring in your tools for sharpening if they have become dull.
If you have large trees that need pruning, call us for the name of a tree service. The sooner you call, the more likely you will get your trees pruned at the best time of year.
February into early March is the best time to prune fruit trees. Prune out any dead or diseased branches, any branch that is crossing and rubbing another and any “water sprouts” (those weak “branches” that shoot straight up).
On a nice warm day, spray Bonide All-Seasons Dormant Oil on trees, shrubs, roses, vines or most anything else you had insect or disease problems on last year. It kills overwintering insect eggs and will help reduce the problem this year. Avoid spraying blue spruce or you will have a green spruce.
When shoveling snow from your sidewalks and driveways, pile the snow around trees, shrubs and perennial plants instead of out in the street as long you have not used chemicals or salt to melt the ice. These plants will benefit from the added moisture.
Indoor Plants
If a houseplant is not doing well, check these five growing factors: light, temperature, nutrients, moisture, and humidity. They must be favorable to provide good growth. Bring the plant in to our plant doctors if you need help with a diagnosis.
Keep holiday cacti blooming by keeping them in a cooler location with bright sun. You can move them outdoors in summer in a semi-shaded location. Then bring them in next fall for reblooming.
Cyclamen are great plants for brightening your home in winter. They prefer a cool, dry and bright place. The pink, red, white or maroon flowers will continue for weeks.
Try growing a citrus tree in your house. If is best to have a tree which has been grafted, as opposed to trying to grow them from seed. The fragrance of the blossoms is wonderful and after pollinating the flowers with a cotton swab or artist’s brush, you should eventually have fruit. Choose the sunniest window in your house for citrus.
Grow your own herbs inside. Either from seeds or plants, there is nothing like fresh herbs for all kinds of winter dishes, like soup, stews, and many other comfort dishes for those cold winter days.
Keep your poinsettia blooming after the holidays by providing proper care. Poinsettias need good drainage, so if the pot is still wrapped in foil, remove the foil or make a hole in the bottom to allow the water to drain out. Keep the soil moist, but don’t overwater. Place your plant in a cool, (60 to 65 degrees F.) location that gets plenty of light. Keep out of warm or cool drafts, and fertilize once a month.
Children are fascinated by “garbage gardening”. Carrot tops can be grown in a dish with a small amount of water. This results in a delicate fern. Sweet potatoes, pineapple tops, avocado seeds, orange or grapefruit, and peach seeds can also be started.
If you are overwintering your geraniums inside, be sure to cut them back 1/3 of their height before February 1.
If you have a problem with those very annoying fungus gnats coming from the soil under your houseplants, let your plants dry out down to at least 1 inch before watering them. Gnats thrive in moist soil and multiply. Quick Kill Mosquito Bits with Bti, a biological pesticide will control them in the larval stage. Applying a pyrethrum or permethrin to the soil will reduce their numbers. Whitefly sticky traps will also catch those that come out of the soil.
African violets bloom better when surrounded by other African violets. The more the merrier.
Birds
Echter’s offers many seed mixes for all types of birds who are seed eaters. Individual types of seed are also popular and there is a great selection to choose from. Sunflower seed, safflower seed and nyjer seed are among the favorite choices. Insect-eating birds such as flickers and nuthatches have a taste for suet and peanut butter rather than seed, so be sure to consider their needs as well.
Put your leftover Christmas tree outside and decorate it with strings of popcorn and cranberries to feed the birds. Add pine cones which have been spread with peanut butter and rolled in bird seed. The birds will love you.
Ever wonder about how the birds protect themselves in the freezing cold weather? First of all, they need clean feathers, so an unfrozen water source is essential for birds to bathe. They need water in the winter as well as spring and summer. By placing a birdbath de-icer in your birdbath, the birds will stay happy all winter.
Another requirement is shelter. You will often find a lot of birds in dense shrubs, spruce and pine trees. Any protection you can offer would be appreciated very much by our feathered friends. If squirrels are a nuisance, use a squirrel-proof feeder.
Home & Patio
Urea is a safer ice melt around lawns, plants and pets, but it only melts ice down to about 15 degrees. If you need to use calcium chloride for cold-temperature ice melting, try to avoid pushing it onto desirable plants. Only use as much ice melt as is necessary and try to keep it in the center of the walk.
Dried herbs for cooking taste better when dried on paper towels or a wire screen. Hanging them upside down can deplete their essential oils.
We can sharpen your mower blade for a nominal fee. Bring in your lawn mower blade on or off the mower.
Miscellaneous
Gardening is a great way to exercise. You can burn as much as 300 to 400 calories per hour by digging, raking, or turning compost. Besides, gardening is fun and fruitful! Be sure to start with short spurts and ease into longer periods of gardening time.
Echter’s Plant Doctors are available during store hours seven days a week to answer your gardening questions. For accurate diagnosis, it helps to bring in a sample.