Autumn is your lawn’s favorite time of year! It’s the best time to treat your turf to a little extra maintenance, that will ensure a thick, green, healthy lawn next spring!
Remove the Leaves “Leave the leaves” may be an excellent idea for your perennial beds and the ecosystem in general, but not for your lawn! Leaves block light and trap moisture. Those soggy mats of leaves on your turf can lead to disease problems. So as leaves fall, rake them from lawns and add them to the compost bin or shred them and dig directly into your vegetable garden.
Aerate to Loosen the Soil Regular aeration prevents soil from becoming compacted and covered with a layer of thatch. Thatch blocks water, oxygen, and nutrients from reaching the soil. It’s a good idea to aerate your lawn BEFORE FERTILIZING, so the fertilizer will be able to reach the roots.
Apply Winter Fertilizer Green Thumb Winterizer should be applied in mid October. This slow-release fertilizer will feed continuously for the next sixteen weeks, giving grass roots plant sugars to protect roots from freezing over the winter, and enough energy to bounce back in the spring.
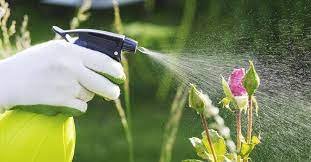
Get Rid of the Weeds In the autumn, weeds prepare for winter by sending energy and nutrients into their roots. It’s a good time to apply Weed Free Zone to kill these invasive weeds, roots and all. Make sure to remove weeds before they go to seed for the season, or you’ll see them again in the spring!
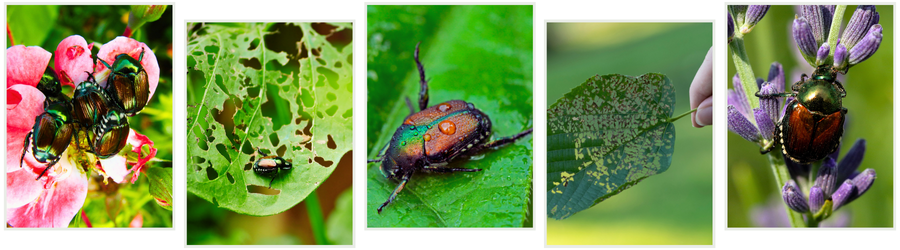
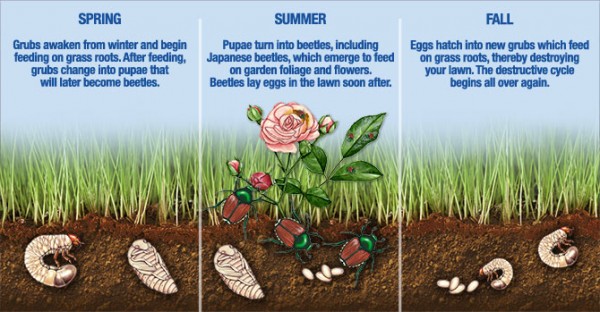
Grub Control No, the Japanese Beetles haven’t gone away — they’ve burrowed into your turf for the winter! Early Autumn is the prime time to apply a grub control before the weather turns colder and they burrow deeper. GrubGONE! is a bio-insecticide that is effective at controlling turf grubs without side effects of off-target damage to beneficial insects.
Continue Watering Continue to water as long as the temperatures remain above freezing, and always be sure to give your lawn a good watering before you drain your sprinkler systems for the year. While it’s true there is less evaporation at this time of year, natural moisture may not be enough to keep the grass roots hydrated and healthy going into the winter. Make sure your lawn continues to receive at least an inch of water a week.
Keep mowing Grass will continue to grow up until the first hard frost. If you put the mower away too soon and allow the grass to become too long, it will mat, which can make it susceptible to fungi like snow mold. In the autumn, aim to maintain an ideal height of 2 ½”-3.” This is long enough to protect the root system over the winter, but not long enough to encourage disease. Regular mowing is also an easy way to chop up those fallen leaves for a natural, soil-enhancing mulch.
Reseed and Repair The cooler temperatures of autumn make it an ideal time to thicken up existing turf. The soil is still warm, moisture doesn’t evaporate as quickly, nights are cooler, and the sun isn’t as hot during the day. This allows grass to grow more rapidly and gives it a chance to establish before cold weather arrives.
We all look forward to the spring season with delight each year. The promise of warmer weather, more daylight, and all of those beautiful spring flowers is a welcome reward after a long winter of grey days, icy air, and shoveling snow. Soon trees and shrubs will be budding, bulbs and perennials will begin emerging from the ground, and our gardens will slowly come back to life once again. Though it’s still too early to plant, there’s plenty to do in the garden. Grab your garden tools, and let’s get started!
CARE OF GARDEN TOOLS — Speaking of garden tools, early spring is a good time to make sure they’re ready for the upcoming season. Check your gardening supplies so that you’ll have what you need in the spring. Gives your garden gloves a good wash and dry, or replace worn ones. Take time to clean all tools thoroughly, removing any residual soil, then inspect for damage or rust. If you do find rust, give those areas a good scrub with steel wool. It will be a long season of work for your garden tools, so it’s a good idea to have them sharpened at the beginning of the season. Echter’s can do that for you! Simply bring in your tools (and lawn mower blades), and for a nominal fee, we’ll sharpen them. If you need to replace or add to your garden tool arsenal, stop by. We’re well stocked with all kinds of garden implements — especially at the beginning of the year.
EARLY SPRING CLEANUP — Winter can be hard on your garden! Take a walk around your garden to assess any winter damage. Remove debris leftover from winter storms, and tidy up the garden beds and boxes. Clean up any dead annual or vegetable plants that remained over the winter. Trim back the tattered foliage or old bloom stalks of perennials to encourage new growth to come in. Cut back ornamental grasses as low as possible, so the old foliage won’t detract from the new growth. Don’t be in too big a hurry to remove mulches though. There are plenty of beneficial pollinators overwinter in gardens by hibernating in dried leaf piles and last-season’s perennial plants, and March can still be one of our snowiest months!
PREPARE YOUR SOIL — Now is a good time to add organic amendments like compost and peat moss. Rototill or spade into your garden soil to a depth of 6 inches.
PLAN YOUR VEGETABLE GARDEN — A great vegetable garden starts with a great plan! Make a list of what you’d like to grow, how much area you have, and how many of each plant you’d like to grow. Check seed packets for plants’ mature sizes, sunlight and watering needs, and the yield of the veggies when planning. Then have fun mapping out and designing your planting areas!
IT’S TIME TO PRUNE — If you didn’t get to it in February, you can still do pruning of deciduous trees and shrubs in March. Some exceptions would be birch, maple, walnut, and elm. These should be pruned in mid-summer. In early spring, you can still easily see the branching structure of trees and shrubs before the leaves start coming in. Begin by removing the three Ds: anything dead, damaged, or diseased. Then move on to any crossed branches (branches that rub against another), water sprouts (branches that grow straight up from the branch), and suckers (branches that spring up from the base of the tree or shrub). Generally speaking, remove young branches that are growing inwards towards the center of the tree as opposed to outwards. Use a pole pruner to reach branches up to about 15 ft. off the ground. Pruning paints and wound dressings are not recommended on the pruning cuts. If you missed it, here’s a deeper dive into late-winter pruning.
GET STARTED ON SOME EARLY LAWN CARE — As in other areas of the garden, begin by checking for any problems that may have developed. Once the snow has melted off your lawn, check the turf in shaded areas for snow mold, a fungus that is white to pink in color and grows on the surface of the grass blades. If you see evidence of snow mold, lightly rake the affected areas and dispose of the debris. Any remaining mold should dissipate on its own after that.
LAWNS SHOULD BE CORE AERATED once or twice each year. That’s done by poking holes in the ground and pulling out plugs. This reduces soil compaction and helps control thatch in lawns while also helping water and fertilizer move into the root zone. Schedule your lawn for an aeration in March, and prepare by marking your sprinkler heads to avoid having them damaged. Water the lawn the day before aerating, so it will be softer and easier to pull plugs. Then water again after aeration to help the lawn recover. Leaving the plugs on the surface will help break down the thatch that has accumulated.
GET A HEAD START ON WEEDS — You can begin to get ahead of weeds by choosing a lawn fertilizer with a pre-emergent as your first feeding of the year. This will prevent annual weed seeds from germinating, and give your lawn a chance to thicken up and discourage weeds on its own. It’s best to apply these after aerating the lawn. This is important because aerating after a pre-emergent will greatly reduce its effectiveness!
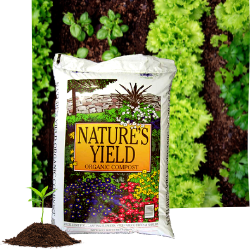
OVERSEEDING — As the weather begins to reliably warm up in March, you can begin overseeding thin areas of lawn. Rake areas to be seeded to expose and loosen the soil, then apply a thin layer of Nature’s Yield Compost . Use a high-quality seed blended for your conditions. Echter’s has many different blends to choose from. A hand spreader will help to apply the seed evenly. After seeding, be sure to keep the surface area moist until the seed is well germinated.
PLANT COLD-HARDY CROPS — While it’s too early to plant tender, warm-season plants, it is time to plant some early cold-hardy crops. Things like onion sets, bare-root strawberries, asparagus roots and seed potatoes can be sowed directly into the vegetable garden in March. Be sure to keep a frost blanket handy for any late-season frosts, just to be on the safe side.
START SEEDS INDOORS — Now is the time to start broccoli, Brussels sprouts, cauliflower, kohlrabi, alyssum, lobelia, pansy, and geranium seeds inside for planting out later in the spring. Start tomatoes and peppers inside now, then they’ll be ready to transfer to the garden beds in late May.
PREPARE BIRDHOUSES FOR THE BUSY SPRING SEASON — Returning birds will be looking for real estate soon! In preparation for the new arrivals, clean out and sterilize last year’s birdhouses, or put up new ones. Make sure any older birdhouses are still firmly mounted as well. It’s a good time to perform bird feeder maintenance too. Clean out all feeders and fill with fresh seed. You may also want to consider creating a pile of nesting materials to make your yard extra inviting for this year’s visitors.
Late winter is an ideal time for pruning deciduous trees and shrubs. There’s no foliage growth yet, so the shape of the tree is easy to see — and so are any problems that need to be corrected through pruning! Pruning doesn’t need to be an overwhelming chore though. If you follow a simple checklist each year, you can keep up with this winter gardening task and keep your trees healthy. Gather your pruning tools, and let’s get started!
The three Ds: Dead, Diseased, Damaged
Begin your pruning by removing any of the three Ds — anything that’s diseased, damaged, or dead. Broken and damaged branches are more than just unsightly. They open the tree up to pests and disease. Prune back to at least 6 inches below the diseased area into healthy wood.
Removing dead branches is an obvious pruning task, but how do you know if a branch is dead or just dormant? Scrape away a small part of the bark, If it’s alive, it will be green underneath. If it’s dead, it will be hard and brown inside. You can also try the “bend test.” Bend the branch gently. A live branch will bend, but a dead branch will snap.
Water Sprouts and Suckers
Next, look for suckers and water sprouts and remove them. Water sprouts are newer branches growing straight upwards through the tree, whereas suckers are new growth springing up around the base of the tree.
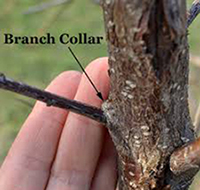
Water sprouts are caused by heavy pruning in previous years, or by stress to the tree. To prune them away, cut at the base making sure to preserve the branch collar. The branch collar is a swollen area at the base of the water sprout. Prune to about 1/2″ away from the branch collar.
Crossing and Competing Branches
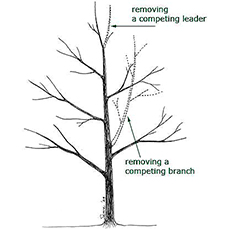
Look for branches that are not growing out from the center of the tree. These may be branches that, like water sprouts, grow straight upwards through the canopy. Also look for branches that are growing inwards towards the trunk. These branches are called competing branches because they compete for space, sun, and nutrients with healthier branches. Cut these away, so what remains are only healthy branches that are growing outwards from the main trunk.
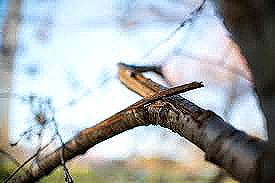
Crossing branches are branches that grow across another. If left in place, these can rub against another branch causing damage. Removing a crossing branch ensures you won’t have to removed a damaged branch next winter!
The overall shape of the tree should be clearly visible now. Step back and look at the overall structure of the tree. If it still seems a little overcrowded in spots, prune until the shape is more even. You might want to raise the canopy a bit — that is, prune away any branches that are just too low. If there are branches that are in the way each time you mow in the summer, go ahead and remove them.
Renew an Overgrown Shrub
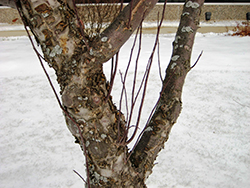
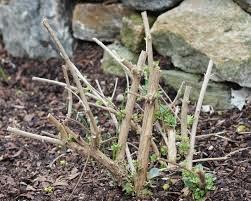
For shrubs that may have become overgrown and leggy through the years, a late-winter pruning can be done to improve shape, vigor, and blooming. Prune away the oldest and weakest canes at or near the ground level. This will improve the overall height & shape and should result in more foliage and better flower quality.
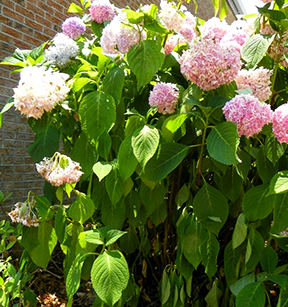
NOTE: It’s crucial to do a little homework before you begin pruning. If you prune spring-blooming shrubs (think lilac, forsythia, etc.) in late winter, you’ll be cutting off this spring’s blooms! Some shrubs (like hydrangea macrophylla) bloom on “old wood,” which means last year’s new canes. If you prune out the old wood on these shrubs, you’ll cut off the canes that would be blooming this year! So, a little research will ensure you’re pruning the right shrub at the right time of year.
That’s it! If you keep up with this pruning checklist each winter, it should never become an overwhelming chore, and your trees and shrubs will be much healthier when springtime arrives.
Why should you consider starting this year’s garden indoors? Why not just wait until the last frost date passes, and plant seeds directly in the garden beds? There are lots of reasons — especially in Colorado — why getting a head start on the season is such a good idea.
Get a Jump on the Growing Season Besides just being a lot of fun, one of the best reasons to start seeds indoors is that here in Colorado, the growing season tends to be rather short — even more so in the mountain communities! Being able to set young plants out (as opposed to sowing seed directly) allows your crops to be a few weeks ahead at the beginning of the season, and that means earlier harvests of those tasty spring and summer veggies!
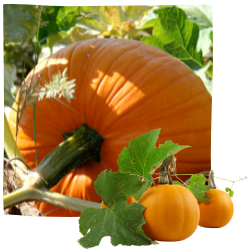
Grow a Warm-Season Crop in a Short-Season Climate Everyone’s favorite summer vegetables usually have a long growing season. Beans, corn, and tomatoes can require anywhere from 60-100 days from seed to maturity, and those bright October pumpkins require 120 days! If you have to wait for the outdoor soil to reach the optimal temperature for growing, you’ll miss out on valuable growing days. Considering Colorado’s growing season is only an average of 150 days, getting started earlier sure can be an advantage. Start these popular summer crops weeks earlier by seeding indoors, and start enjoying those juicy tomatoes a little sooner!
When it comes to starting perennial flowers from seed, you may be able to get first-year blooms on flowers that usually don’t flower until their second year in the garden. Varieties that benefit from a head start indoors are: Asters, Black-eyed Susans, Coleus, and Lavender.
Grow a Variety That Isn’t Offered as a Starter Plant You might also consider starting from seed if you’d like to try varieties of veggies that your local garden center doesn’t offer as “starts” or young plants in the spring. By growing your own vegetables from seed, you have more varieties available to you. For example, while we grow more than 200 different types of vegetable plants each year here at Echter’s, we can’t offer every variety of every crop. Sometimes there may be something you’d like to grow in your garden that we don’t offer. Seed gardening is a great way to grow those extra-special varieties that may not be commonly available.
Fun for kids If you’ve got little gardeners around the house, the process of planting a dry, dead looking seed into soil, then watching it sprout and grow into a live plant is nothing less than magic! It can also provide a valuable lesson in where our food comes from. One small seed can grow a lot more than a plant. It just might grow a lifelong love of gardening.
A Word of Caution With some crops, it can be beneficial to just wait until after the last spring frost and sow directly into the garden. This tends to be true of root vegetables like radishes and carrots. Root crops are fussy about being transplanted because no matter how careful you are during the transplanting process, there’s bound to be some minor root damage, and that will show up in the final vegetable. Direct sowing produces better results in those plants.
There’s so much satisfaction that comes from starting your garden from seed. You control what’s going into your food crops, you can save money, and you have access to a greater variety of plants. One of the nicest things about seed gardening is having something green and growing during the grey days of winter. Pay us a visit, and be inspired by all the crops and varieties that are available this year!
Never worry about the size of your Christmas tree. In the eyes of children, they are all 30 feet tall. ~Larry Wilde
Nothing says Christmas like the spicy scent of a fresh-cut Christmas tree — a real tree. Keeping your tree fresh through the holiday season can be tricky though! Here are a few tips from the pros on how to make that forest freshness last.
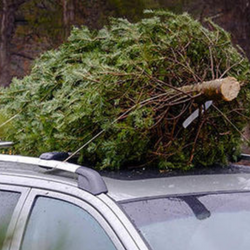
BRINGING THE TREE HOME When purchasing your fresh Christmas tree, be sure to bring a blanket or tarp to cover the tree if you are tying it to the top of your car. This will protect your tree from drying out on the way home. Be certain your vehicle can safely transport the tree you purchase to your home. Bring rope or bungee cords to secure the load adequately.
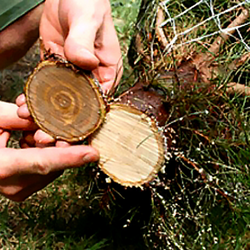
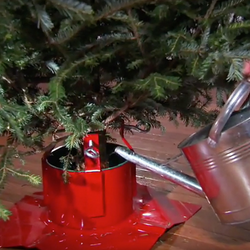
GIVE IT A FRESH CUT Begin by cutting 1-2″ off the trunk of your tree, and immediately place it in water. Why? When trees are cut, pitch oozes out and seals the pores. By sawing a bit off the base, you’ll open up the pores, and the tree will be able to absorb water. Then add tree preservative to the water.
WATER, WATER, WATER! The best way to keep your Christmas tree fresh is to keep it hydrated. It’s the single most important thing you can do for your tree. A Christmas tree may “drink” a gallon or more of water each day, so check the reservoir often! Making sure your tree has enough to drink each day will prevent needles from drying, boughs from drooping, and will help to keep the tree fragrant.
Never let the water level go below the tree’s base! A seal of dried sap can form over the cut stump in just four-to-six hours if the water drops below the base of the tree. If the reservoir goes dry — even once — the tree cut will seal and may not take up water again.
LOCATION IS KEY A Christmas tree may look beautiful next to a fireplace, but heat sources will only serve to dry out your tree. Place your tree away from fireplaces, wood stoves, heating vents, and direct sunlight. The lights on the tree produce drying heat as well. Always turn the tree lights off when leaving home or going to sleep for the night.
KEEP IT COOL Lower the temperature in the room with your tree. It’s another way to slow down the drying process. The lower the temperature of the room, the better the tree will do.
WHEN IN DOUBT, DO WHAT THE PROS DO! Professionals use products like Wilt Stop to prolong the freshness of Christmas greenery. It’s a natural, non-toxic product derived from the resin of pine trees. It has the unique ability to form a soft, clear flexible film on plants, and it’s what the pros count on to extend the life of fresh-cut Christmas trees. It’s a great way to prevent moisture from escaping and drying the branches out!
AFTER CHRISTMAS The end of Christmas doesn’t have to be the end of life for your Christmas tree! Fresh-cut trees are useful in the garden in a number of ways.
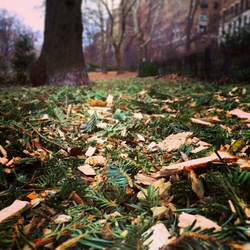
You can use the pine needles for mulch. Pine needles are full of nutrients that enhance the pH of your soil and can prevent soil compaction in the winter.
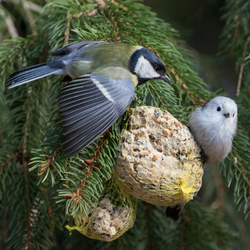
Put your leftover Christmas tree outside, and decorate it with strings of popcorn and cranberries to feed the birds. Add pine cones which have been spread with peanut butter and rolled in bird seed. The birds will love you!
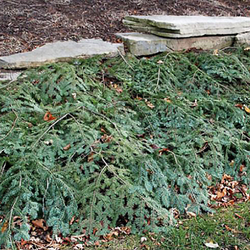
Use branches as extra insulation. Cut off the branches of your tree and lay them on your garden bed, the boughs will protect your plants from winter freezes and spring thaws. By laying them on your garden you’re giving your plants an even, steady temperature through the coldest months of the year.
A fresh-cut Christmas tree can be an easy and enjoyable part of your holiday celebrations. With just a little know-how, attention, and maintenance, your tree can provide that forest-fresh scent throughout the holiday season.
It’s just not the holiday season without these bright, festive classic plants! You can’t go wrong with rich red poinsettias, but they’re available in everything from a snowy white to candy pink — even speckled and marbled varieties! They’re easy to care for, and with a few tricks, they’ll last through the holiday season and beyond.
Poinsettias prefer a bright area away from cold drafts, fireplaces, radiators, or heat vents. Keep them from direct sun. Never expose the plant to cold temperatures for more than a few minutes; a chilled or frozen plant will begin to drop leaves very quickly. Never allow the soil of you poinsettias to dry out completely, but be sure they are not constantly wet or sitting in water inside the foil wrap. Water the plant thoroughly only when the soil surface is dry to the touch. Remember to discard excess water from the saucer.
Be careful of locations where the hot afternoon sun may shine directly on the colorful bracts and cause the color to fade. Temperatures ideally should not exceed 70° during the day, or fall below 65° at night. To prolong the bright color of the bracts, temperatures should not exceed 72 degrees Fahrenheit during the day or 60 degrees Fahrenheit at night.
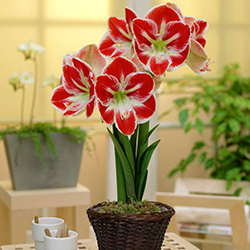
Amaryllis
These statuesque bloomers are a Christmas tradition for many! Their large, colorful blooms bring life to the darkest days of winter. They offer a variety of brilliant festive colors, and are extremely easy to grow.
Amaryllis bulbs will bloom 7-10 weeks after planting. Choose a pot about 2″ wider than the bulb and one that is heavy enough to keep from tipping. Fill the pot part way with potting mix. Set the bulb so that the top 1/3 of the bulb will be above the top of the soil when you fill the pot to 1″ below the top edge of the pot. Give the plant about 4 hours of bright light a day. Plant every 2 weeks for a spectacular color show all winter.
Once the blooms have faded, the plants are not dead! You can rebloom the same bulb the following year. Just cut back the flower stalks to 1-2″ above the bulb, and allow the leaves to continue growing into spring and summer, watering and rotating regularly. Around mid-August, allow the bulb to go dry and allow the foliage to naturally die back. The bulb can then be stored in a cool, dark spot for 8-12 weeks of dormancy. Once the dormancy period is met, the bulb can be repotted in fresh soil, watered, and set in a sunny spot to bring life to another holiday season.
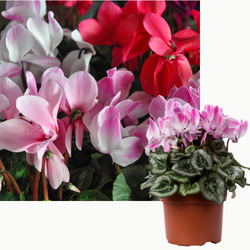
Cyclamen
These are wonderful plants for brightening your home during the holidays. The pink, red, white or maroon flowers will continue for weeks. They prefer a cool, dry and bright place. Choose a plant with plenty of unopened buds to get the most flowers this season.
With proper care, cyclamen will bloom indoors for several months and can be kept through the summer to provide another display of blossoms next winter. This plant does best in a cool room and in bright light, but away from direct sunlight. A north or east-facing windowsill is ideal. General Care: Remove faded flowers and old leaves. After the plant has stopped blooming, reduce watering and stop feeding. Place the pot in a cool spot and keep it dry until July. Then repot the cyclamen tuber in fresh compost, burying the tuber to half its depth. Place the pot in a cool, well-lit spot and water to keep the soil moist.
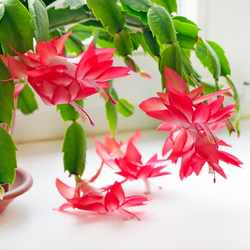
Christmas Cactus
Holiday cactimake a great addition to your holiday décor. Their intensely colored blooms droop gracefully at the end of bright green branches. They’re available in an array of different colors, and can continue to bloom long after the holidays are over.
They prefer cooler rooms. Keep the soil on the dry side in November. Only water when the soil feels dry about an inch below the surface. To ensure flowers for Christmas, keep your plant in a room with bright daylight hours and no light after sunset. Flower buds should set and the plants will be in flower by late December.
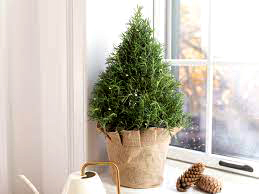
Fragrant Herbs
To bring fragrance into your home during the holidays don’t forget herbs! Rosemary, lavender and thyme along with many other herbs will add a delightful aroma to the home. Use the wonderful scent of fresh greens and pine trees to add to the traditional holiday atmosphere.
Don’t wait until spring to enjoy fresh flowers. Keep the bloom going, and add color and life to your winter season with these popular indoor plants.
Now that our doors and windows are closed for the winter, houseplants provide a welcome splash of life and color in our indoor landscape.
Fresh, vibrant, and green, those innocent looking houseplants contribute much more than just a touch of color though. They play a significant role in keeping stale, recirculated air clean. Plants create fresh oxygen, filter dangerous toxins out of the air, and add a bit of fresh air to any room they live in. For the most part, houseplants are pretty easy to care for, but the winter season can present some special challenges for them. Here are a few quick tips to make your indoor garden a successful one.
BUMP UP THE AVAILABLE LIGHT Adequate light is one of the most important environmental factors in successfully growing plants indoors. Too little light may make your plant leggy with spindly new growth. Let your plants receive as much light as possible during the darker winter days. As the angle of the sun changes and the days get shorter, you may want to rearrange your plants to ensure they’re getting sufficient light in the winter months.
If you don’t have a sunny windowsill to house your indoor garden, grow lights can be especially useful. The proper lighting can supplement sunlight, or replace it entirely in the winter! Echter’s carries everything from full-spectrum bulbs to fluorescent grow tubes that fit in standard fixtures. Add some digital timers, and getting enough hours of light for your houseplants becomes effortless!
CHOOSE PLANT LOCATIONS CAREFULLY Place your plants well away from winter’s chill. Don’t put them near entry doors where they will be exposed to cold drafts. Make sure the leaves of your plants living in window areas don’t actually touch the window. Minimize exposing plants to temperature extremes by placing them well away from your heating system’s air vents and also away from your fireplace.
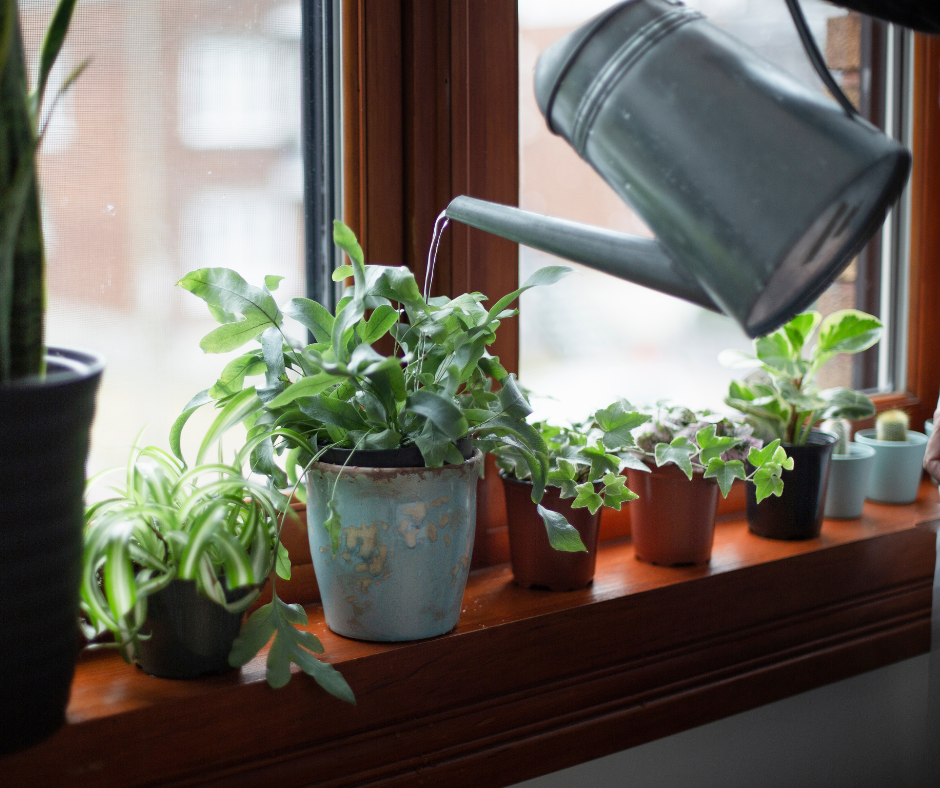
DECREASE WATER & FOOD Remember that indoor plants need less water & fertilizer during the short days of winter. Shorter days mean less growth, so you’ll want to water only when your plants require it.
Overwatering is the number one killer of houseplants! Frequent watering forces air from the soil and opens the door for root-killing bacteria and fungus to move in. Surface soil can dry out more quickly during winter months, but that’s not a good indicator that the plant needs water. Push your finger into the soil to determine if it is dry an inch or two below the surface—that’s when it’s time to bring out the watering can. Avoid shocking your plants’ roots by using room-temperature water in the winter. Use fertilizer at half strength every other time you water until about mid-March.
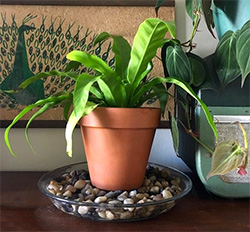
INCREASE THE HUMIDITY Houseplants will benefit from added humidity. Humidifiers are great, but you can also use a simple-to-make pebble tray. Take an oversized saucer, add pebbles, and fill halfway with water. Then place your plant on the pebbles. As the water evaporates, add more, but don’t let the plant sit in water.
KEEP A SHARP EYE OUT FOR PESTS Dry air in our winter-warm homes can create a favorable environment for pests. Keep a close eye on your plants’ leaves for signs of problems. Periodically check your plants with a magnifying glass.
Thoroughly check the undersides of leaves, stems, and branch axils. Look for common plant pests such as spider mites, mealybugs, whiteflies, & fungus gnats. Spotting problems and responding to them early can keep populations from exploding.
Just as winter is a season of rest for the outdoor garden (and the gardener!), consider it an off season for your houseplants, and give them a season of rest too. Give them the essentials, but leave things like repotting and propagation until spring when your plants begin growing actively again. Next spring, after a long winter’s nap, your plants will be ready to get growing again!
In October, when the temperatures finally begin to cool, it’s a welcome sign that soon both gardens and gardeners will be able to settle in for a well-earned winter’s rest.
Those cozy evenings by the fireside will be here before we know it, but this month, there’s still plenty to be done to get the garden ready for its dormant period, and also to prepare for next year’s busy growing season!
BEGIN BY CLEANING UP THE BEDS Start the winterizing process with a good cleanup! A proper cleanup this fall will improve overall plant health for the following year. Begin by removing any weeds. They’re sending their energy into their roots just like all the other plants at this time of year. You’ll want to get them out, so they don’t spread seed or dig deeper roots over the winter.
You’ll also want to clean up dropped fruit under fruit trees. Fruits and vegetables left out all winter will only rot, attract animals, and set seed. Remove all vegetable plants that are finished producing for the season. Dispose of plants which had insects or disease. You don’t want to put those in the compost pile. The same goes for weeds. Pull out all dead plant material. This helps keep your garden healthy through the winter and helps protect against pests.
CUTTING BACK & PRUNING Many perennials and ornamental grasses add seasonal interest to the garden with attractive seed heads and plumes. Choose what you would like to remain intact and tidy up others by cutting tall stems back to the base foliage.
Cutting old and diseased foliage in the fall can help perennials jump right into new growth come spring. However, do not prune early-flowering shrubs such as lilac, forsythia, certain varieties of hydrangea, or rhododendron. These have already set next spring’s flower buds. Pruning now would remove next spring’s blooms! Spring bloomers like these can get a haircut right after they finish flowering next year.
AMEND THE SOIL — Autumn is a great time to amend your soil by working in organic matter. The addition of compost now will improve the soil next spring. Rototilling, or turning the soil over, will reduce insect and disease problems next year. Be sure to do this while the soil is dry.
ADD MULCH — Renewing all mulches in the autumn will yield several benefits. It helps maintain a consistent soil temperature, retains moisture, and prevents exposure of roots — which is a common cause of winter damage. Apply mulch around perennial plants — especially those that have been recently planted — as well as around trees and shrubs.
PREPARE FOR THOSE EARLY FROSTS — Keep an eye on those weather apps for nighttime temps dipping to or below freezing, and keep the frost blankets handy. A little protection for the first frost or two ensures your plants will continue to thrive in the warm autumn days that invariably follow a frost. If you run out of frost blankets, be sure to cover with a similar breathable material. Plastic is not recommended for frost protection because condensation beneath the plastic may lead to ice formation, which can damage the foliage.
TO HARVEST, OR NOT TO HARVEST — THAT IS THE QUESTION! Though you may be able to extend the season by using floating row covers and frost blankets for the first autumn frost or two, generally it’s time to pull the warm-season veggie plants and put any harvests on the table for dinner. Here is a brief list of what to protect and when to call it a season:
Beans will not tolerate frost. Harvest and put them on the dinner menu.
Corn is frost sensitive and also should be harvested rather than covered.
Harvest all unprotected tomatoes and peppers. Unripened tomatoes can be placed in a paper bag or between sheets of newspaper to continue ripening indoors. Be sure to check on them often throughout their ripening process.
Cucumbers and summer squash should be harvested and thoroughly wiped dry before storing. Thin-skinned cucumbers do not store well and those should be eaten within a few days.
WHAT NOT TO HARVEST … YET Not all crops need to be hurriedly harvested before an autumn frost. Some cool-season vegetables are actually improved by the cold!
– Root crops like carrots and beets can remain in the ground until there’s a danger of the soil freezing. The soil acts as their protection from frost. – Celery and late cabbage can be harvested after you notice the frost has slowed their growth. – Don’t harvest winter squash or pumpkins yet! Wait until their vines are frost-killed and their skins are hard to the thumbnail. – Kale and collards can be left in the garden until long after the first fall frost. Continue to harvest as needed until the foliage finally succumbs to the cold weather. – Potatoes should be harvested after the vines die down, so the potato skin has a chance to mature. This makes them less susceptible to bruises, cuts, and moisture loss during storage. – Lettuces and salad greens can be covered with frost cloth. – Onions should be harvested only after the frost has stopped their growth.
For a deeper dive into methods of storing vegetables for the winter, the Colorado State University Extension provides this handy fact sheet.
TO RAKE, OR NOT TO RAKE? Rake! Although some fallen leaves can be mulched back into the soil with your lawn mower, most turf grasses will not tolerate a thick mat of leaves over the winter. Soggy mats of leaves on turf can lead to disease problems. You can add dry leaves to the compost pile, or shred & dig directly into your vegetable beds to improve the soil over the winter.
Aerate your lawn to loosen compacted soil, and apply Green Thumb Winterizer in mid-October. Your lawn will be nice and green in the spring. For the final mowing of the season, leave your grass at a height of 2½”.
Bindweed, dandelion, and other perennial weeds will be moving food reserves down to their roots now. This is a great time to use Weed Free Zone to kill these invasive weeds, roots and all.
Before you drain your sprinkler system for the year, give your lawn a good watering. Continue to hand water as long as temperatures remain above freezing.
Put a trip to Echter’s on your autumn to-do list! We’ll help you tackle putting your garden to bed. Then you can feel free to settle back and enjoy the season knowing that your garden is well-prepared for a long winter’s nap!
With the summer harvest season in full swing, the last thing you may be thinking about is planting more vegetables. But why give up popping out the back door to harvest fresh veggies just because summer is drawing to a close? Smart gardeners know that late summer is the ideal time to plant another round of crisp, fresh, cool-season veggies to extend the harvest just a little longer.
Late summer is prime time for sowing seeds! The soil is still warm from summer temperatures, so seeds germinate more easily. By the time seedlings are up and growing, the air temperatures will have begun to cool as autumn weather settles in. Warm soil & cool air —you couldn’t ask for better growing conditions!
Autumn gardening offers a few advantages over spring & summer as well. Spring planting problems (like bolting because of heat and pesky garden pests) aren’t an issue in the autumn. Even though frost is a necessary consideration, some vegetables are even sweeter after a light frost. So if you’re thinking of squeezing in a little more gardening before the season truly ends, grab your favorite cool-season veggie seeds and a calendar, and get sowing!
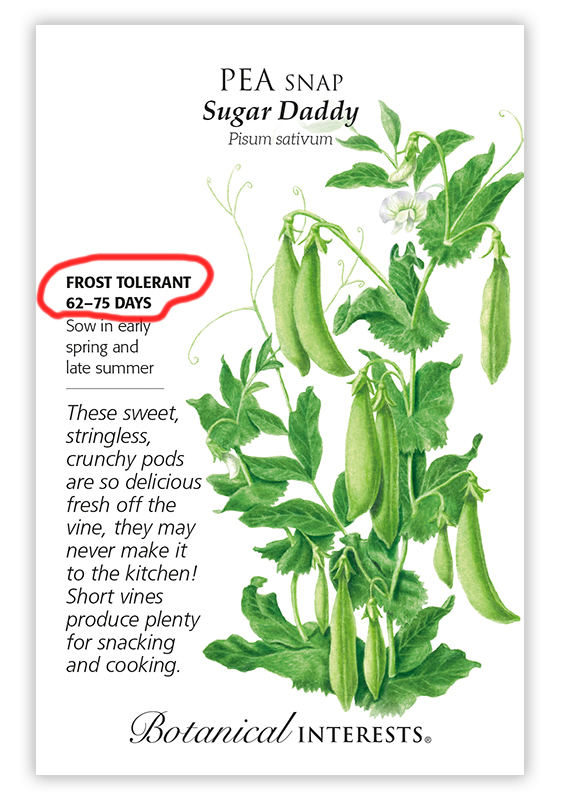
Successfully extending the vegetable season depends on a little careful planning. Begin by learning the average date of the first autumn frost in your area. Once you know this, consult the seed packet to find the days to maturity for each particular crop. For the peas in the seed packet to the left, it will be 62-75 days from sowing seed to mature peas. Armed with this information, count backwards on the calendar to find the date you should sow the seed. Simple!
TIP: You may want to pad your planting estimates with an extra couple of weeks. As the days grow shorter, there will be less sunlight for growing, and daytime temperatures will also be cooler. What may have grown quickly in the warming soil and lengthening days of spring, may take just a little longer in the autumn.
As you remove fading summer vegetable crops from your garden, it’s easy to plug in a frost-tolerant, cool-season crop in its place. Begin by adding a soil amendment to replenish essential micro-organisms, provide nutrients, and improve the overall condition of the soil. It takes healthy soil to grow healthy plants!
Lastly, be prepared for those early autumn frosts! Though there are a number of frost-tolerant crops that will laugh at a light frost, sometimes Mother Nature does something unexpected! It’s wise to be ready to give your plants an extra bit of help if necessary. Make sure to keep frost cloths & blankets, fleece tunnels & jackets, etc. at hand and ready to go on short notice. Keep a close eye on weather forecasts and forecasted overnight low temps. Protect your plants, and they’ll be able to keep right on growing in the Indian Summer that inevitably follows a first frost event.
Now … what to plant and when? With an average frost date of mid-October for our Zone 5 Colorado gardens, try planting these popular cool-weather loving crops in late August to early September. They are reliable favorites.
Go ahead and enjoy another round of leafy greens like spinach, chard, watercress, kale, and lettuces. Peas are another favorite for the autumn garden.
Root vegetables like carrots, beets, turnips, and radishes are popular choices that also do well in cool-season Colorado gardens.
Broccoli, cauliflower, cabbage, and kohlrabi will enjoy sunny days and cool nights in the autumn garden. They can all tolerate a light frost.
Autumn gardening can be rewarding and fun as long as you’re knowledgeable and prepared. Why not get just one more vegetable harvest in before winter arrives? Those late-season veggies will taste mighty good in soups & stews come January!
Knowing when and how to harvest is an especially important part of growing your own food. Why? Because it affects the quality, flavor, and nutritional value of your homegrown produce! But how do you know when something is fully ripe, and what’s the best way to harvest? Scroll through, and check out our tips on how to harvest popular crops in Colorado.
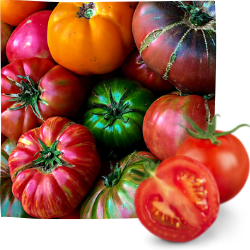
Let’s start with the jewels of the garden — tomatoes! For the best taste and the highest nutritional value, you’ll want to leave your tomatoes on the vine until they’re fully colored, then gently twist and pull from the vine. The trick is in what “fully colored” looks like. Gone are the days when you could wait for a tomato to be a rich, vibrant red before confidently plucking it from the vine.
Nowadays tomato varieties comprise a rainbow of colors — yellows, oranges, greens, stripes, and even sprinkles! It’s particularly important to know what your ripe tomato should look like. If in doubt, a ripe tomato will give slightly to the touch. It it’s not ripe, it will still feel quite hard. Another tell-tale sign is how resistant the tomato is to being picked. If it hangs onto the vine for dear life when you try to pluck it, it’s not ready yet! If you’re growing heirloom varieties, you should pick them just shy of full color because they generally ripen before their color deepens.
When to Harvest Root Vegetables?
Beets … Most beet varieties are ready to pull about two months from planting. For baby beets, you’ll want to harvest earlier, when the roots are 1½” across. Letting beets stay in the ground too long will yield tough, woody roots!
Carrots … Carrots may be harvest young (at about ½” diameter) for baby roots, or allowed to grow to full size for storage. Not sure if they’re ready to harvest? Pull a few carrots for a quick taste test. If they’re crisp and sweet, they ready to eat. (TIP: loosen the surrounding soil before attempting to pull up a carrot. Carrots are notorious for breaking off when they’re pulled.)
Potatoes … After the potato plants have flowered, you may dig some of the potatoes to enjoy as “new” or “baby” potatoes. If you want to harvest full-sized potatoes, allow the tops to die back in the autumn, then dig up the tubers.
Check These Heavy Producers Daily!
Cucumbers … Harvest when they’re firm and smooth. Check on them often! If they’re left on the vine & become too large, they can become bitter and pithy. Use your garden shears or pruners to neatly clip these from the vine. This will prevent possible damage to the vine caused by twisting or pulling. Cut the stem approximately ¼” above the cucumber.
Green Beans … Pick them when the pod has filled out, but before you can see the seeds bulging. Simply grasp the bean pod firmly up near the top where it connects to the vine, then use your thumb to gently pinch it loose.
Zucchini … There are two things to remember about harvesting zucchini — pick young and pick often! These can quickly become too large. Zucchini is at its most tender and flavorful when it’s about 5″-7″ long and you can easily poke your fingernail through the skin. Use a sharp knife (or your pruners) to cut from the vine. (TIP: you can also harvest those delicious yellow flowers! Enjoy them raw in salads.)
Harvest this summer favorite after the silks become brown and dry. The ear should be completely filled out, and the end should be rounded instead of pointed.
Peppers, Peppers, Peppers
Bell Peppers … These grow in a range of colors including green, red, dark purple, yellow, and orange. In general, they’re ready to harvest when they are the full color of the variety planted. You can harvest bell peppers when they’re green. If you allow them to stay on the vine to ripen further, green peppers may turn red, then orange, then yellow! Purple varieties will turn from green to a dark purple to nearly black. Bells can be eaten at any stage during this ripening process, however the longer you leave them on the plant, the sweeter they become and the higher the Vitamin C content will be. To harvest, use a sharp knife or scissors to cleanly cut peppers from the plant to ensure the least damage to both pepper and plant.
Chile Peppers … Both mild and hot peppers can be harvested when they reach full size and are fully colored. They can also be harvested as soon as they reach a usable size. Chiles can be eaten at just about any stage of development. Mild peppers commonly get sweeter as they mature, while hot peppers get hotter the longer they’re left on the plant. To harvest: cut peppers from the plant with pruners. Leave a short stub of stem attached to the fruit. Do NOT pull peppers from the plant by hand — this can result in broken branches.
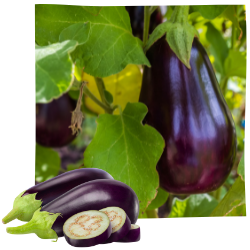
With eggplant, slightly immature & smaller fruits are tastier and will contain less seeds. Eggplants should be firm and shiny when fully ripe. Cut with a knife or pruners rather than trying to pull from the plant.
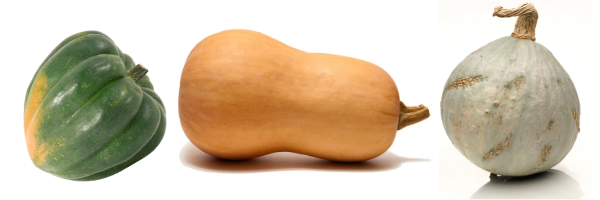
Winter squash … such as acorn, spaghetti, buttercup, butternut, and Hubbard are ready to harvest when you cannot puncture the skin with your thumbnail and the stems are dry and begin to shrivel. Use pruners to cut cleanly from the vine.
Harvest pumpkins when they’re fully colored and the skin is hard enough to resist a fingernail puncture. They should sound hollow when thumped. Use a sharp knife or pruners to cut the pumpkin from the vine. Leave about 2″ of stem, and handle carefully. Any nicks or bruises will accelerate decay.
After the Harvest Look for signs of trouble, such as yellowing leaves, rotting fruit, or unwanted pests. Be sure to put any plants that have disease or insect infestations into the trash — not the compost pile!
Healthy plant foliage can go into the compost pile after removing any seed heads. Remove any weeds from the vegetable garden, then improve the soil with compost, or plant a cover crop in the bed to overwinter.
Remember to Share the Harvest If you find yourself with an overabundance of anything (we’re lookin’ at you, zucchini!) always remember to share the harvest with friends, family, and neighbors. If their cupboards are full, donations of fresh, homegrown vegetables are welcomed at your local food bank! After all, the summer harvest should be a season of plenty for everyone.
Each summer we get questions from exasperated gardeners asking, “What can I plant that the deer won’t eat?” It’s a complicated subject, since what works for one gardener might not work for another. However, there are a few smart garden strategies that you can try that may make your garden less attractive to deer.
MAKE SMART PLANT CHOICES Your first line of defense isalwaysto make smart plant choices. Be aware of plants deer favor, and make sure you’re not stocking your garden with a buffet of their favorites! Armed with a little information, you may be able to plant your solution to the deer problem and discourage them naturally.
Deer tend to like plants that are smooth, tender, and flavorful. Plants such as arborvitae, tulips, hosta, daylilies, and roses are favorites. What they do not like are plants that are highly aromatic, prickly, thorny, fuzzy, or plants that contain a milky sap like milkweed. They also naturally avoid plants that are toxic such as foxglove, daffodils and poppies.
So, what types of plants are deer resistant? Some good shrub choices are: Holly, Barberry, Spirea, Boxwood, and Lilac. For the herb and vegetable garden try: onions, garlic, sage, tarragon, lavender, mint, and rosemary. Deer-resistant flowering plants include: Peony, Marigolds, Forget-me-not, Bee Balm, and Iris. Ornamental grasses in general are not a favorite of deer, but within that category try planting Blue Fescue, Golden Hakone grass, or a Black Mondo grass
As for that elusive deer-proof plant — there is no single plant that is guaranteed to be completely “deer proof!” As Dr. James Klett, Professor of Horticulture and Landscape Architecture at Colorado State University states, “Deer — if they’re hungry enough — are going to eat anything. If there is a completely deer-resistant plant out there, I don’t know what it is.”
TRY STRATEGIC PLANTING If you think in terms of which plants deer do and don’t prefer, you can begin to plan your garden with a bit more foresight and strategy. Since deer tend to be skittish about coming in close to a living area & would rather remain near the safety of the forest, try planting your deer-favorite plants (like tulips and roses) close to the house. Also, planting less-preferred plants in a protective ring around those that are more desirable can be an effective strategy.
Another deer-repelling strategy you can try is to “foul the fringes” — that is, line the perimeter of your property with unpalatable plants. Strategically placed hedges or thorny shrubs can serve as a natural way to redirect the deer and discourage lingering to feed on more attractive plants nearer to your home. Clever!
OBSCURE THEIR VIEW Deer don’t go past anything they can’t see through or over. You can make that work in your favor. Use solid hedges of pungent junipers or form trellises with fragrant morning glories. If deer can’t see what’s inside, they’re less likely to take that leap of faith onto your property.
MAKE THEM A TASTIER OFFER Try working with their favorite plants combined with their desire to stay near the safety of their forest home. Plant things they DO like well away from your garden. A feast of their favorite flowers (delphinium, phlox, hosta and pansy) may have them nibbling, then heading safely back into the forest. It can be your sacrificial garden. The idea is to leave them thinking, “Why brave the garden close to the house, when the good stuff is planted all the way out here?“
Keep in mind that deer are like people, and what deters one won’t always deter another, but trying several of these strategies can help. With a little careful planning, and a few tricks here and there, it may be possible for your garden to coexist peacefully with these beautiful creatures!
Colorado gardeners are portrayed with a wide range of descriptive terms: enthusiastic, resilient, tenacious, optimistic and persistent come to mind. We learn by experience, and all of us — novice or veteran gardener, have enjoyed success and have also been disappointed with failure. What we all share is our sense of place and region, with all of its gardening advantages and challenges. Our sunny skies and dry climate provide the perfect palette for plants native to the region as well as those from other areas of the world that thrive in similar conditions.
What are Xeric plants? Xeric is a term that applies to plants that grow well with minimal irrigation once they are established. They are eagerly sought by the gardener who is looking for plants that demand less water and adapt to the soils of the region. The xeriscape gardening concept uses seven basic design and planting fundamentals.
Why Choose Native & Xeric Plants for Your Home Landscape? There are plenty of good reasons to fill your garden with water-wise native plants. It makes sense to use plants that are naturally adapted to Colorado’s unique climate, soils, and environment. When they’re correctly sited, native species require less water & fertilizer, and they’re more pest & disease resistant.
By choosing native plants, you’ll be working with nature, instead of trying to work with plants that aren’t suited to our local conditions. Another great reason to choose native plants is to restore habitat and biodiversity in our rapidly-growing urban areas. Gardens with native plants provide food, shelter, and other important resources for our wildlife — including our native pollinators!
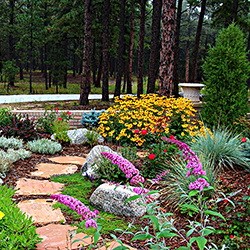
Where Can You Find Xerics & Natives? It’s not hard to find xeric or native plants for your garden! Many plants that are native to our region are also xeric. These water-wise plants include favorites such as Blue Flax, Blanket Flower, Penstemon, Apache Plume, Kinnikinnick, Boulder Raspberry, Hackberry, Hawthorn and Serviceberry. The true natives — such as the Desert Four O’clock and Purple Poppy Mallow — also play very well with immigrants from abroad including Russian Sage, Ice Plant, Torch Lily and many more. These are just a few of the many interesting choices that will happily settle in and make themselves right at home in your garden.
At Echter’s, we carry a wide variety of drought-resistant and xeric plants that are especially suited for Colorado’s dry climate. Our knowledgeable staff will help you choose just the right plants for your landscape.
You’ll find that xeric and native plants are resilient, tenacious and persistent. They will inspire enthusiasm and optimism in your gardening adventures. So celebrate your sense of place, and welcome native and xeric plants to your garden where they will feel right at home!
We’ve experienced some very warm weather this last week, and it looks like there is going to be more of it next week! Some of your plants may be showing signs of heat stress. Leaves may wilt. Vegetables like lettuce and spinach may bolt (flower prematurely) or in the case of plants you want to blossom, like peppers or watermelon, they may drop blossoms, reducing yield. Here are a few tips to help your garden withstand the hottest part of the summer.
Watch Your Plants Plants will often tell you when they are needing water. Lawns will turn a bluish green and show footprints that don’t rebound. Bean leaves will turn a darker green and begin to wilt. Most plants will perform better if you don’t allow them to wilt before watering, so check your garden every day and observe their needs.
Water When Necessary It’s true that you need to water more often during hot weather, but first check the soil. The surface may look dry even though there is plenty of moisture in the root zone. Over-watering can be just as harmful as under-watering, so don’t over do it. Slow, deep watering will ensure that water soaks down to the roots. Soaker hoses and drip irrigation systems work well. If using a hose that has been laying in the sun, be sure to let it run for a minute or two, until cool water comes out.
Mulch to Keep Things Cool! A couple of inches of organic mulch like compost, grass clippings, or bark mulch will help reduce moisture loss as well as cool the soil temperature. A side benefit is that it prevents most weeds from germinating, too!
Shade Cover cool-weather veggies like lettuce and spinach with shade cloth. It won’t totally prevent bolting, but it might delay it a bit. Also, raise your lawn mower blade up so that you have 3 inches of grass left standing after you mow. This will provide shade for the roots of your lawn keeping them cool and much happier (which means a greener lawn).
Don’t Spray Chemicals During Heat Avoid spraying garden chemicals when temperatures are above 85 degrees. Weed killers can volatilize (evaporate and become air borne) and drift onto desirable plants. Insecticides can burn leaves of plants when temps are above 85. Spray early in the morning when temps are cooler and the air is still, or wait.
Summer is just getting started! With a little extra attention and a little extra know-how, your garden can come through this summer’s heat waves with flying colors, and keep right on blooming!
Watering plants that have been recently planted outdoors is
tricky. The rule is to water them in thoroughly after they are planted. Then
watch the area next to the edge of the original soil ball to see if it is
getting dry. You want to encourage the roots to move out into the surrounding
soil to get water without letting the original soil ball get too dry. Reduce
the watering frequency with time, but water thoroughly each time you water.
Don’t just wet the surface of the soil.
An easy way to harden plants that are going outdoors is to
cover them with Plant & Seed Guard for a few days after you plant them. You
can use wire supports if necessary to hold the fabric away from the plants.
Attach it to the ground with wire staples. It’s re-usable.
Pot begonias and dahlias now and keep them indoors until
later in May. This will give them a good head start and they will bloom earlier
after putting them outside.
Plant gladioli, lilies, cannas, callas, ranunculus,
crocosmia and other summer blooming bulbs toward the end of April. Plant
pansies between the bulbs to give you early color.
Fertilize your spring-flowering bulbs after the blooms have
gone with Gro Rich Rose & Perennial fertilizer. Wait until the leaves turn
brown to remove them. The leaves help build strength in the bulbs for next
year.
Place your plant supports into position early. If you wait
until they really need support, it may be difficult as the plant will be too
large. This is especially true for peonies.
When you hand water, use a nozzle with a shut-off or trigger
nozzle that stops the flow of water when released so you don’t waste water.
Before transplanting, be sure that your plants are not dry.
Flowering annual starts which can be planted out in early April after “hardening them off” are alyssum, dusty miller, sweet peas, anchusa, larkspur, centaurea, pansies, dracaena, and snapdragons. When is it safe to plant other flowers?
Pinch back your annuals to promote stronger, bushier plants and more flower production.
If you have a fence you’d like to hide there are several
plants you can use besides shrubs. Vines like trumpet vine, silver lace vine,
wisteria, honeysuckle vine, Virginia creeper and climbing roses which are
perennials can be used. Annual vines like sweet peas, morning glories, Scarlet runner beans are just a
few good fence covers. Remember other tall plants like sunflower or hollyhocks.
Group flowers and vegetables with the same water needs
together to take advantage of their lower water requirements.
When planning your flower bed, whether it is planted in
annuals or perennials, don’t overlook ornamental grasses for a beautiful
contrasting texture.
Spring is the best time to divide perennials that bloom in
mid or late summer such as asters and chrysanthemums. Wait until September to
divide early spring-flowering perennials like bleeding hearts and peonies.
Plant wildflower seeds in April. Improve your soil before
planting by raking in either peat moss or compost or a combination of the two.
Add some spice to predictable bulb and perennial beds by
broadcasting seeds of annuals like larkspur, cosmos, poppies, bachelor buttons
or other annuals among your established plants.
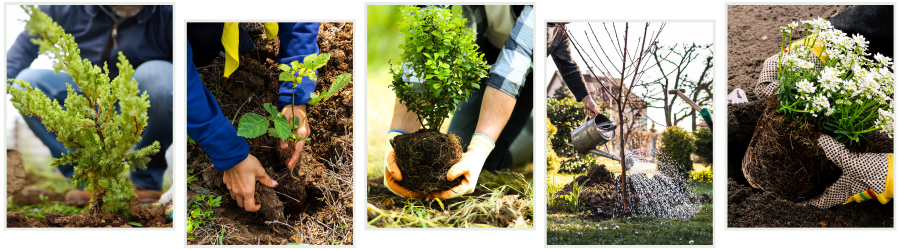
April is the best time to plant new trees and shrubs. Improve
the soil first with compost and/or peat moss. Then apply MYKE Tree & Shrub
Transplanter and water in with Root Stimulator, both of which reduce transplant
shock and stimulate root growth.
When planting large trees, stake them for the first year. Use
2” wide staking straps around the tree. Do not use wire, twine or rope on the tree itself. Place the
stakes 2-3 feet away from the tree, tie the strap to the stake and leave a little slack. Let the tree sway
slightly to develop roots and caliper.
April is perfect time to take stock of the plants in your
yard. Are there plants that have overgrown their spaces? Are some sickly and
unattractive? Now is the time to pull them out and replace them with a new and
vibrant plant. This is what garden renewal is about.
Cut back butterfly bushes, blue mist spireas, Russian sage
and other late summer-blooming shrubs at this time.
If you didn’t get around to pruning your shrubs and trees in
March, you can still do some pruning now, the earlier the better.
Start your fertilizing program for roses, trees and shrubs
when the leaves appear on the branches.
Protect your ash trees from Emerald Ash Borers. Use
Ferti-lome Tree and Shrub Systemic Insect Drench for easy-to-use systemic
protection from insects all year long. Follow the label directions and just mix
it with water in a watering can or bucket and pour the solution around the base
of trees or shrubs.
Watch for distorted leaflets on honeylocust trees.
Leafhoppers can damage this trees fine leaves. They can also damage lawns. A
good insecticide can help eliminate these tiny pests.
If you don’t have room for two different fruit trees for
cross pollination, try one of our 4-in-1 apple, pear or sweet cherry trees for a great crop of fruit. There are
four different grafts on one tree.
Are you tired of raking up crabapples in the summer? Spray
crabapple trees with Monterey Floral Growth Regulator at mid to full bloom.
This will prevent the fruit from forming.
Check for borer holes in your shade, spruce and pine trees.
Evidence of these borers will be small holes, possibly with evidence of sap
and/or sawdust. Our plant doctors can recommend the proper treatment depending
on the type of tree and borer.
Remove protective tree wrap from young trees around April 1.
Check the trunk for any problems.
Remember the worms on the ash trees last year? Watch for
them again this year and spray with Eight from Bonide.
Although annuals look beautiful planted around new trees,
there is a danger of over-watering your trees while trying keep your flowers
pretty.
There are several trees, shrubs, and flowers which will
attract those all-important pollinators – the bees. Anyone with a fruit tree or
a vegetable garden knows their importance. Stop by our Plant Doctor desk for a list of these plants. Remember to refrain from spraying
insecticides while bees are present. Something to note: bumblebees are more
effective pollinators than honeybees.
Deep-root waterers get water under the lawn which is useful
for trees, shrubs and roses. Some of these tools also have a container for
dissolving fertilizer pellets to feed your plants right at the roots.
Before transplanting, always make sure trees and shrubs are
not dry to help avoid transplant stress.
Start treating your pine and spruce trees for insects like
scale, tussock moth, Cooley spruce gall, pine tip moth, pitch mass borer, and
ips beetle. Come in and we can recommend the appropriate preventive treatments.
Vegetable Gardens
It’s time to plant seeds of peas, turnips, carrots, beets,
spinach, Swiss chard, lettuce, radishes. Plant garlic cloves, seed potatoes,
dormant strawberry plants and onion sets.
Keep an N-sulate cover handy for unexpected frosts after
your garden is planted. It will keep the frost off new seedlings as they emerge
from the soil.
Mid-April is the time to set out broccoli, cabbage,
cauliflower, kohlrabi, Swiss chard, radicchio, and Brussels sprouts plants. Be
sure to “harden them off” first.
Enjoy an earlier growing season by four weeks by setting out
Season Starter plant protectors in April. You can set tomatoes and pepper
plants inside them ten days after initial setup of your Season Starter. The
setup period allows the soil beneath the solar shelters to warm to a
temperature suitable for plant growth.
Vegetable gardens benefit from watering at ground level,
instead of watering overhead. Watering with soaker hoses helps to prevent many
diseases and insects.
Remember to rotate your vegetable crop plantings each year.
Plant each variety of vegetable in a different part of your garden than you did
last year. This will minimize repeated problems with disease and insects.
Plant your fast growing crops in two-week intervals to
prolong the availability of lettuce, spinach, peas, and radishes. When the
weather gets too hot for these vegetables, plant some in the shade of taller
plants, like pole beans and corn. This system is also good for gardeners with
limited space.
By placing a floating row cover over your carrot, lettuce,
and spinach seed, your seeds will germinate quicker, and the birds won’t make a
meal of them. Floating row covers also eliminate cabbage loopers on cabbage,
broccoli, cauliflower, and Brussels sprouts. Keep your cover handy in
case there is a cold snap for any newly planted vegetables and flowers.
Use soaker hoses in your vegetable garden and flower beds.
You can either lay the hose on top of the soil next to the plant or bury it to
get water directly to the roots. Soaker hoses can also be used to water trees and shrubs.
Lawns
Early April is the best time to start fertilizing your lawn.
By using a fertilizer with pre-emergent (weed and grass preventer), you will be
able to eliminate a lot of annual grass and weed seeds by keeping them from
germinating.
April is a good time to seed or overseed lawns. Use a good grass seed and apply New Lawn Starter fertilizer after the seed is sown. Keep the area moist even after germination. Do not apply a pre-emergent crabgrass control before or after seeding, as this will prevent grass seed germination.
Core aerate your lawn before fertilizing this month. Not
only does this help the lawn’s vigor and health, it also reduces maintenance
and water usage. Be sure your lawn is well watered a day or two before
aeration.
Keep your mower blade sharp. Dull blades can invite lawn
diseases to enter grass blades. Bring your rotary mower blades into Echter’s
for sharpening. You can bring them in on or off the mower.
Use a rain gauge to measure the amount of water you are
putting on your lawn. Apply 3/4” to 1” slowly enough to evenly soak the lawn
without running off the area.
Inspect your irrigation system regularly. Be sure sprinkler
heads are not plugged and are properly adjusted for the radius and the level of
spray needed. As surrounding plants grow, you will need to modify your system.
Especially check for leaks in the sprinkler lines.
Houseplants
On a nice warm day, take your houseplants outside and give
them a shower, or use your bathroom shower. The plants will appreciate a good
cleaning after being inside all winter.
Birds
It’s spring cleaning season even for birds. If you haven’t
cleaned your bird houses this year, clean them out and then spray them with a bird feeder cleaner before
the new birds arrive.
Continue feeding the birds at your feeders. Seed-producing
plants are just beginning to grow and there are now more birds competing for the depleted wild seed
supply. Give them a supply of water also.
Winter may feel quiet in the garden, but there’s still plenty you can do now to prepare for a healthy, successful growing season. Late January and February offer valuable opportunities to check in on your landscape, care for indoor plants, and get organized for spring.
A little attention during the colder months goes a long way once warmer days return.
Start with the Big Picture: Winter Garden Check-Ins
As snow melts and temperatures fluctuate, it’s a good idea to step outside and take a look around your garden. Heavy snow, dry spells, and wind can all impact plants this time of year.
One of the most important winter tasks is monthly watering. When weather allows, water lawns, trees, shrubs, perennials, and bulb beds about once a month to prevent root damage and reduce disease issues later. Choose days above 40°F, water mid-day, and disconnect hoses afterward to avoid freezing.
Also take time to:
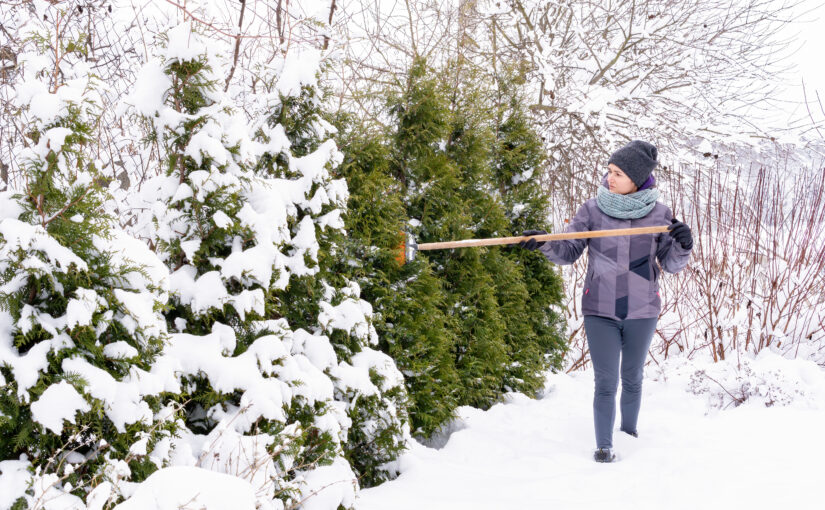
Knock heavy snow off shrubs and tree branches using a broom (start low and work up)
Check mulch around perennials, roses, and bulbs, replacing any that has blown away
Pile chemical-free snow around plants when shoveling for added moisture
Caring for Lawns During Winter
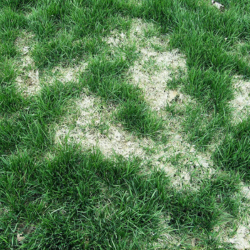
Shady lawn areas—especially on the north side of structures—can develop snow mold as snow and ice melt. If you notice matted or discolored patches, gently rake the grass to improve air circulation and help it dry out.
Snow Mold in Lawn
If you see narrow “trails” in your lawn, voles may be active. These rodents can damage turf and chew bark on trees and shrubs, especially junipers. Early awareness helps prevent more serious damage later in the season.
Late Winter Pruning & Tool Prep
Late winter is an ideal time for pruning many plants because their structure is easy to see without foliage.
Now is the right time to:
Prune summer- and fall-blooming shrubs
Shape deciduous trees and remove dead, damaged, or crossing branches
Cut ornamental grasses back before new growth begins
Prune grape vines in February
Begin pruning fruit trees from February into early March
Before the busy season arrives, winter is also perfect for cleaning and sharpening garden tools. Remove dirt and rust, apply light oil to metal surfaces, or bring tools to Echter’s for professional sharpening- from pruners to mower blades.
Learn more about pruning and early spring preparation in our March classes (linked below).
If trees, shrubs, roses, or vines had insect or disease issues last year, applying dormant oil on a mild winter day can help prevent problems this season. Dormant oil works by smothering overwintering insect eggs before spring growth begins.
We recommend Bonide All-Seasons Dormant Oil. Tip: Avoid spraying blue spruce, as needles may discolor.
Planning Vegetable & Flower Gardens
While winter limits outdoor planting, it’s a great time to plan. January and February are ideal months to:
Purchase flower and vegetable seeds for the best selection
Take inventory of seed-starting supplies like pots, flats, and soil
Sterilize reused containers or replace worn supplies
Add a propagation heat mat for quicker, more uniform germination
Testing your soil now helps you understand pH and nutrient needs before planting. Amendments can be worked into the soil early so beds are ready when spring arrives.
Asparagus beds benefit from added manure, and winter planning is also a great time to try something new alongside family favorites.
Learn more about vegetable gardening and starting plants from seed in our March classes (linked below).
Houseplants bring life indoors during winter, but they also need the right conditions to thrive. If a plant struggles, check five key factors: light, temperature, nutrients, moisture, and humidity.
Winter favorites include:
Cyclamen, which prefer cool, bright locations
Holiday cacti, which bloom best in bright light and cooler temperatures
Citrus trees, which thrive in sunny windows and reward patience with fragrant blooms
Herbs, grown from seed or plants, for fresh winter cooking
If fungus gnats appear, allow soil to dry at least one inch between waterings. Sticky traps catch adults, and biological controls like Mosquito Bits help manage larvae.
Helping Birds Through Winter
Winter is a demanding season for birds, and feeding them makes a real difference. Offer a mix of seeds such as sunflower, safflower, and nyjer, and don’t forget suet for insect-eating birds.
Birds also need:
Unfrozen water for drinking and bathing
Shelter, such as dense shrubs, evergreens, and birdhouses
Squirrel-resistant feeders when needed
A Little Effort Now Goes a Long Way
Late winter gardening isn’t about doing everything- it’s about doing the right things at the right time. Small tasks now help prevent problems, save time, and create a smoother transition into spring.
If you ever have questions, Echter’s Plant Doctors are available! Bring in samples when possible for the most accurate diagnosis-we’re always happy to help.
When it comes to fall gardening, no plant is more iconic than the garden mum. With their mounded shape, abundant blooms, and rich colors — from deep burgundy to gold, bronze, orange, and creamy white — mums bring the essence of the season to patios, porches, and garden beds. They’re beloved for their versatility and long-lasting color, making them a staple of autumn decorating.
Choosing the Best Mums When shopping for mums, look for plants that are full and well-branched with plenty of buds just beginning to show color.
A plant loaded with tightly closed buds will last longer into the season, giving you weeks of blooms to enjoy. Be sure the foliage looks healthy and green, and avoid plants that are rootbound or appear wilted. At our garden center, our mums are grown right here on-site with plenty of space, which means they’re bigger, bushier, and fresher than trucked-in plants.
Caring for Mums in the Autumn Garden Mums are cool-weather lovers, so they thrive as nights get crisp. Place them in a sunny spot, whether in containers or directly in your garden beds. Keep the soil consistently moist, but not soggy, and be mindful that pots may dry out more quickly than plants in the ground. Deadheading spent blooms and removing faded flowers will encourage fresh ones to open. With just a little care, your mums will continue to shine throughout the season.
Decorating with Mums Garden mums pair beautifully with pumpkins, gourds, cornstalks, and straw bales, making them the perfect finishing touch for autumn displays.
Use them in decorative pots on your porch, cluster them at your entryway for a cheerful welcome, or plant them alongside ornamental grasses and fall pansies for a vibrant seasonal bed. Their bold colors and full blooms bring warmth and charm to any space, instantly creating that cozy fall feeling. It just wouldn’t be autumn without them!
Living in the foothills means enjoying stunning views — while also living with significant wildfire risk. Wildfires are a natural part of Colorado’s varied ecosystems, and creating defensible space around your home is vital to protecting both your home and your community.
FIRE-RESISTANT PLANTS All plants are not equal when it comes to wildfire mitigation. While no plant is truly fireproof, some species are significantly more resistant to ignition and can help slow or alter fire spread. These plants tend to have a low oil or resin content. Instead, their leaves have a high water content giving them an advantage over the high-oil plants (like junipers and conifers) that fuel fires. In fact, a plant’s moisture content is the single most important factor governing its volatility!
Native Colorado species are often a good choice as they are adapted to the local climate and soil conditions.
A compact growth form that stays low to the ground, and plants that are drought tolerant will also tend to be fire resistant.
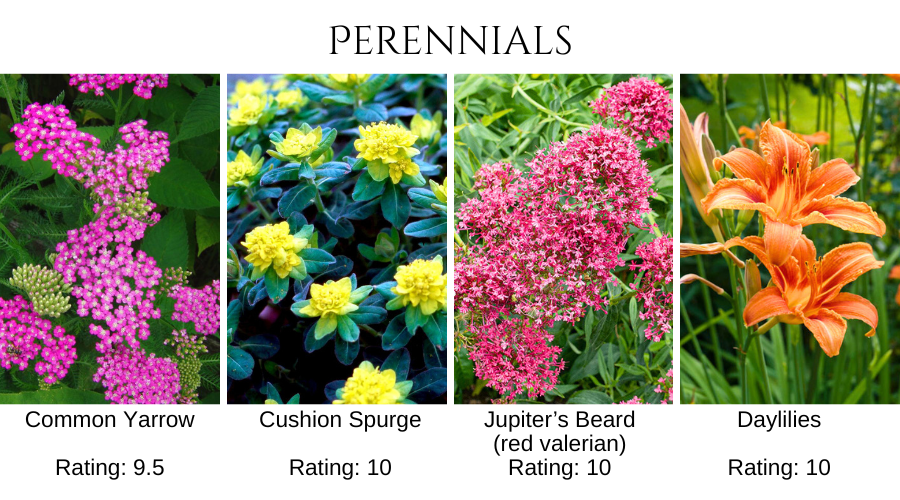
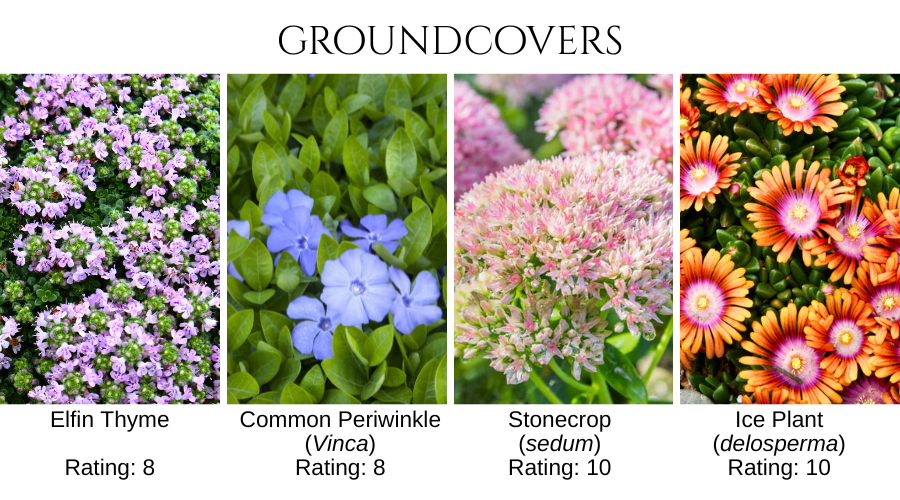
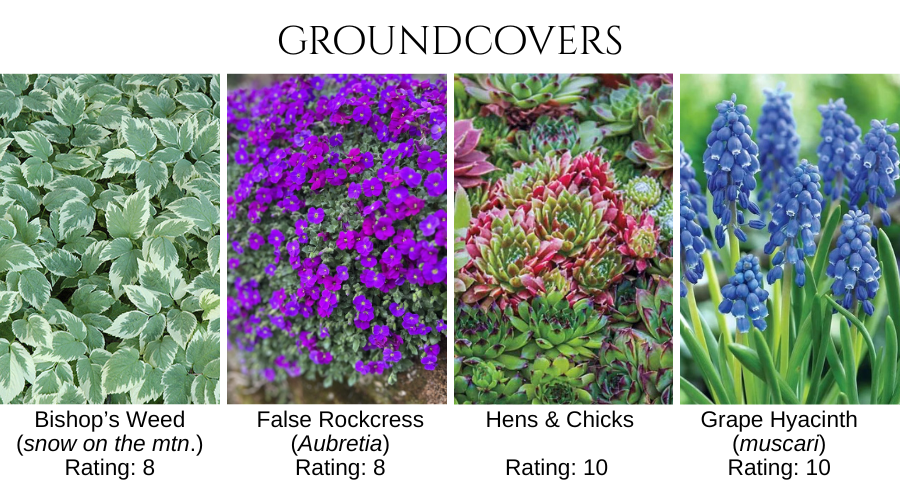
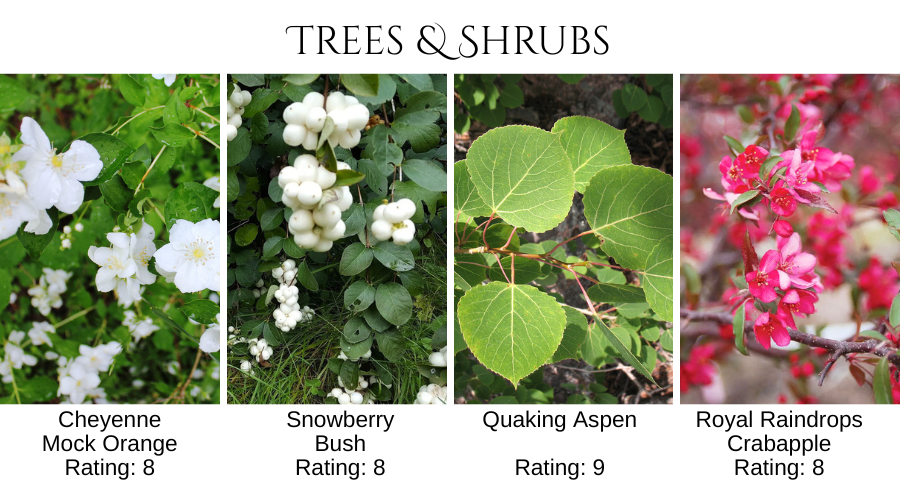
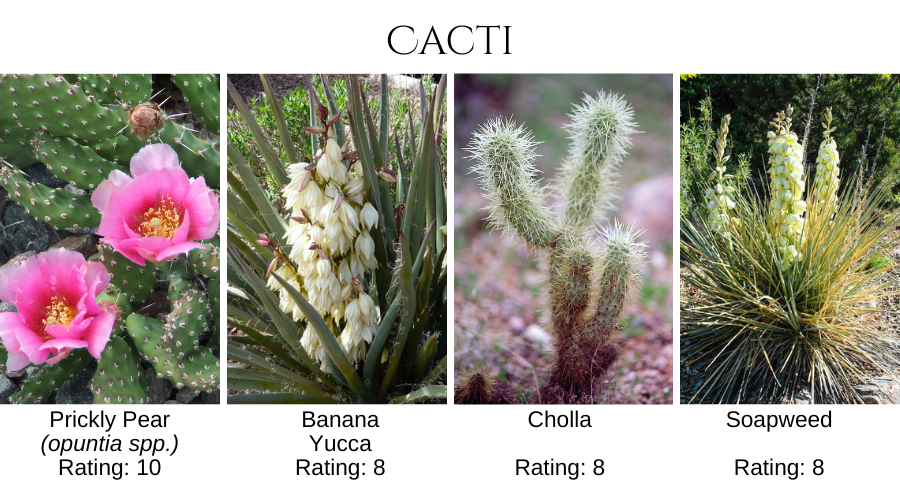
LOW FLAMMABILITY PLANT RATINGS A Colorado State University study has rated plants from 0-10 (based on a methodology developed by Idaho Firewise) to represent their overall flammability. On this scale, plants with lower scores mean they are highly flammable and ignite easily in a wildfire. The most flammable plants have a rating of 0-7, while the least flammable plants have ratings of 8-10.
Smart plant choices are an essential part of reducing wildfire spread and protecting your home.
Choose plants with a flammability rating of 8, 9, or 10 for the defensible space zones closest to your home. Plant choice, spacing and maintenance are critical to reduce the risk adjacent to the structure.
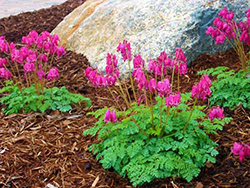
However, low risk doesn’t have to mean low curb appeal! Firewise plants can be a beautiful addition to your landscape. Below is just a sampling of the many plants that are slow to ignite, but quick to add color and interest to your landscape.
Echter’s carries many of CSU’s recommended low-flammability plants. Visit our nursery and perennials areas, or call us (303-424-7979) for availability of plants that interest you. We’ll help you create a beautiful landscape that also serves as a protective barrier against wildfires.
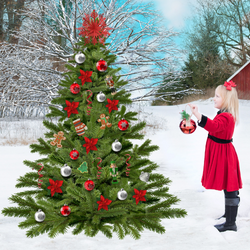
The holiday season is just around the corner, and for many families, that means it’s time to select the centerpiece of holiday décor: the Christmas tree. If you’re considering an artificial tree this year, you’re not alone. Artificial Christmas trees have come a long way, and they now offer an attractive, convenient, and eco-friendly option for bringing festive cheer into your home. Here’s how to choose the right tree for your space and why it might be the best choice over a real tree.
Consider Your Space The first thing to consider when choosing an artificial Christmas tree is the space you have available. Measure the height of your room and the space where the tree will go. If you have a smaller area, such as a hallway or corner, a slim artificial tree could be perfect. These trees are designed to fit in tight spaces while still looking lush and festive. If you have a large living room or an open space with high ceilings, a full-size 9-foot tree will create a beautiful statement.
Choose the Style Our artificial Christmas trees are designed to mimic the natural beauty of real trees like Douglas fir, balsam pine, spruce, and alpine. The type of tree you choose depends on your personal style and the look you want for your holiday décor. If you prefer a fuller tree with soft needles, a Douglas fir replica might be your best bet. For a more rustic, woodsy look, consider a spruce or alpine tree, which has a more open, natural branch structure.
Pre-Lit or Unlit? Artificial trees come in two main options: pre-lit and unlit. Pre-lit trees come with factory-installed lights, which save you the time and effort of stringing lights yourself. They’re especially convenient if you want to set up your tree quickly and enjoy evenly spaced lighting. However, unlit trees give you the freedom to customize the lights to match your theme or color palette each year. If you love experimenting with different light displays or colors, you may prefer an unlit tree.
Durable and Easy to Maintain One of the major advantages of an artificial tree is its durability. A well-made artificial tree, crafted with care, will last for many years, providing holiday cheer season after season. There’s no need to worry about watering the tree or dealing with needles falling onto your floor. Simply unpack it from storage, set it up, and it’s ready to go. This makes it a great option for families with pets or small children.
Why Choose an Artificial Tree? Artificial Christmas trees offer several advantages over real trees: Longevity: With proper care, an artificial tree can last for 10 years or more, making it a cost-effective choice in the long run. Eco-Friendly: Unlike real trees, artificial trees don’t need to be cut down each year, helping reduce the demand for tree farming and transportation. Allergy-Friendly: Some people are allergic to the pollen, mold, or sap found in real trees. An artificial tree eliminates these allergy triggers, allowing everyone to enjoy the holidays sneeze-free. Less Mess: No fallen needles or sap to clean up means more time to relax and enjoy the festive season.
Choosing the perfect artificial Christmas tree involves considering your space, style, and lighting preferences. With so many options available at our garden center, you’re sure to find the tree that suits your home and holiday vision perfectly!
Houseplants are a wonderful addition to any indoor space, bringing life, color, and even improved air quality into our homes. However, like any living organism, plants can face challenges that affect their health and vitality. One of the first signs of trouble usually appears in their leaves. Being attuned to these signals can help you catch and address issues early, ensuring your plant remains healthy and happy. In this blog post, we’ll explore common houseplant problems — such as watering issues, improper lighting, and pests — and how they manifest through the plant’s foliage.
Overwatering One of the most common issues houseplant owners face is overwatering. Plants need water, but too much can lead to a range of problems that typically show up first in the leaves. The most telling sign of overwatering is yellowing leaves. If you notice that your plant’s leaves are turning yellow, especially the lower leaves, it might be an indication that the roots are sitting in waterlogged soil. Overwatered roots can begin to suffocate, causing root rot, which prevents the plant from absorbing nutrients properly.
Other signs include limp, mushy leaves or stems, and sometimes an unpleasant odor from the soil. To prevent overwatering, ensure your pot has proper drainage, and allow the top couple of inches of soil to dry out between waterings. If you suspect overwatering, remove the plant from its pot to inspect the roots. If you find mushy, brown, or black roots, it’s time to prune the damaged roots and repot the plant in fresh, well-draining soil.
Underwatering On the flip side, underwatering is another common culprit behind unhappy foliage. The most noticeable sign of this issue is wilting. If your plant’s leaves appear limp, shriveled, or dry to the touch, it’s likely not receiving enough water. This is particularly common in plants with thin leaves, like ferns, which need consistent moisture.
Crispy leaf edges, browning tips, and curling are also indications of underwatering. Unlike overwatered plants, underwatered plants will often look droopy and feel light when you pick up the pot. The solution here is simple—give the plant a good soak, ensuring that water drains out the bottom. Going forward, try to keep the soil consistently moist without letting it dry out completely between waterings. However, avoid letting the plant sit in water, which could lead to overcompensation and result in overwatering.
Too Much Light Light is essential for a plant’s growth, but too much light can cause damage. One of the key indicators of excessive light exposure is scorched leaves. These leaves will appear faded or washed out in color, sometimes with brown, crispy patches, particularly on the side of the plant facing the light source. If you notice that your plant’s leaves are bleaching or developing burn spots, it’s a good sign that the light is too intense.
Plants that receive too much direct sunlight may also show signs of heat stress, such as curling or drooping leaves. To remedy this, try moving the plant to a spot with indirect light or provide a sheer curtain to diffuse the sunlight. Some plants, like succulents, can tolerate (and even thrive) in bright light, but many houseplants prefer medium to low light conditions.
Not Enough Light Conversely, not enough light can also cause problems. Plants that aren’t getting enough light will often develop pale, yellowish leaves, and growth may become leggy as the plant stretches towards the light source. The leaves may also be smaller and spaced farther apart on the stem, indicating that the plant is not producing enough energy to sustain healthy, compact growth.
If you suspect your plant is suffering from insufficient light, try moving it to a brighter location or consider supplementing with a grow light. Different plants have varying light needs, so make sure you’re providing the right conditions for your specific plant species.
What’s Bugging Your Plant? Pests are another common issue that houseplant owners face, and they often show up on the leaves. Common pests like spider mites, aphids, mealybugs, and scale can cause damage that includes speckled or mottled leaves, sticky residue (from aphid honeydew), and stunted growth. Spider mites, in particular, leave tiny yellow spots or a fine webbing on the undersides of leaves. Mealybugs look like small white cottony masses, often found in leaf joints, while scale insects appear as small brown bumps.
If you notice any of these signs, isolate the plant from others to prevent the pests from spreading. Insecticidal soap, neem oil, or wiping the leaves with rubbing alcohol can often help eliminate infestations, but be persistent—pests can be stubborn.
What Indicates a Happy Plant? On the brighter side, recognizing signs of a healthy, happy plant is equally important. Healthy foliage is typically vibrant and firm, with good color (depending on the species) and no signs of yellowing, browning, or crispness. New growth is another positive sign. If your plant is regularly producing new leaves, it’s a good indication that it’s thriving. Additionally, the leaves will feel supple and strong, with no signs of drooping or wilting.
Plants that are in the right environment—receiving the proper amount of light, water, and nutrients—will grow steadily and without signs of distress. A happy plant will also have healthy roots that are white or light tan in color and firm to the touch.
Your houseplant’s leaves are like its communication system, offering clues about its overall health. By paying close attention to the condition of the leaves, you can quickly spot signs of overwatering, underwatering, light issues, or pests and take action to correct the problem. With a little care and observation, you can keep your houseplants looking lush and vibrant, ensuring they continue to thrive in your home for years to come.
As the heat of the summer starts to wane and the cool breeze of autumn begins to hint at its arrival, many gardeners find themselves drawn to the garden center, seeking new additions to their landscapes. However, one common sight that might give pause is a tree with crispy, dry leaves. While it might seem like a sign of distress, it’s important to understand what causes this condition and why a tree with crispy leaves might still be a great purchase.
Why Do Trees Get Crispy Leaves? In Colorado, our summers can be particularly harsh on trees, especially those that are still in nursery pots. These pots can limit the root system’s access to water, and combined with intense sunlight and high temperatures, it’s no surprise that some trees may develop crispy leaves.
The primary culprit is often water stress. In a pot, even the most diligent watering might not keep up with the tree’s needs during the peak of summer. The roots can only pull from the limited soil available, and if that soil dries out too quickly, the leaves can suffer. However, while crispy leaves may look unattractive, they don’t necessarily indicate a sick tree. In most cases, the tree itself remains healthy and ready to thrive once planted in the ground.
Choosing a Tree in Late Summer When selecting a tree with crispy leaves, it’s essential to look beyond the foliage. Check the trunk and branches for signs of health. The bark should be firm, without any cracks or peeling. Gently scratch a small area of the bark with your fingernail; if you see green beneath, the tree is alive and well. Also, inspect the roots if possible. Healthy roots are white or light brown and flexible, not mushy or brittle.
Late summer and early autumn are excellent times to plant trees in Colorado. The soil is still warm from the summer, which encourages root growth, but the air temperatures are cooler, reducing the stress on the tree. Additionally, many garden centers offer discounts on their remaining stock, allowing you to purchase high-quality trees at a fraction of the cost.
Watering Needs of Newly-Planted Trees Watering is the most critical factor in the success of a newly-planted tree. Once your tree is in the ground, it’s essential to keep the root zone consistently moist. Water deeply, ensuring that the moisture reaches the full depth of the root ball and into the surrounding soil. In the first few weeks after planting, you may need to water every few days, depending on the weather.
As the tree establishes, you can gradually reduce the frequency of watering, but continue to water deeply. In Colorado, it’s also a good idea to water your trees during dry spells in winter. Even when the tree is dormant, its roots need moisture to survive.
Tips for Caring for Your New Tree In addition to proper watering, mulching around the base of the tree can help retain moisture and regulate soil temperature. Apply a 2-3 inch layer of mulch, but keep it a few inches away from the trunk to prevent rot. Pruning is not usually necessary for newly-planted trees unless there are broken or crossing branches. Allow the tree to focus its energy on establishing roots before encouraging new growth.
Advantages of Planting in Early Autumn Planting in early autumn gives your tree the best chance to establish itself before the ground freezes. The cooler temperatures reduce stress, and the tree can focus on root growth without the pressure of supporting a full canopy of leaves. Plus, the discounts available at this time of year mean you can invest in more plants or upgrade to larger specimens without breaking the bank.
So, don’t let a few crispy leaves deter you. With the right care, a late-summer tree can become a thriving, beautiful addition to your landscape. Take advantage of the seasonal discounts and plant your trees with confidence this autumn!
When gardening in a challenging climate like Colorado’s, the timing of planting can impact the success of our gardens. While spring is often hailed as the prime season for gardening, and summer might seem tempting, there’s a quieter, less celebrated time that offers significant advantages: early autumn. Planting trees, shrubs, and perennials in the fall can lead to healthier, more resilient plants, and a garden that’s ready to thrive come spring. Here’s why autumn should be your go-to season for planting.
Cooler Temperatures = Happier Plants Colorado’s summers can be scorching, with temperatures frequently reaching highs that stress plants—especially newly planted ones. In contrast, early autumn brings cooler days and nights, which are much gentler on young roots. This milder weather reduces the risk of transplant shock, allowing plants to establish themselves more comfortably. With the intense heat of summer behind us, your new trees, shrubs, and perennials can focus on root development without the added burden of extreme temperatures.
Extended Root Growth Period One of the most significant advantages of fall planting is the extended period for root growth. In the fall, soil temperatures remain warm enough to encourage root development even as air temperatures drop. This allows plants to develop strong, deep roots before winter sets in. By the time spring arrives, your plants are already well-established and better equipped to handle the growing season’s demands. In contrast, plants set in the ground during summer may struggle to establish roots while also trying to maintain top growth.
Reduced Watering Needs In Colorado, water conservation is always top of mind, and fall planting offers a water-wise solution. Cooler temperatures mean less evaporation and reduced water stress for your plants. Additionally, autumn rains can help provide consistent moisture, reducing the need for supplemental watering. Newly planted trees, shrubs, and perennials will still need regular watering to get established, but the amount required is typically much less than what’s needed during the hot, dry summer months.
Fewer Pests and Diseases Summer gardens are often plagued by pests and diseases, which can make establishing new plants a challenge. However, many of these issues begin to wane as the weather cools in autumn. This reduction in pest and disease pressure means your new plants are less likely to face immediate threats, allowing them to settle in and grow without the need for constant vigilance or treatment. It’s a natural way to give your plants a healthier start.
Enjoy Better Selection at Nurseries While spring and summer might be the busiest time at nurseries, autumn often brings a more curated selection of hardy plants that are well-suited to Colorado’s climate. Many nurseries, like ours, offer sales or discounts as they clear out inventory before winter, so you might find high-quality trees, shrubs, and perennials at a great price. Plus, with fewer customers around, you’ll have more time to browse and get advice from knowledgeable staff without feeling rushed.
Get a Head Start on Spring By planting in the fall, you’re essentially giving your garden a head start on the next growing season. Come spring, when everyone else is just starting to dig, your fall-planted trees, shrubs, and perennials will already be settled, ready to burst into growth and bloom. This can lead to earlier flowering, stronger plants, and a garden that looks more mature and vibrant from the get-go.
If you’re looking to create a resilient, thriving garden in Colorado, consider making early autumn your prime planting season. The cooler temperatures, extended root growth period, reduced watering needs, fewer pests, and the chance to get a head start on spring all make fall an excellent time to invest in your garden’s future. So, as summer winds down, don’t pack away your gardening tools just yet—embrace the benefits of autumn planting, and watch your garden flourish.
If you’re a gardener in Colorado, chances are you’ve encountered the voracious appetite of Japanese beetles wreaking havoc on your plants. These metallic green and copper-colored pests are more than just a nuisance. They can quickly decimate a garden if left unchecked. Let’s dive into what makes these beetles such a challenge for gardeners and how you can manage them effectively.
Identifying Japanese Beetles Japanese beetles (Popillia japonica) are easily recognizable by their distinctive coloring: metallic green bodies with copper-brown wing covers. They are about half an inch long and have small white tufts of hair along their sides, which can sometimes resemble spots.
You’ll often find them congregating in groups on plants, particularly those with large leaves like roses, linden trees, and grapes.
Damage Caused by Japanese Beetles These beetles are not picky eaters — they’re indiscriminate feeders. Their known diet includes over 300 plants. They chew through leaves, flowers, and even fruits, leaving behind skeletonized foliage that can quickly turn your once-vibrant garden into a ragged mess. Their feeding habits can weaken plants and make them more susceptible to other stressors, potentially leading to plant death in severe infestations.
Life Cycle of Japanese Beetles Understanding the life cycle of Japanese beetles is crucial for effective management. They have a one-year life cycle that begins with eggs laid in the soil during mid-summer. These eggs hatch into grubs that feed on grass roots, causing damage to lawns and other grassy areas. By late spring of the following year, the grubs pupate and emerge as adult beetles, typically around June in Colorado.
Grub Stage Damage: Grubs feed on grassroots, which can lead to brown patches in lawns and weakened turf that easily pulls up like a loose carpet. Adult Stage Damage: Adult beetles emerge and feed on foliage, flowers, and fruits, causing visible damage within days.
Protecting Your Landscape Managing Japanese beetles requires a multi-pronged approach that addresses the damage they cause at each stage of their life cycle.
In the grub stage
Beetles will be burrowed into your lawn. There are a number of products available that target grubs in lawns and have proven to be effective against Japanese Beetles.
Products like Milky Spore (a bacterial disease of grubs), beneficial nematodes (parasitic organisms that target grubs), and grub control products such as GrubGONE! or GrubEX! can help reduce grub populations in the soil without harming beneficial insects.
Milky Spore (Paenibacillus popillae) is an organic product that is easy to use and will protect your landscape for the next ten years. It is a spore that affects Japanese Beetle grubs and nothing else! Yes, you read that right. It will not harm anything else in your garden. That means it can safely be used in the lawn, in the vegetable garden, and throughout your landscape. (Note: Expect this product to develop over time. It takes 3-4 years to build up enough of the spore disease to be noticeably effective)
Beneficial Nematodes (Heterorhabditis bacteriophora) seek out and kill all stages of harmful soil-dwelling insects — including Japanese Beetles. They are tiny worms found in soil that target young stages of pest insects, like larvae, grubs, nymphs, and pupae. They are a natural and effective alternative to chemical pesticides, and have no detrimental effect on non-target species such as ladybugs, earthworms and other helpful garden insects. Releasing the nematodes into your garden is a simple process. They are sold in an easy-release powder that dissolves quickly with water. For application, you can opt for a standard watering can or use a hose-end sprayer or pump sprayer to apply.
GrubGONE! is a natural and effective product with the main ingredient being Btg (Bacillus thuringiensis galleriae). Commonly found in nature, these bacteria can live and multiply within the bodies of insects, and produce spores and protein crystal toxins which can result in death of the insect host. It is a granular which should be applied in the spring, and then again in mid- to late summer when adult beetles will re-enter the turf to lay eggs and overwinter.
GrubEX! is a granular pesticide (Chlorantraniliprole 0.08%) that should be applied in spring or early summer. A single application can prevent grubs of all kinds from damaging your lawn all season long, especially killing the Japanese Beetle larvae (grubs) so they never get the chance to develop into adults.
In the adult beetle stage
Japanese beetles will be actively flying and feeding on plant material in your landscape. A number of strategies can be employed to mitigate damage and get rid of the adult beetles.
Handpicking adult beetles can sometimes be effectively employed in small plantings. The beetles are easily picked or dislodged; shaking infested plants over a collecting container in early morning when temperatures are cool can be particularly productive. It is best to physically remove them from your plants with a gloved hand, but don’t squish them! Squished bugs emit pheromones, which end up attracting more beetles. Take the captured beetles and toss them in a bucket of soapy water.
BeetleGONE! is the first Bacillus thuringiensis galleriae (Btg) bio-insecticide to control adult beetles (plus the larvae or turf grubs) at a level of efficacy equivalent to chemical standards, but without the side effects or off-target damage to beneficial insects and pollinators. Unlike other biological or chemical grub-control products, BeetleGONE! can be used as a curative treatment for grub control as well as a preventative treatment. It works by making the foliage inedible to the beetles. This is a powder that you mix with water to apply. (Should be reapplied every 7-10 days)
Beetle traps, which use pheromones to attract beetles into a bag or container, can be controversial. While they can capture large numbers of beetles, they might also attract more beetles to your yard. If you choose to use traps, place them at least 30 feet away from your garden to draw beetles away from rather than into your plants.
Dealing with Japanese beetles requires vigilance and a strategic approach. By understanding their life cycle, identifying their damage, and employing a combination of cultural, biological, and if necessary, chemical controls, you can protect your garden from these invasive pests. Experiment with different methods to find what works best for your specific garden environment and remember to always follow product instructions carefully.
By taking proactive steps, being persistent, and staying informed, you can keep your garden thriving and beautiful, even in the face of challenges posed by Japanese beetles.
For a more detailed look at Japanese Beetles and possible controls, check out this informative fact sheet from the Colorado State University Extension: Japanese Beetle Fact Sheet by Dr. Whitney Cranshaw
They’re furry, they’re cute, and in the garden … they’re a real problem! These critters can be one of a gardener’s most despised pests, capable of wiping out entire crops overnight. They seem to have an insatiable appetite for young, tender shoots and leaves, which makes a vegetable garden one of their favorite targets.
Rabbits are attracted to a wide variety of plants, especially in the early spring when tender new growth is abundant. They can quickly decimate rows of lettuce, spinach, carrots, and they’ll even nibble on fruiting plants like tomatoes and peppers. Their feeding habits not only stunt plant growth but can also leave plants vulnerable to diseases and pests.
Protecting your vegetable garden from rabbit damage requires a combination of strategies tailored to your specific garden layout and local rabbit population. While physical barriers like fencing are among the most effective methods, integrating natural repellents, strategic planting, and vigilant maintenance can significantly enhance your garden’s defenses against these persistent pests.
SIGNS OF RABBITS IN THE GARDEN If you suspect these furry marauders may be visiting your garden, there are a few ways to detect their presence. If you see your plants completely disappear overnight — especially when they’re young tender shoots such as peas, Swiss chard, or pepper seedlings — it’s a pretty good bet that rabbits are responsible. Look for their pea-sized droppings, tufts of hair on fences, and spots that look like a small animal may have been digging. You’ll find plant damage that looks like it’s been trimmed with pruners rather than nibbled or chewed. Rabbits have both upper and lower incisors, so when they feed, they create a clean cut.
There are a number of strategies that can be employed to discourage rabbits and make your veggie garden a much less attractive buffet option. Many gardeners have found one, or a combination of several, of the strategies below worked for them.
CREATING PHYSICAL BARRIERS One of the most reliable and effective ways to protect your vegetable garden from rabbits is by using physical barriers like fencing.
A sturdy fence around your garden perimeter, preferably made of hardware cloth or chicken wire with holes no larger than 1 inch, can effectively keep rabbits out. Make sure the fence is at least 2 feet high to keep rabbits from jumping over, and you’ll need to extend fencing at least 6 inches below ground to prevent them from burrowing under.
For individual plants or smaller areas, construct barriers from chicken wire or hardware cloth to form cylinders around each plant. Planting small crops like lettuce in a hanging basket is another creative way to put them safely out of reach of the local rabbit population.
Raised beds (if they’re at least 2 feet high) can be another effective way to lift enticing plants off the ground and keep them out of sight and out of reach for rabbits.
TRY INTIMIDATING OBJECTS Rabbits may feel less welcome in your garden if they think there are predators nearby. Try placing artificial snakes or owls within sight of favorite vegetable crops to discourage rabbits.
Moving objects like pinwheels may help deter a rabbit. Try motion activated sprinklers that will spray when rabbits hop by. Whatever objects you try, be sure to move them around to different places in the garden now and then, or swap them out for new and unfamiliar objects.
SMART GARDEN DESIGN & PLANT SELECTION Another helpful strategy is to plan your garden with rabbit-resistant plants in mind. While no plant is completely rabbit-proof, some are far less appealing to rabbits than others. Try interplanting susceptible crops with more rabbit-resistant plants to confuse their noses and discourage them from feasting on your prized vegetables.
Rabbits will tend to stay away from plants that have a pungent scent, so planting highly-aromatic herbs such as rosemary, mint, thyme, and sage will act as a deterrent. The same is true for anything in the onion family: chives, onions, garlic, allium, etc., tend to act as a natural repellent.
TRY RABBIT REPELLENTS Some gardeners swear by repellents to deter rabbits. Rabbit repellents work either by releasing an unpleasant odor or by making desirable plants taste bad.
I Must Garden’s rabbit repellent is a spray which combines both of these strategies, and is biodegradable and completely safe for people, pets, and the environment. Bonide’s Go Away Deer & Rabbit Repellent works by using strong scents combined with white pepper (rabbits don’t like anything spicy!) which works as an irritant without causing harm.
While these methods can be effective, they will need to be reapplied after rain or irrigation, and their effectiveness can vary based on local rabbit populations. It’s always a good idea to alternate repellents so that rabbits do not get used to any scent or flavor. Rabbits do most of their feeding in the evening and into the night, so to be most effective, you’ll want to apply deterrents at the end of the day.
MAINTENANCE AND MONITORING Regular garden maintenance is crucial in deterring rabbits. Keep your garden tidy by removing weeds, tall grasses, and any debris where rabbits might hide or nest. Check your fences and barriers regularly for any signs of damage or places where rabbits might be able to squeeze through.
By implementing these strategies and staying proactive throughout the growing season, you can enjoy a bountiful harvest of vegetables without sharing it all with the local rabbit population.
Creating a beautiful and thriving water garden involves more than just placing plants in water — it’s about understanding the roles each type of aquatic plant plays in maintaining a balanced pond ecosystem. Whether you’re a seasoned gardener or just starting out, understanding the different types of water plants and their roles can significantly enhance your pond’s health and beauty.
There are three main categories of aquatic plants: submerged, emergent, and floating. Each plays a vital role in maintaining water quality and supporting aquatic life. Incorporating a variety of these different types of plants not only enhances the visual appeal of your water garden but also plays a crucial role in maintaining its health. They are your allies in achieving a balanced and beautiful water garden. The key to a successful aquatic garden lies in understanding and harnessing the natural benefits of each type of aquatic plant.
Submerged Plants: Oxygenating Powerhouses
Submerged plants play a crucial role in maintaining water clarity and quality by oxygenating. They grow entirely underwater, with their leaves and stems providing habitats for aquatic organisms. These plants not only oxygenate the water but also absorb excess nutrients, helping to prevent algae overgrowth.
Examples include Anacharis(Egeria densa) a popular choice for its rapid growth and ability to absorb excess nutrients; and Hornwort (Ceratophyllum demersum) known for its bushy appearance and effective nutrient uptake.
Emergent Plants: Nature’s Filtration System
Emergent plants grow with their roots underwater but their stems and foliage above the water surface. They play a crucial role in providing habitat, shade, and filtration. Their upright growth adds vertical interest to your pond and offers shelter for fish and amphibians.
Popular choices for emergent pond plants include Water Lilies(Nymphaea spp.), famous for their beautiful blooms and large floating leaves that provide shade and habitat for aquatic creatures. Pickerel Weed(Pontederia cordata) features spikes of blue flowers above glossy green leaves and is ideal for shallow areas of the pond.
Floating Plants: Shade and Nutrient Control
Floating plants rest on the water’s surface without being anchored to the pond bed. They are excellent natural filters, shading the water and reducing sunlight penetration, which helps control algae growth. These plants are also prized for their ability to quickly cover the surface, reducing evaporation and providing hiding places for fish.
Water Hyacinth(Eichhornia crassipes) and Water Lettuce(Pistia stratiotes) are both popular choices. Water Hyacinths are admired for their exquisite colorful blooms and broad leaves, while Water Lettuce forms dense mats of bright green that provide shade and shelter for fish.
When selecting aquatic plants, consider the specific conditions of your pond—such as water depth, sunlight exposure, and desired aesthetic—and choose plants accordingly. With proper planning and maintenance, your aquatic garden will flourish, providing enjoyment for both you and the diverse aquatic life it supports.