Growing Grapes in Colorado Gardens: A Comprehensive Guide

Growing grapes in Colorado can be a rewarding experience, whether you’re aiming for fresh table grapes, juice, or even homemade wine. This guide will walk you through the essential steps for successful grape cultivation, from choosing the right cultivars to planting, trellising, pruning, and general care.
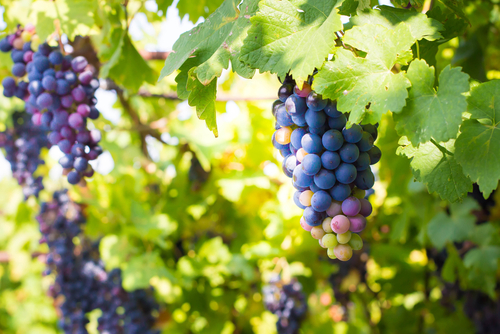
Types and Cultivars

Types of Grapes:

  • Table Grapes: Ideal for fresh eating, with popular seedless varieties like Himrod, Interlaken, Canadice, St. Theresa, and Reliance.
  • Juice and Jelly Grapes: Popular cultivars include Concord, Valiant, Niagara, and St. Croix.
  • Wine Grapes
  • Raisin Grapes

Cultivars:

  • American Cultivars (Vitis labrusca): Known for their strong “foxy” (musty) flavor and aroma, these are used for juice, fresh eating, and some wines.
  • European Cultivars (Vitis vinifera): With tight clusters and thin skins, these grapes are used for wines and require more heat units for maturity, making them less suitable for Colorado.
  • French-American Hybrids: Popular for wine, with characteristics that vary depending on parentage.

Planting Grapes

Grapes need full sun and protection from wind. Space plants 6 to 8 feet apart, in rows 6 to 10 feet apart, depending on your trellising system. Strong trellising systems are necessary to support the heavy vines and fruit. Use treated posts and 12-gauge or heavier wire.
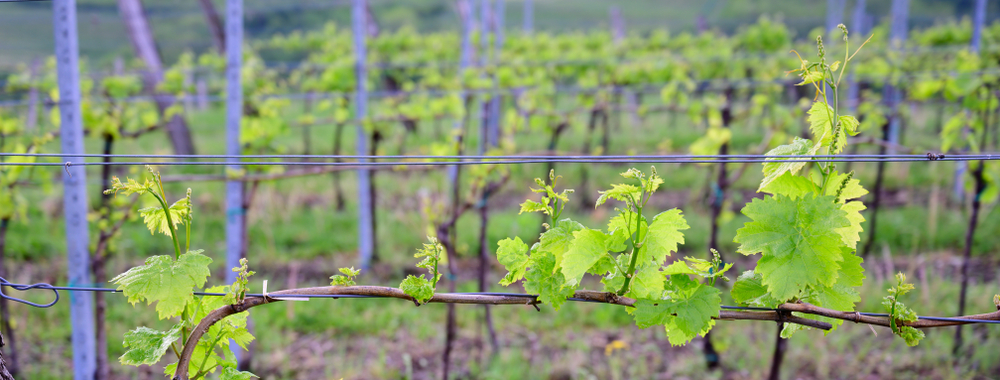
Trellising and Pruning

Grapes fruit on one-year-old wood, making pruning a balance between fruit production and renewing wood. Proper pruning is essential for high yields and large clusters of grapes. Unpruned or under-pruned grapes will produce many small clusters of tiny grapes, while over-pruning reduces yield.

Single Curtain System:

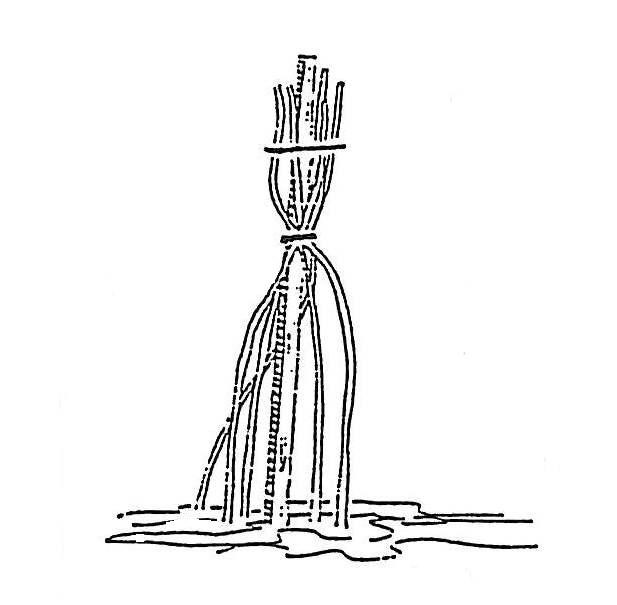
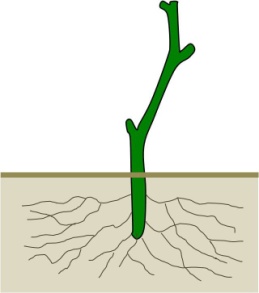
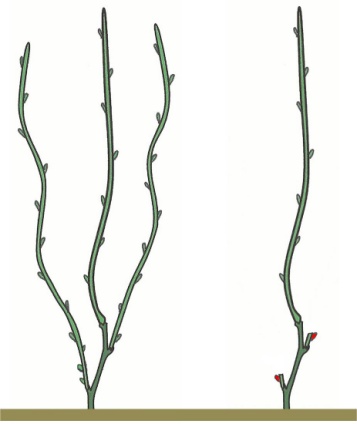
  1. Pruning at Planting: Cut back to two to three buds to encourage the growth of a strong primary trunk.
    • Image provided by CSU extension
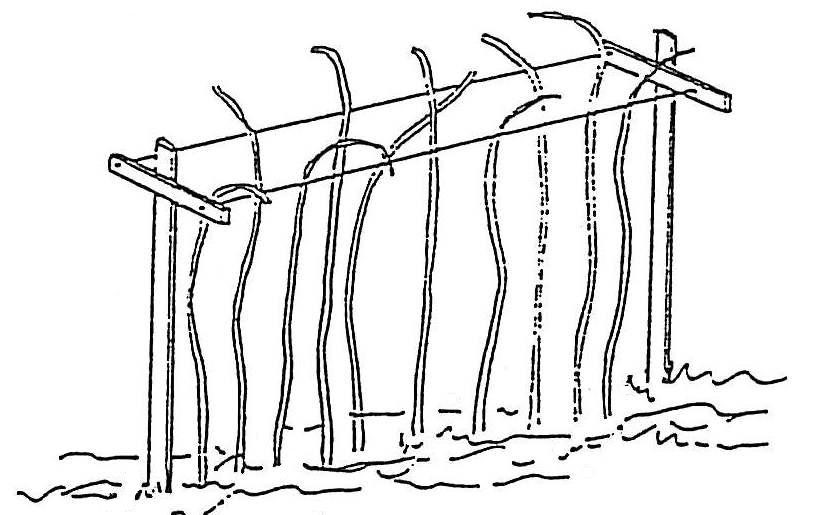
  2. Second Spring Pruning: Select one cane to become the trunk and remove others, leaving one or two renewal spurs.
    • Image provided by CSU extension
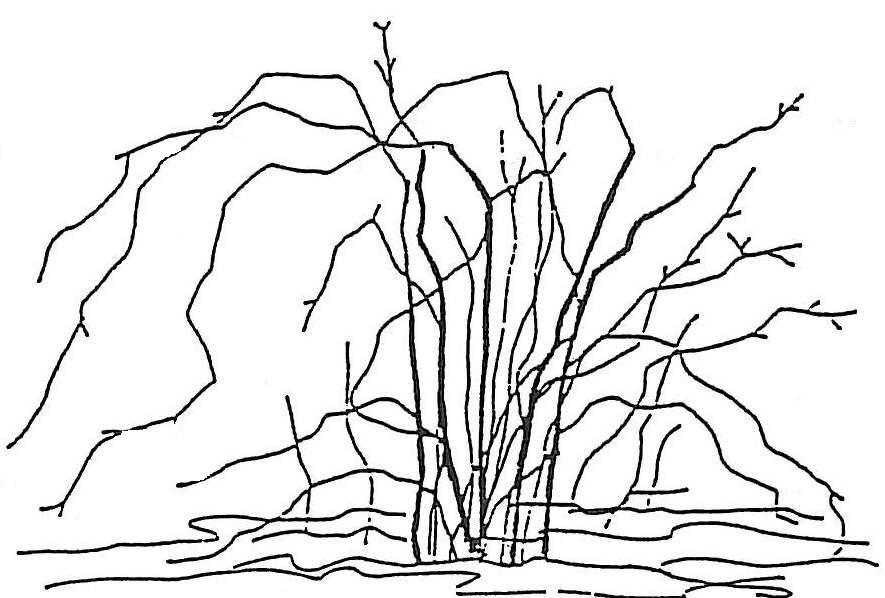
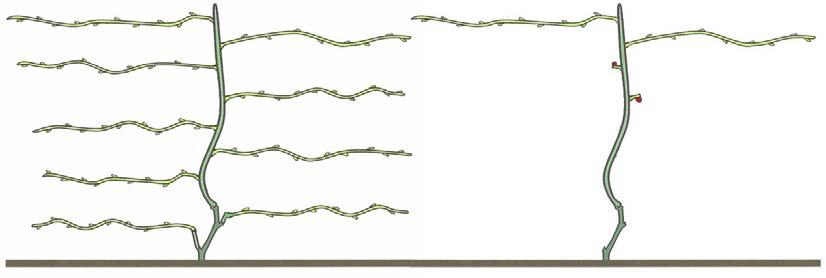
  3. Third Spring Pruning: Select two one-year-old canes to become fruiting canes and cordon arms along the trellis. Prune two other canes back to two buds each to serve as renewal spurs.
    • Image provided by CSU extension
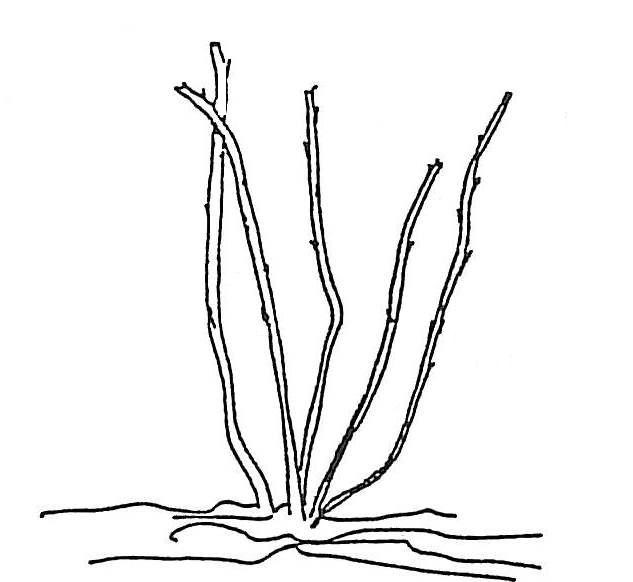
  4. Fourth Spring and Beyond: Continue selecting new fruiting canes and renewal spurs each spring, maintaining the balance between fruit production and new wood growth.
    • Image provided by CSU extension

General Care of Grapes

  • Mulching: Use a four-foot-wide weed-free bark/wood chip mulch strip under the trellis to help retain moisture and reduce weed competition.
  • Watering: Avoid over-watering, as it can lead to iron chlorosis.
  • Fertilization: Go light on fertilization. Apply one-fourth cup of 21-0-0 (or equivalent) per established plant, broadcast under the trellis, and water in.
  • Harvest: Flavor is the best indicator for home gardeners to determine harvest time.

Common Grape Pests

Fruit:

  • Birds: Bird netting may be necessary to protect the fruit.
  • Botrytis Bunch Rot: Often a problem with heavy canopies due to inadequate pruning and poor air circulation.
  • Spotted Wing Drosophila Flies: These can affect ripe grapes.

Plants:

  • Powdery Mildew: Refer to CSU Extension Fact Sheet #2.902 for management.
  • Iron Chlorosis: Typically a symptom of over-watering. Refer to CSU Extension CMG GardenNotes #223 for more information.
  • Root Rots: Poor soil drainage can lead to root rot issues.
  • Weeds and Diseases: Grapes do not tolerate competition well, so adequate control is necessary.

By following these guidelines, you can enjoy a bountiful grape harvest in your Colorado garden. Happy gardening!

For more detailed information, call or visit Echter’s Garden Center or contact your local CSU Extension office.
Growing and Pruning Raspberries in Colorado: A Comprehensive Guide

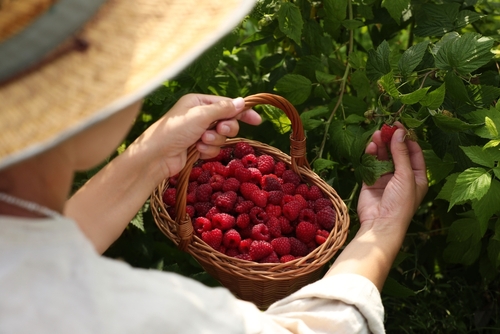
Raspberries are a delightful addition to any home garden, providing delicious fruit and vibrant foliage. In Colorado, only selected varieties of red and yellow raspberries are recommended due to the state’s unique climate. This guide covers everything from choosing the right varieties to effective pruning techniques, ensuring you enjoy a bountiful raspberry harvest.

Suitable Raspberry Varieties for Colorado

Red and Yellow Raspberries:

  • Best for general cultivation in Colorado.
  • Recommended varieties include summer-bearing types like ‘Nova’ and ‘Boyne,’ and fall-bearing types suitable for the Front Range and Western Slope.

Black Raspberries:

  • Hardy varieties such as Niwot and Pequot can thrive in some Colorado areas.

Other Varieties:

  • Blackberries, purple raspberries, boysenberries, loganberries, and dewberries require special winter protection and are less recommended.

Types of Raspberries

Summer-Bearing (Floricane):

  • Produce flowers and fruit on second-year canes.
  • Fruit once per season.

Fall-Bearing (Primocane or Everbearing):

  • Produce flowers and fruit on first-year canes.
  • Can provide two harvests: one in fall and a lighter one in summer on the lower parts of the canes.
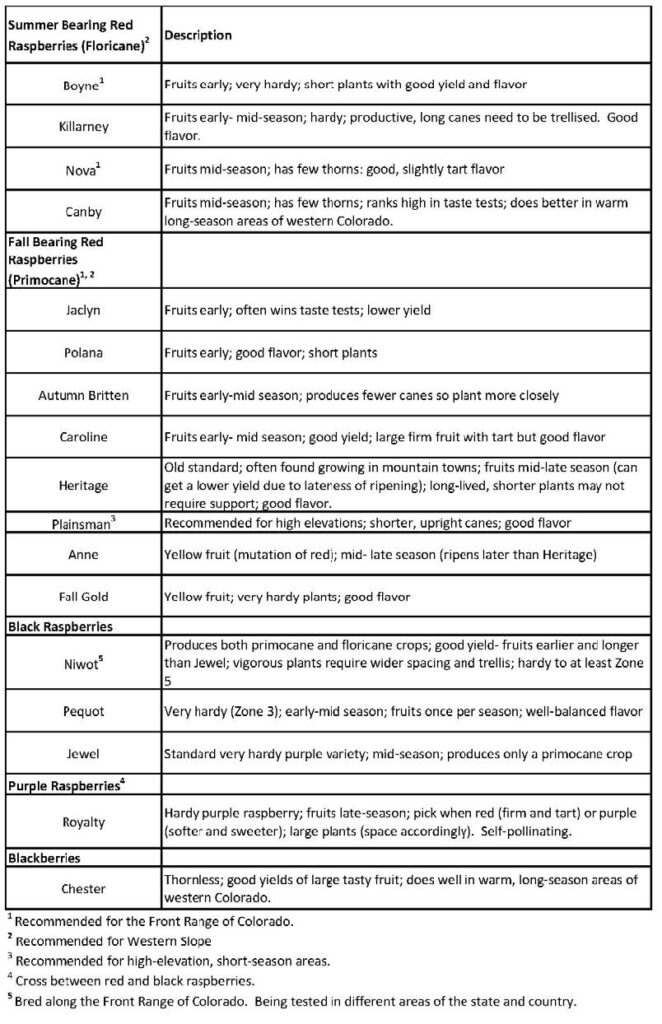
Chart Provided by CSU Extension

Soil Preparation and Planting

Soil Requirements:

  • Well-drained garden soil rich in organic matter.
  • Conduct a soil test to determine nutrient needs, especially nitrogen, zinc, iron, and manganese.

Planting:

  • Plant red and yellow raspberries as rooted suckers in spring.
  • Space plants 2-3 feet apart with rows 5-10 feet apart.
  • Cut tops to 4-6 inches above ground after planting.

Pruning Techniques

Red Raspberries:

  • Can be trained to a single stake or supported by horizontal wires 18” apart.
  • Freestanding canes should be headed back below 4.5 feet to prevent bending.

Black and Purple Raspberries:

  • Less vigorous and pruned heavily.
  • Often left freestanding.

General Pruning Tips:

  • Remove spent floricanes after fruiting to prevent disease.
  • In spring, remove dead, weak, and small canes.
  • For fall-bearing varieties, either mow all canes to ground level after harvest or remove the fruited cane parts, leaving the lower portions for summer fruit.

Trellising and Support

  • Trellising is advisable to keep canes erect and simplify harvesting.
  • Use wires 3 feet above ground to confine canes to the hedge row.
  • Larger fruit can be achieved by tipping canes at a convenient height.

Watering and Fertilization

Watering:

  • Maintain moderate moisture in the root zone.
  • Increase watering during flowering and fruiting periods.
  • Withhold water after the first frost to harden off plants.

Fertilization:

  • Apply nitrogen fertilizer as needed based on soil tests and cane growth.
  • Fall-bearing raspberries require more nitrogen than summer-bearing varieties.

Winter Protection

For Summer-Bearing Varieties:

  • Lay canes down and cover with soil or mulch after November 1.
  • Lift canes in early April and return the soil to the furrow.

For Fall-Bearing Varieties:

  • Mow canes after harvest to avoid winter damage.
  • If a summer crop is desired, protect canes similarly to summer-bearing types.

Yield and Longevity

  • Expect 15-20 pounds of fruit per year from a 25-foot hedge row by the third year.
  • Productivity may decline after 8-10 years, necessitating relocation of the raspberry bed.

Disease and Pest Management

Common Pests:

  • Spider mites, which can be managed by maintaining healthy, well-watered plants.
  • Raspberry cane borers, identified by wilting cane tips, can be controlled by removing affected canes.
  • Spotted wing drosophila, managed through refrigeration, cleanup of dropped fruit, and trapping.

Preventative Measures:

  • Purchase disease-free stock from reputable sources.
  • Regularly thin canes to improve light and air circulation.

By following these guidelines, you can successfully grow and enjoy raspberries in your Colorado garden. For more detailed information and expert advice, contact Echter’s Garden Center or refer to resources from Colorado State University Extension. Happy gardening!

Growing Blueberries: A Comprehensive Guide to Blueberry Care & Culture

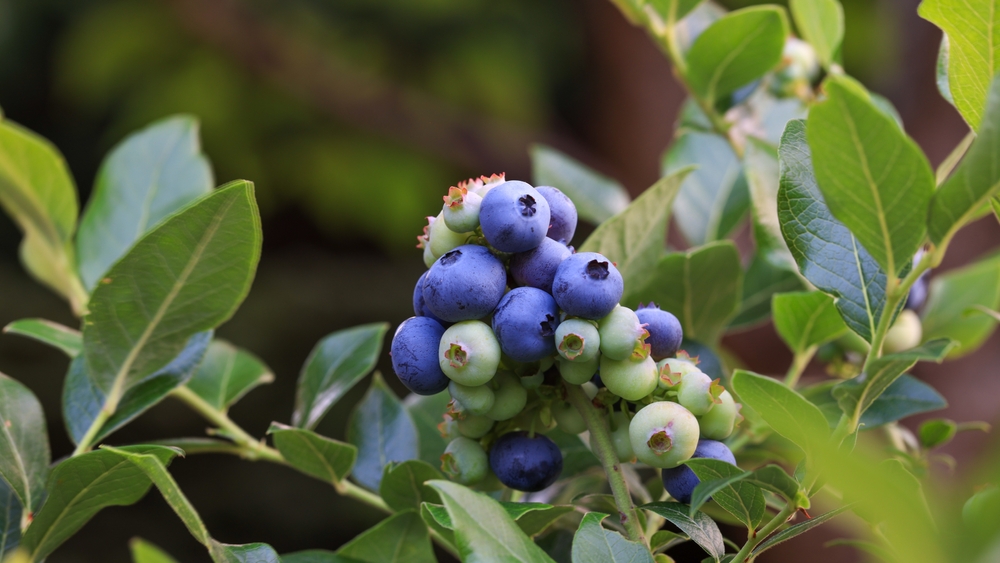
Blueberry bushes are an excellent addition to both edible and ornamental landscapes. They not only produce delicious, nutritious fruit but also enhance the garden’s aesthetic with their glossy, deep green leaves in summer and vibrant scarlet foliage in autumn. Here’s how to successfully cultivate blueberries, particularly in regions like the Rocky Mountain West, where soil conditions may pose a challenge.

Essential Growing Conditions

To thrive, blueberries require well-drained, acidic soil (pH 4.5 – 5.5) rich in organic matter. They should be planted in part shade/shade locations and protected from harsh winter winds. Given that naturally acidic soil is rare in the Rocky Mountain region, consider the following methods to create suitable conditions:

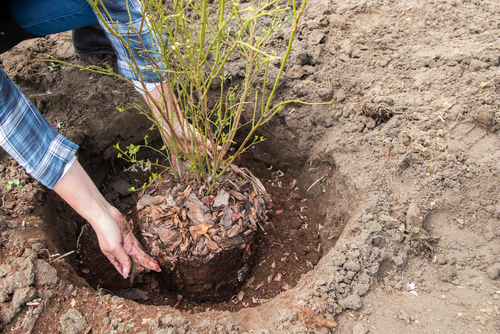
  1. Soil Replacement: Remove existing soil from the planting area to a depth of two feet and replace it with a mix of 50% good commercial topsoil and 50% horticultural sphagnum peat moss. Adding extra compost is also beneficial.
  2. Container Planting: Use half a whiskey barrel or a large 20″ plastic pot with additional drainage holes. Fill with the soil mix mentioned above and sink the container into the ground.
  3. Raised Beds: Build a raised bed (3-4 feet wide and 8-12 inches high) using the same specialized soil mix.

Regularly test the soil’s pH using test kits available from Echter’s or other local garden centers.

Plant Care Tips

  • Mulching: Apply a layer of bark chips to conserve moisture, cool the roots, and suppress weeds.
  • Watering: Maintain continuous but moderate moisture throughout the growing season. Avoid over-watering by checking the soil’s top inch for moisture before watering.
  • Fertilization: Annually amend the soil with compost and regularly acidify with products like Ferti-lome Evergreen Food or Miracid. Start fertilizing in May, just before bloom, and continue as directed on the fertilizer label.
  • Pest and Disease Control: Insect problems are rare but can be managed with Malathion if necessary. To prevent fungal issues, water in the early morning and prune correctly.

Bird Control

Birds such as robins, finches, and starlings enjoy blueberries just as much as we do. To protect your crop, cover shrubs with Ross Garden Netting as berries begin to ripen, following the manufacturer’s instructions.

Harvest and Storage

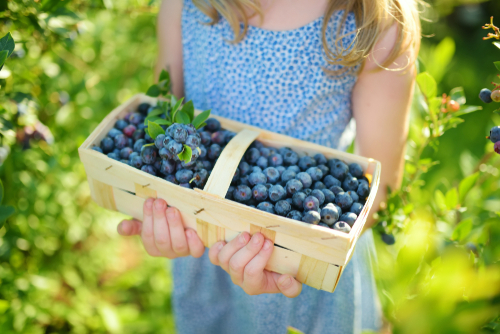
Blueberries are harvested from July through September. Store them in a refrigerator at 32-35°F to keep them fresh for 10-14 days. Fresh blueberries freeze well and maintain their taste, texture, and appearance for up to two years when stored at 0°F. Always freeze blueberries unwashed to preserve their natural protective coating. They can also be canned or processed into syrup.

Winter Protection

For best results, protect blueberry bushes during winter:

  • Apply 4-5 inches of bark mulch around the base in late November after the ground freezes. Remove the mulch in April.
  • Water during extended dry periods or when there’s no snow cover.
  • Stop fertilizing by the end of July to allow plants to harden off before winter.

Pruning Guide

Proper pruning is essential for healthy blueberry plants and optimal fruit production:

  • Establishment Years (First Two Years): Remove winter-killed and diseased wood. Prevent fruit setting to aid establishment by rubbing out flower buds in early spring.
  • First Pruning Year: Prune in early spring after the bush has been planted for two seasons. Remove diseased or dead wood and any crossing canes. Keep two or three healthy canes.
  • Second Through Fifth Years: Continue the same process each year, maintaining a goal of 12 healthy canes of different ages by the fifth year.
  • Maintenance Pruning (After Fifth Year): Maintain the bush at 12-15 canes, pruning out the oldest canes annually and leaving two or three new ones.

Pruning, along with proper soil pH, drip irrigation, and mulching, significantly impacts berry size and quality. Annual pruning ensures consistent, high-quality fruit production.

In summary, with the right care and attention, blueberry bushes can be a fruitful and beautiful part of your garden. By following these guidelines, you can enjoy bountiful harvests of delicious, nutritious blueberries year after year.

For more gardening tips and expert advice, visit our website at Echter’s Garden Center or call us at 303-424-7979.

Early Spring Garden Tips

“I love spring anywhere,
but if I could choose,
I would always greet it
in a garden.”

~ Ruth Stout ~

We all look forward to the spring season with delight each year. The promise of warmer weather, more daylight, and all of those beautiful spring flowers is a welcome reward after a long winter of grey days, icy air, and shoveling snow. Soon trees and shrubs will be budding, bulbs and perennials will begin emerging from the ground, and our gardens will slowly come back to life once again. Though it’s still too early to plant, there’s plenty to do in the garden. Grab your garden tools, and let’s get started!

CARE OF GARDEN TOOLS — Speaking of garden tools, early spring is a good time to make sure they’re ready for the upcoming season. Check your gardening supplies so that you’ll have what you need in the spring. Gives your garden gloves a good wash and dry, or replace worn ones. Take time to clean all tools thoroughly, removing any residual soil, then inspect for damage or rust. If you do find rust, give those areas a good scrub with steel wool. It will be a long season of work for your garden tools, so it’s a good idea to have them sharpened at the beginning of the season. Echter’s can do that for you! Simply bring in your tools (and lawn mower blades), and for a nominal fee, we’ll sharpen them. If you need to replace or add to your garden tool arsenal, stop by. We’re well stocked with all kinds of garden implements — especially at the beginning of the year.

EARLY SPRING CLEANUP — Winter can be hard on your garden! Take a walk around your garden to assess any winter damage. Remove debris leftover from winter storms, and tidy up the garden beds and boxes. Clean up any dead annual or vegetable plants that remained over the winter. Trim back the tattered foliage or old bloom stalks of perennials to encourage new growth to come in. Cut back ornamental grasses as low as possible, so the old foliage won’t detract from the new growth. Don’t be in too big a hurry to remove mulches though. There are plenty of beneficial pollinators overwinter in gardens by hibernating in dried leaf piles and last-season’s perennial plants, and March can still be one of our snowiest months!

PREPARE YOUR SOIL — Now is a good time to add organic amendments like compost and peat moss. Rototill or spade into your garden soil to a depth of 6 inches.

PLAN YOUR VEGETABLE GARDEN — A great vegetable garden starts with a great plan! Make a list of what you’d like to grow, how much area you have, and how many of each plant you’d like to grow. Check seed packets for plants’ mature sizes, sunlight and watering needs, and the yield of the veggies when planning. Then have fun mapping out and designing your planting areas!

IT’S TIME TO PRUNE — If you didn’t get to it in February, you can still do pruning of deciduous trees and shrubs in March. Some exceptions would be birch, maple, walnut, and elm. These should be pruned in mid-summer. In early spring, you can still easily see the branching structure of trees and shrubs before the leaves start coming in. Begin by removing the three Ds: anything dead, damaged, or diseased. Then move on to any crossed branches (branches that rub against another), water sprouts (branches that grow straight up from the branch), and suckers (branches that spring up from the base of the tree or shrub). Generally speaking, remove young branches that are growing inwards towards the center of the tree as opposed to outwards. Use a pole pruner to reach branches up to about 15 ft. off the ground. Pruning paints and wound dressings are not recommended on the pruning cuts. If you missed it, here’s a deeper dive into late-winter pruning.

GET STARTED ON SOME EARLY LAWN CARE — As in other areas of the garden, begin by checking for any problems that may have developed. Once the snow has melted off your lawn, check the turf in shaded areas for snow mold, a fungus that is white to pink in color and grows on the surface of the grass blades. If you see evidence of snow mold, lightly rake the affected areas and dispose of the debris. Any remaining mold should dissipate on its own after that.

LAWNS SHOULD BE CORE AERATED once or twice each year. That’s done by poking holes in the ground and pulling out plugs. This reduces soil compaction and helps control thatch in lawns while also helping water and fertilizer move into the root zone. Schedule your lawn for an aeration in March, and prepare by marking your sprinkler heads to avoid having them damaged. Water the lawn the day before aerating, so it will be softer and easier to pull plugs. Then water again after aeration to help the lawn recover. Leaving the plugs on the surface will help break down the thatch that has accumulated.

GET A HEAD START ON WEEDS — You can begin to get ahead of weeds by choosing a lawn fertilizer with a pre-emergent as your first feeding of the year. This will prevent annual weed seeds from germinating, and give your lawn a chance to thicken up and discourage weeds on its own. It’s best to apply these after aerating the lawn. This is important because aerating after a pre-emergent will greatly reduce its effectiveness!

OVERSEEDING — As the weather begins to reliably warm up in March, you can begin overseeding thin areas of lawn. Rake areas to be seeded to expose and loosen the soil, then apply a thin layer of Nature’s Yield Compost . Use a high-quality seed blended for your conditions. Echter’s has many different blends to choose from. A hand spreader will help to apply the seed evenly. After seeding, be sure to keep the surface area moist until the seed is well germinated.

PLANT COLD-HARDY CROPS — While it’s too early to plant tender, warm-season plants, it is time to plant some early cold-hardy crops. Things like onion sets, bare-root strawberries, asparagus roots and seed potatoes can be sowed directly into the vegetable garden in March. Be sure to keep a frost blanket handy for any late-season frosts, just to be on the safe side.

START SEEDS INDOORS — Now is the time to start broccoli, Brussels sprouts, cauliflower, kohlrabi, alyssum, lobelia, pansy, and geranium seeds inside for planting out later in the spring. Start tomatoes and peppers inside now, then they’ll be ready to transfer to the garden beds in late May.

PREPARE BIRDHOUSES FOR THE BUSY SPRING SEASON — Returning birds will be looking for real estate soon! In preparation for the new arrivals, clean out and sterilize last year’s birdhouses, or put up new ones. Make sure any older birdhouses are still firmly mounted as well. It’s a good time to perform bird feeder maintenance too. Clean out all feeders and fill with fresh seed. You may also want to consider creating a pile of nesting materials to make your yard extra inviting for this year’s visitors.