Listening to Your Plants: How Their Leaves Communicate Health and Problems

Houseplants are a wonderful addition to any indoor space, bringing life, color, and even improved air quality into our homes. However, like any living organism, plants can face challenges that affect their health and vitality. One of the first signs of trouble usually appears in their leaves. Being attuned to these signals can help you catch and address issues early, ensuring your plant remains healthy and happy. In this blog post, we’ll explore common houseplant problems — such as watering issues, improper lighting, and pests — and how they manifest through the plant’s foliage.

Overwatering
One of the most common issues houseplant owners face is overwatering. Plants need water, but too much can lead to a range of problems that typically show up first in the leaves. The most telling sign of overwatering is yellowing leaves. If you notice that your plant’s leaves are turning yellow, especially the lower leaves, it might be an indication that the roots are sitting in waterlogged soil. Overwatered roots can begin to suffocate, causing root rot, which prevents the plant from absorbing nutrients properly.

Other signs include limp, mushy leaves or stems, and sometimes an unpleasant odor from the soil. To prevent overwatering, ensure your pot has proper drainage, and allow the top couple of inches of soil to dry out between waterings. If you suspect overwatering, remove the plant from its pot to inspect the roots. If you find mushy, brown, or black roots, it’s time to prune the damaged roots and repot the plant in fresh, well-draining soil.

Underwatering
On the flip side, underwatering is another common culprit behind unhappy foliage. The most noticeable sign of this issue is wilting. If your plant’s leaves appear limp, shriveled, or dry to the touch, it’s likely not receiving enough water. This is particularly common in plants with thin leaves, like ferns, which need consistent moisture.

Crispy leaf edges, browning tips, and curling are also indications of underwatering. Unlike overwatered plants, underwatered plants will often look droopy and feel light when you pick up the pot. The solution here is simple—give the plant a good soak, ensuring that water drains out the bottom. Going forward, try to keep the soil consistently moist without letting it dry out completely between waterings. However, avoid letting the plant sit in water, which could lead to overcompensation and result in overwatering.

Too Much Light
Light is essential for a plant’s growth, but too much light can cause damage. One of the key indicators of excessive light exposure is scorched leaves. These leaves will appear faded or washed out in color, sometimes with brown, crispy patches, particularly on the side of the plant facing the light source. If you notice that your plant’s leaves are bleaching or developing burn spots, it’s a good sign that the light is too intense.

Plants that receive too much direct sunlight may also show signs of heat stress, such as curling or drooping leaves. To remedy this, try moving the plant to a spot with indirect light or provide a sheer curtain to diffuse the sunlight. Some plants, like succulents, can tolerate (and even thrive) in bright light, but many houseplants prefer medium to low light conditions.

Not Enough Light
Conversely, not enough light can also cause problems. Plants that aren’t getting enough light will often develop pale, yellowish leaves, and growth may become leggy as the plant stretches towards the light source. The leaves may also be smaller and spaced farther apart on the stem, indicating that the plant is not producing enough energy to sustain healthy, compact growth.

If you suspect your plant is suffering from insufficient light, try moving it to a brighter location or consider supplementing with a grow light. Different plants have varying light needs, so make sure you’re providing the right conditions for your specific plant species.

What’s Bugging Your Plant?
Pests are another common issue that houseplant owners face, and they often show up on the leaves. Common pests like spider mites, aphids, mealybugs, and scale can cause damage that includes speckled or mottled leaves, sticky residue (from aphid honeydew), and stunted growth. Spider mites, in particular, leave tiny yellow spots or a fine webbing on the undersides of leaves. Mealybugs look like small white cottony masses, often found in leaf joints, while scale insects appear as small brown bumps.

If you notice any of these signs, isolate the plant from others to prevent the pests from spreading. Insecticidal soap, neem oil, or wiping the leaves with rubbing alcohol can often help eliminate infestations, but be persistent—pests can be stubborn.

What Indicates a Happy Plant?
On the brighter side, recognizing signs of a healthy, happy plant is equally important. Healthy foliage is typically vibrant and firm, with good color (depending on the species) and no signs of yellowing, browning, or crispness. New growth is another positive sign. If your plant is regularly producing new leaves, it’s a good indication that it’s thriving. Additionally, the leaves will feel supple and strong, with no signs of drooping or wilting.

Plants that are in the right environment—receiving the proper amount of light, water, and nutrients—will grow steadily and without signs of distress. A happy plant will also have healthy roots that are white or light tan in color and firm to the touch.

Your houseplant’s leaves are like its communication system, offering clues about its overall health. By paying close attention to the condition of the leaves, you can quickly spot signs of overwatering, underwatering, light issues, or pests and take action to correct the problem. With a little care and observation, you can keep your houseplants looking lush and vibrant, ensuring they continue to thrive in your home for years to come.

Growing Grapes in Colorado Gardens: A Comprehensive Guide

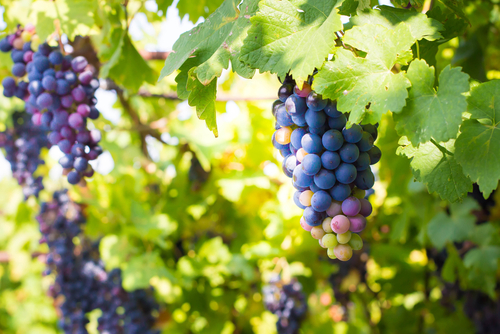
Growing grapes in Colorado can be a rewarding experience, whether you’re aiming for fresh table grapes, juice, or even homemade wine. This guide will walk you through the essential steps for successful grape cultivation, from choosing the right cultivars to planting, trellising, pruning, and general care.

Types and Cultivars

Types of Grapes:

  • Table Grapes: Ideal for fresh eating, with popular seedless varieties like Himrod, Interlaken, Canadice, St. Theresa, and Reliance.
  • Juice and Jelly Grapes: Popular cultivars include Concord, Valiant, Niagara, and St. Croix.
  • Wine Grapes
  • Raisin Grapes

Cultivars:

  • American Cultivars (Vitis labrusca): Known for their strong “foxy” (musty) flavor and aroma, these are used for juice, fresh eating, and some wines.
  • European Cultivars (Vitis vinifera): With tight clusters and thin skins, these grapes are used for wines and require more heat units for maturity, making them less suitable for Colorado.
  • French-American Hybrids: Popular for wine, with characteristics that vary depending on parentage.

Planting Grapes

Grapes need full sun and protection from wind. Space plants 6 to 8 feet apart, in rows 6 to 10 feet apart, depending on your trellising system. Strong trellising systems are necessary to support the heavy vines and fruit. Use treated posts and 12-gauge or heavier wire.

Trellising and Pruning

Grapes fruit on one-year-old wood, making pruning a balance between fruit production and renewing wood. Proper pruning is essential for high yields and large clusters of grapes. Unpruned or under-pruned grapes will produce many small clusters of tiny grapes, while over-pruning reduces yield.

Single Curtain System:

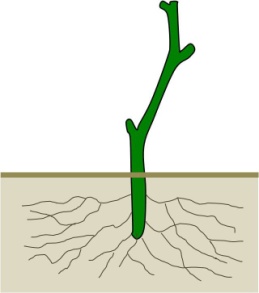
  1. Pruning at Planting: Cut back to two to three buds to encourage the growth of a strong primary trunk.
    • Image provided by CSU extension
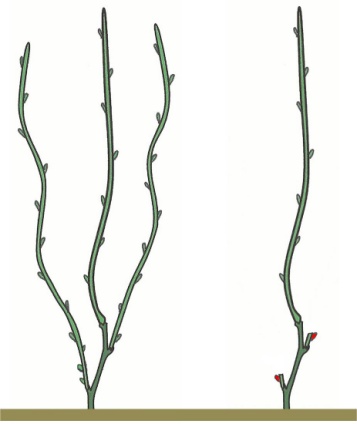
  2. Second Spring Pruning: Select one cane to become the trunk and remove others, leaving one or two renewal spurs.
    • Image provided by CSU extension
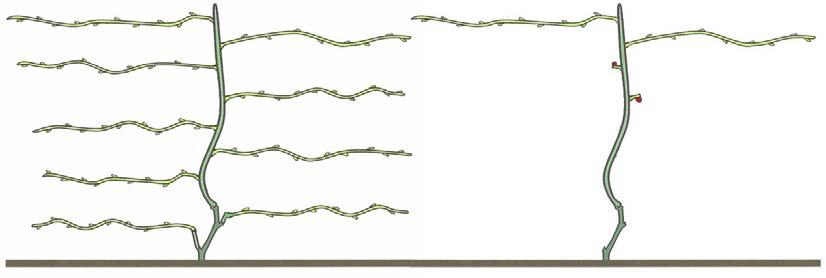
  3. Third Spring Pruning: Select two one-year-old canes to become fruiting canes and cordon arms along the trellis. Prune two other canes back to two buds each to serve as renewal spurs.
    • Image provided by CSU extension
  4. Fourth Spring and Beyond: Continue selecting new fruiting canes and renewal spurs each spring, maintaining the balance between fruit production and new wood growth.
    • Image provided by CSU extension

General Care of Grapes

  • Mulching: Use a four-foot-wide weed-free bark/wood chip mulch strip under the trellis to help retain moisture and reduce weed competition.
  • Watering: Avoid over-watering, as it can lead to iron chlorosis.
  • Fertilization: Go light on fertilization. Apply one-fourth cup of 21-0-0 (or equivalent) per established plant, broadcast under the trellis, and water in.
  • Harvest: Flavor is the best indicator for home gardeners to determine harvest time.

Common Grape Pests

Fruit:

  • Birds: Bird netting may be necessary to protect the fruit.
  • Botrytis Bunch Rot: Often a problem with heavy canopies due to inadequate pruning and poor air circulation.
  • Spotted Wing Drosophila Flies: These can affect ripe grapes.

Plants:

  • Powdery Mildew: Refer to CSU Extension Fact Sheet #2.902 for management.
  • Iron Chlorosis: Typically a symptom of over-watering. Refer to CSU Extension CMG GardenNotes #223 for more information.
  • Root Rots: Poor soil drainage can lead to root rot issues.
  • Weeds and Diseases: Grapes do not tolerate competition well, so adequate control is necessary.

By following these guidelines, you can enjoy a bountiful grape harvest in your Colorado garden. Happy gardening!

For more detailed information, call or visit Echter’s Garden Center or contact your local CSU Extension office.

Growing and Pruning Raspberries in Colorado: A Comprehensive Guide

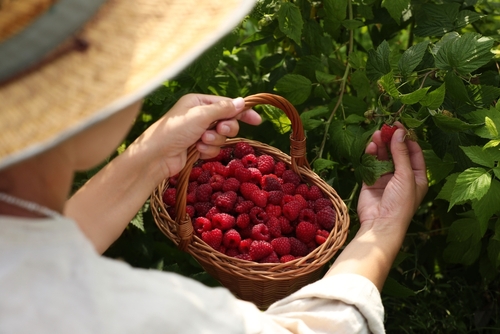
Raspberries are a delightful addition to any home garden, providing delicious fruit and vibrant foliage. In Colorado, only selected varieties of red and yellow raspberries are recommended due to the state’s unique climate. This guide covers everything from choosing the right varieties to effective pruning techniques, ensuring you enjoy a bountiful raspberry harvest.

Suitable Raspberry Varieties for Colorado

Red and Yellow Raspberries:

  • Best for general cultivation in Colorado.
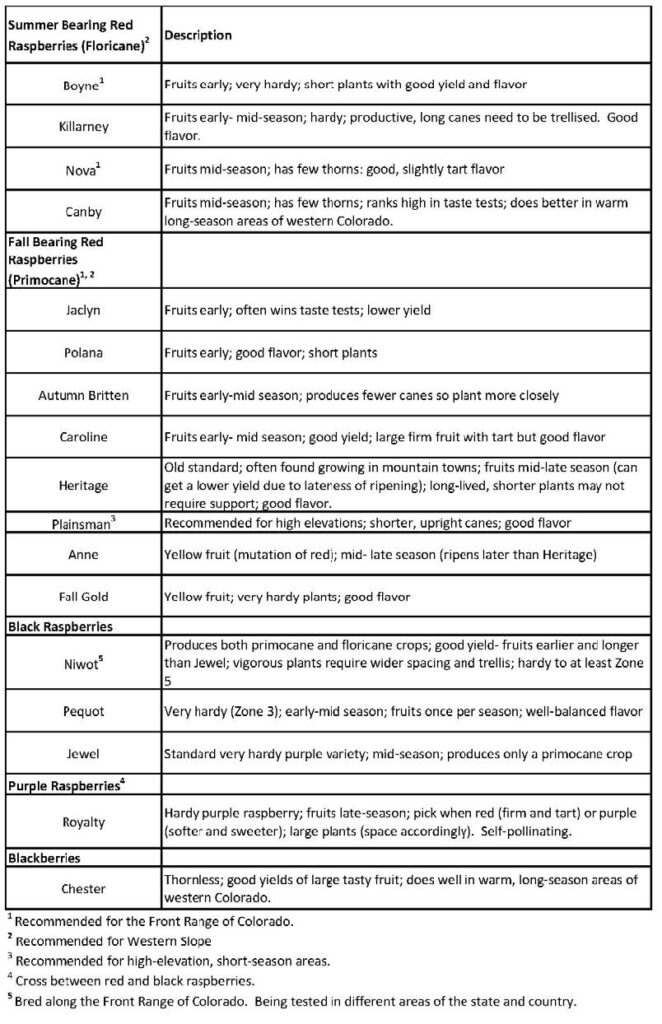
  • Recommended varieties include summer-bearing types like ‘Nova’ and ‘Boyne,’ and fall-bearing types suitable for the Front Range and Western Slope.

Black Raspberries:

  • Hardy varieties such as Niwot and Pequot can thrive in some Colorado areas.

Other Varieties:

  • Blackberries, purple raspberries, boysenberries, loganberries, and dewberries require special winter protection and are less recommended.

Types of Raspberries

Summer-Bearing (Floricane):

  • Produce flowers and fruit on second-year canes.
  • Fruit once per season.

Fall-Bearing (Primocane or Everbearing):

  • Produce flowers and fruit on first-year canes.
  • Can provide two harvests: one in fall and a lighter one in summer on the lower parts of the canes.
Chart Provided by CSU Extension

Soil Preparation and Planting

Soil Requirements:

  • Well-drained garden soil rich in organic matter.
  • Conduct a soil test to determine nutrient needs, especially nitrogen, zinc, iron, and manganese.

Planting:

  • Plant red and yellow raspberries as rooted suckers in spring.
  • Space plants 2-3 feet apart with rows 5-10 feet apart.
  • Cut tops to 4-6 inches above ground after planting.

Pruning Techniques

Red Raspberries:

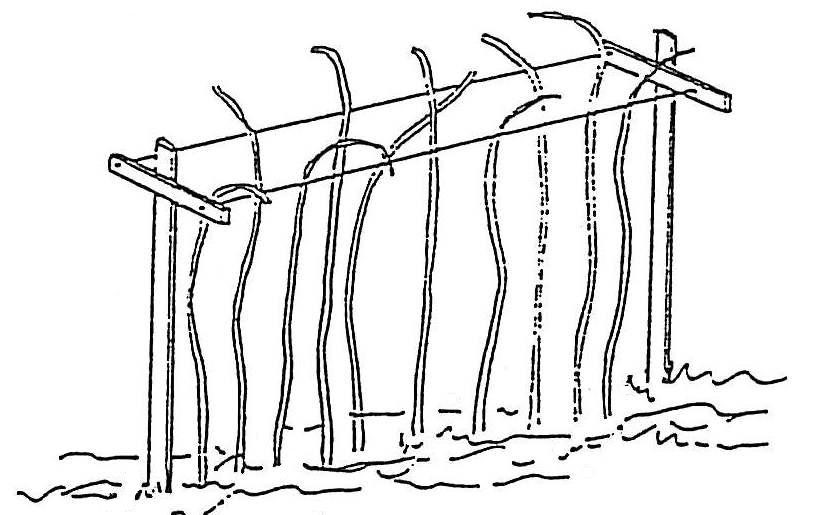
  • Can be trained to a single stake or supported by horizontal wires 18” apart.
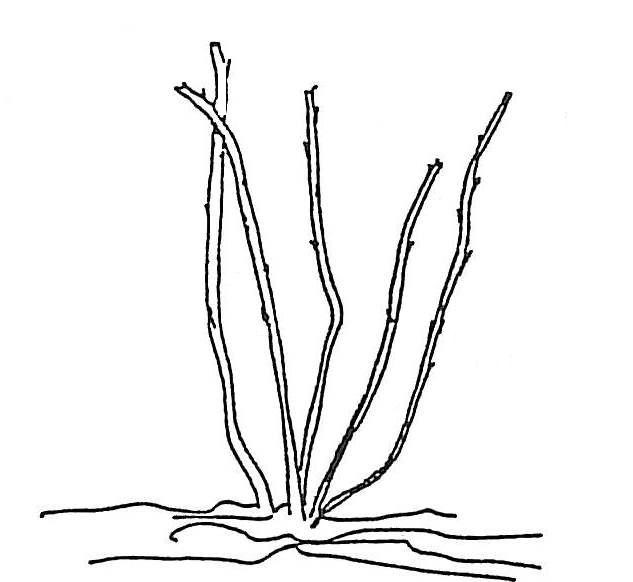
  • Freestanding canes should be headed back below 4.5 feet to prevent bending.

Black and Purple Raspberries:

  • Less vigorous and pruned heavily.
  • Often left freestanding.

General Pruning Tips:

  • Remove spent floricanes after fruiting to prevent disease.
  • In spring, remove dead, weak, and small canes.
  • For fall-bearing varieties, either mow all canes to ground level after harvest or remove the fruited cane parts, leaving the lower portions for summer fruit.

Trellising and Support

  • Trellising is advisable to keep canes erect and simplify harvesting.
  • Use wires 3 feet above ground to confine canes to the hedge row.
  • Larger fruit can be achieved by tipping canes at a convenient height.

Watering and Fertilization

Watering:

  • Maintain moderate moisture in the root zone.
  • Increase watering during flowering and fruiting periods.
  • Withhold water after the first frost to harden off plants.

Fertilization:

  • Apply nitrogen fertilizer as needed based on soil tests and cane growth.
  • Fall-bearing raspberries require more nitrogen than summer-bearing varieties.

Winter Protection

For Summer-Bearing Varieties:

  • Lay canes down and cover with soil or mulch after November 1.
  • Lift canes in early April and return the soil to the furrow.

For Fall-Bearing Varieties:

  • Mow canes after harvest to avoid winter damage.
  • If a summer crop is desired, protect canes similarly to summer-bearing types.

Yield and Longevity

  • Expect 15-20 pounds of fruit per year from a 25-foot hedge row by the third year.
  • Productivity may decline after 8-10 years, necessitating relocation of the raspberry bed.

Disease and Pest Management

Common Pests:

  • Spider mites, which can be managed by maintaining healthy, well-watered plants.
  • Raspberry cane borers, identified by wilting cane tips, can be controlled by removing affected canes.
  • Spotted wing drosophila, managed through refrigeration, cleanup of dropped fruit, and trapping.

Preventative Measures:

  • Purchase disease-free stock from reputable sources.
  • Regularly thin canes to improve light and air circulation.

By following these guidelines, you can successfully grow and enjoy raspberries in your Colorado garden. For more detailed information and expert advice, contact Echter’s Garden Center or refer to resources from Colorado State University Extension. Happy gardening!

Growing Blueberries: A Comprehensive Guide to Blueberry Care & Culture

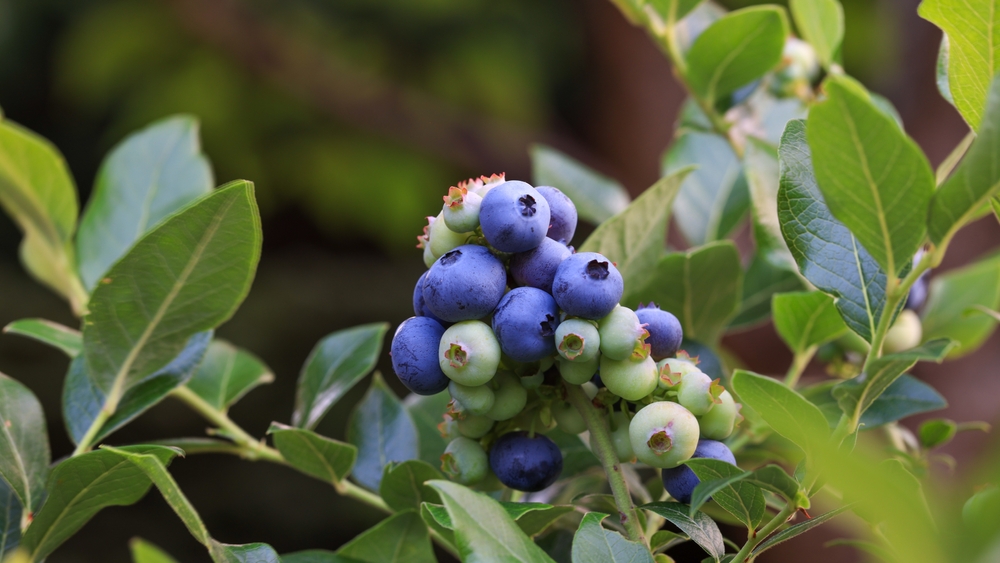
Blueberry bushes are an excellent addition to both edible and ornamental landscapes. They not only produce delicious, nutritious fruit but also enhance the garden’s aesthetic with their glossy, deep green leaves in summer and vibrant scarlet foliage in autumn. Here’s how to successfully cultivate blueberries, particularly in regions like the Rocky Mountain West, where soil conditions may pose a challenge.

Essential Growing Conditions

To thrive, blueberries require well-drained, acidic soil (pH 4.5 – 5.5) rich in organic matter. They should be planted in part shade/shade locations and protected from harsh winter winds. Given that naturally acidic soil is rare in the Rocky Mountain region, consider the following methods to create suitable conditions:

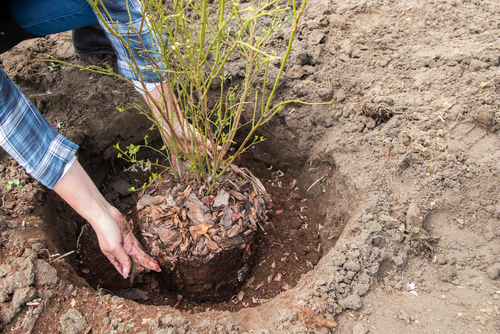
  1. Soil Replacement: Remove existing soil from the planting area to a depth of two feet and replace it with a mix of 50% good commercial topsoil and 50% horticultural sphagnum peat moss. Adding extra compost is also beneficial.
  2. Container Planting: Use half a whiskey barrel or a large 20″ plastic pot with additional drainage holes. Fill with the soil mix mentioned above and sink the container into the ground.
  3. Raised Beds: Build a raised bed (3-4 feet wide and 8-12 inches high) using the same specialized soil mix.

Regularly test the soil’s pH using test kits available from Echter’s or other local garden centers.

Plant Care Tips

  • Mulching: Apply a layer of bark chips to conserve moisture, cool the roots, and suppress weeds.
  • Watering: Maintain continuous but moderate moisture throughout the growing season. Avoid over-watering by checking the soil’s top inch for moisture before watering.
  • Fertilization: Annually amend the soil with compost and regularly acidify with products like Ferti-lome Evergreen Food or Miracid. Start fertilizing in May, just before bloom, and continue as directed on the fertilizer label.
  • Pest and Disease Control: Insect problems are rare but can be managed with Malathion if necessary. To prevent fungal issues, water in the early morning and prune correctly.

Bird Control

Birds such as robins, finches, and starlings enjoy blueberries just as much as we do. To protect your crop, cover shrubs with Ross Garden Netting as berries begin to ripen, following the manufacturer’s instructions.

Harvest and Storage

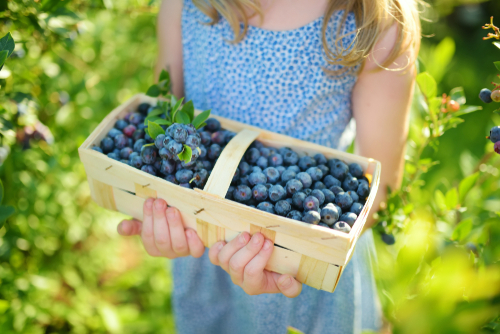
Blueberries are harvested from July through September. Store them in a refrigerator at 32-35°F to keep them fresh for 10-14 days. Fresh blueberries freeze well and maintain their taste, texture, and appearance for up to two years when stored at 0°F. Always freeze blueberries unwashed to preserve their natural protective coating. They can also be canned or processed into syrup.

Winter Protection

For best results, protect blueberry bushes during winter:

  • Apply 4-5 inches of bark mulch around the base in late November after the ground freezes. Remove the mulch in April.
  • Water during extended dry periods or when there’s no snow cover.
  • Stop fertilizing by the end of July to allow plants to harden off before winter.

Pruning Guide

Proper pruning is essential for healthy blueberry plants and optimal fruit production:

  • Establishment Years (First Two Years): Remove winter-killed and diseased wood. Prevent fruit setting to aid establishment by rubbing out flower buds in early spring.
  • First Pruning Year: Prune in early spring after the bush has been planted for two seasons. Remove diseased or dead wood and any crossing canes. Keep two or three healthy canes.
  • Second Through Fifth Years: Continue the same process each year, maintaining a goal of 12 healthy canes of different ages by the fifth year.
  • Maintenance Pruning (After Fifth Year): Maintain the bush at 12-15 canes, pruning out the oldest canes annually and leaving two or three new ones.

Pruning, along with proper soil pH, drip irrigation, and mulching, significantly impacts berry size and quality. Annual pruning ensures consistent, high-quality fruit production.

In summary, with the right care and attention, blueberry bushes can be a fruitful and beautiful part of your garden. By following these guidelines, you can enjoy bountiful harvests of delicious, nutritious blueberries year after year.

For more gardening tips and expert advice, visit our website at Echter’s Garden Center or call us at 303-424-7979.

Beat the Heat in the Summer Garden!

We’ve experienced some very warm weather this last week, and it looks like there is going to be more of it next week!  Some of your plants may be showing signs of heat stress. Leaves may wilt. Vegetables like lettuce and spinach may bolt (flower prematurely) or in the case of plants you want to blossom, like peppers or watermelon, they may drop blossoms, reducing yield. Here are a few tips to help your garden withstand the hottest part of the summer.

Watch Your Plants
Plants will often tell you when they are needing water. Lawns will turn a bluish green and show footprints that don’t rebound. Bean leaves will turn a darker green and begin to wilt. Most plants will perform better if you don’t allow them to wilt before watering, so check your garden every day and observe their needs.

Water When Necessary
It’s true that you need to water more often during hot weather, but first check the soil. The surface may look dry even though there is plenty of moisture in the root zone. Over-watering can be just as harmful as under-watering, so don’t over do it. Slow, deep watering will ensure that water soaks down to the roots. Soaker hoses and drip irrigation systems work well.  If using a hose that has been laying in the sun, be sure to let it run for a minute or two, until cool water comes out.

Mulch to Keep
Things Cool!
A couple of inches of organic mulch like compost, grass clippings, or bark mulch will help reduce moisture loss as well as cool the soil temperature. A side benefit is that it prevents most weeds from germinating, too!

Shade
Cover cool-weather veggies like lettuce and spinach with shade cloth. It won’t totally prevent bolting, but it might delay it a bit.  Also, raise your lawn mower blade up so that you have 3 inches of grass left standing after you mow.  This will provide shade for the roots of your lawn keeping them cool and much happier (which means a greener lawn).

Don’t Spray Chemicals
During Heat
Avoid spraying garden chemicals when temperatures are above 85 degrees. Weed killers can volatilize (evaporate and become air borne) and drift onto desirable plants. Insecticides can burn leaves of plants when temps are above 85. Spray early in the morning when temps are cooler and the air is still, or wait.

Summer is just getting started! With a little extra attention and a little extra know-how, your garden can come through this summer’s heat waves with flying colors, and keep right on blooming!