The High-Country Plant Palette

Your mountain garden can thrive if you start by choosing the right plants! These are plants that will tolerate the high-altitude conditions in your particular climate zone. Many trees, shrubs, perennials, and cool-season annuals grow well at higher elevations.

The Mountain Floral Palette
Consider classics like columbine, delphinium, lupine, bleeding heart, shasta daisies, and gaillardia in your garden. Enduring favorites like peonies and colorful oriental poppies are the mainstays of many a mountain perennial garden — and for good reason: they are all plants that will thrive at elevation!

Mountain gardeners should select perennial varieties that bloom in early to mid-summer. Late bloomers (good at lower altitudes) will get caught by the early fall mountain freezes. Brown-eyed Susan, painted daisy, yarrow, sunflowers, and columbine can also be seeded or planted in gardens or natural areas.

Don’t overlook roses. Grafted roses may not be winter hardy over 6500′ and should be treated as an annual in the mountains. Look for roses grown on their own roots including miniature roses and Rugosa roses. The Canadian, Parkland, and Explorer series also do well. It is important to follow instructions on winterizing your roses by protecting canes and roots from cold temperatures.

For the Vegetable Garden
Look for all of those cool-season veggies that grow so well at lower altitudes in the spring and fall. They’ll be happy all summer long in the cooler growing climate in the mountains! Vegetables like leafy greens and root vegetables are good choices, as are broccoli, cauliflower, Brussels sprouts and peas.

Shrubs That Will Shrug Off the Cold
There are many shrubs that do well in a mountain landscape. The curly leaf mountain mahogany is a native evergreen and has a beautiful upright shape. It sports attractive seed heads in late summer. The tiny trumpet honeysuckle would make a nice addition to a mountain landscape. It offers showy, fragrant, reddish-pink trumpet-shaped flowers for many weeks in the summer.

One of our favorites is the serviceberry bush. It offers beautiful white flowers in the spring, followed by edible fruit (serviceberries) the service berry bush also provides fall color in shades of oranges and yellows. The red twig dogwood provides a showy red contrast against winter snow banks. It grows to a height of 3 feet with a spread of 3 feet.

The Apache plume is a native shrub with a white flowers similar to that of a rose. These are followed by feathery, rose colored seed tails. Planted against a dark background, the Apache plume’s white stems are striking. Often overlooked and many times hard to find, the Russian hawthorn is a small tree (or large shrub). The Russian hawthorn sports yellow to orange fall color and provides food for the birds in the winter. The beautiful cinnamon bark of the native river birch
gives the tall shrub an interesting winter texture.

The lingonberry, an evergreen 4 to 8 inches high is rated to zone 2 and ideal for a part shade border. This shrub is self pollinating and its berries are great for jams, jellies, and sauces.

Wild Cranberry? Yes! This conversation piece grows to zone 3 and is evergreen. The wild cranberry has delicate foliage followed by edible berries in the fall.

Echter’s plant profile signage provides and elevation guide for most plants, and our nursery, perennials, and annuals experts will be happy to answer questions about the suitability of plants for a high-altitude garden.

Remember to harden your plants off before planting! It gives them the best possible chance to adjust to their new environment!

Get to Know Microclimates!

What are Microclimates?
Knowing the importance of microclimates is essential for a garden that thrives at a high altitude. What are they? A microclimate is a small, but distinctly different climate within a larger area. These small areas may be a little warmer, cooler, wetter, or drier depending entirely on their location. Becoming aware of these small climate pockets helps mountain gardeners to choose and site plants more wisely.

Looking for warmer microclimates
Gardens on south-facing slopes are warmer and drier than gardens on north-facing slopes of the same valley at the same elevation! So a garden planted in full sun on a southern-exposed slope will have a longer, warmer growing season than other exposures. Southern exposures are a great place for plants that need more heat to come into flower before early autumn frosts.

Things like structures, fences, large rocks, walls, and trees can all act to provide protective screening from harsh winds. Their thermal mass can raise nearby temperatures and create a warmer microclimate in those areas.

Becoming aware of cooler microclimates
Plant growth is slowed by cool soil temperatures, which drive plant metabolism. When soil temps drop below 55 degrees, plants stop growing. North-facing areas and low spots on your property will naturally be cooler.

Look for any small dips and indentations on your property, which can create collections points for cold air. As a result, frost pockets may be more likely to form in those spots.

Walk through your property carefully looking for these microclimates. This will help you place your plants and shrubs where they will have a better chance at succeeding, and your mountain garden will thrive!

Sources: https://extension.colostate.edu/topic-areas/yard-garden/colorado-mountain-gardening-basics-7-224/

Fun with Summer Annuals!

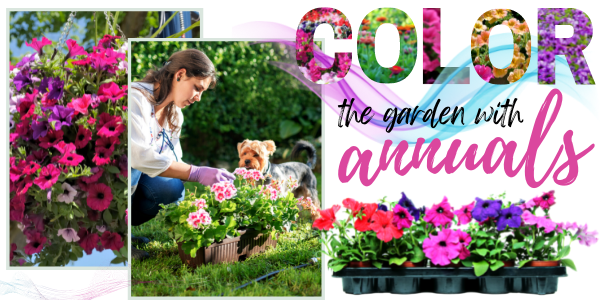
Nothing says summer like a garden filled with bright colorful flowers. So when the spring color show begins to fade and the threat of Jack Frost visiting the garden has passed, it’s time to have some fun and plug in the summer color with these popular single-season plants.

CHOOSING ANNUALS FOR YOUR GARDEN SPACE
There are annuals that are sun lovers and annuals that prefer the shadier side of the garden. Don’t worry — there’s a palette of plants to choose from for either situation. When choosing your plants in the greenhouse, pay special attention to the amount of sunlight they will receive where you plant them.

Annuals that require full sun will need at least 6-8 hours of sunlight on their foliage each day, while part-sun plants would like 4-6 hours of sun daily. Those shade-loving plants will manage with dappled light through the leaves of trees, or less than 4 hours of sunlight daily. Note: partial & full-shade plants in Colorado must be protected from mid-day through mid-afternoon sun.

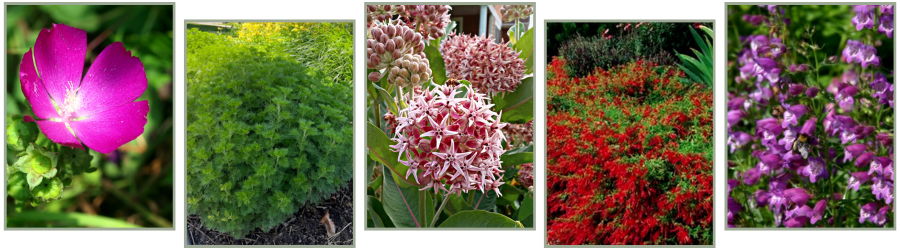
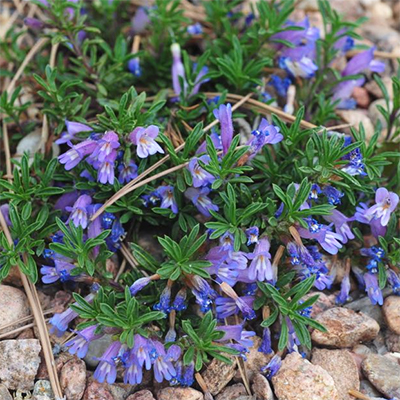
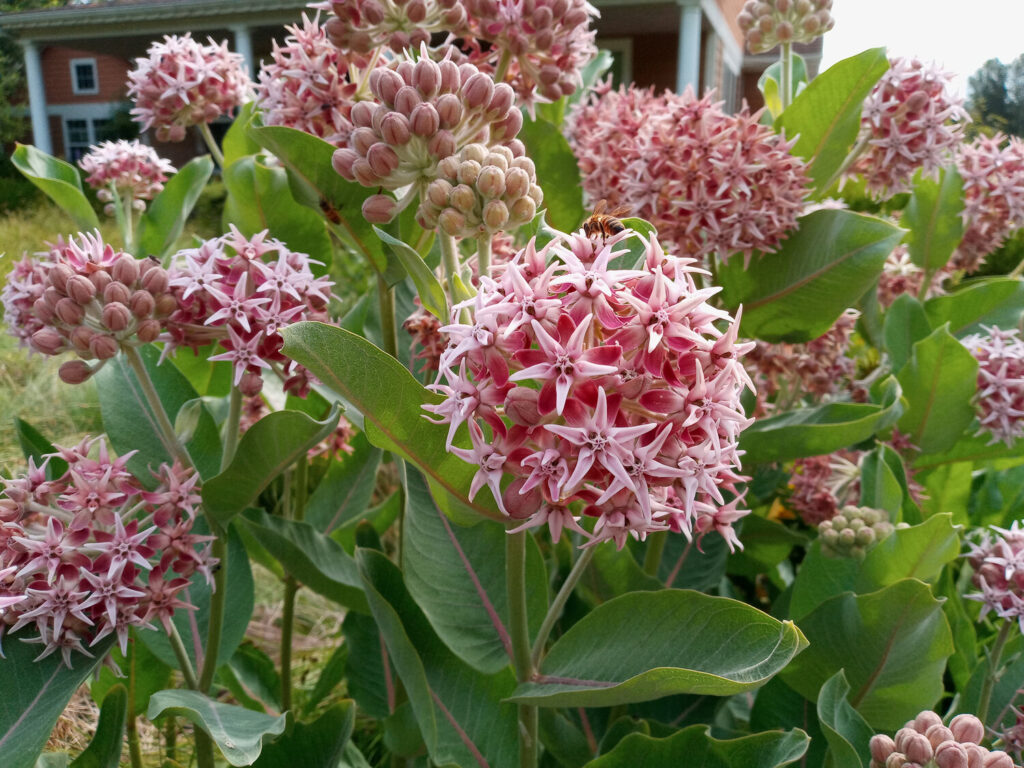
Sun loving annuals include African Daisy, geraniums, petunias, calibrachoa, and bacopa. Shade loving annuals include impatiens, begonia, lobelia, vinca vine, fuchsia, and many more. There’s no shortage of choices for these single-season plants.

Think about the final height and width of the plants in your plan. Pay attention to the recommended spacing between the plants. This will help to avoid overcrowding as the plants grow, which can encourage pest and disease problems.

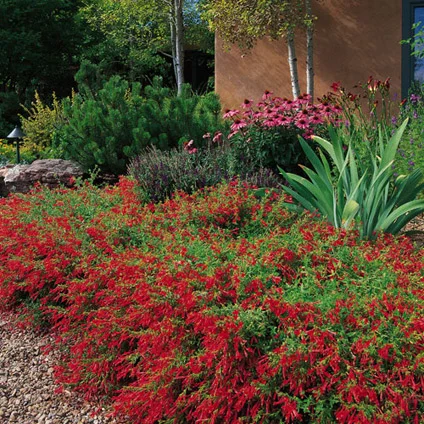
When choosing colors, consider the time of day you will enjoy your flower garden. Red tends to dull at twilight, while white or silver foliage will give a nice glow to your gardens in the evening.

PREPARING TO PLANT YOUR ANNUALS
Remember to harden your plants off gradually before putting them out into the sunny garden all day. What does it mean to harden a plant off? It means to gradually expose a plant to the elements outdoors. Plants coming from the protected environment of a greenhouse need to get accustomed to drier air, brighter sunshine, and wind.

If they are set out suddenly, the change can damage them permanently. We recommend that you set them in a semi-protected area for a few days where they will get some exposure to the elements. Then, when they have been toughened somewhat, you can plant them into a fully-exposed site.

KEEP THE FLOWER POWER GOING ALL SUMMER
Annuals are pretty prolific bloomers, but they need a little maintenance to keep them looking their best.

Fertilize them regularly with a blossom booster formulation. This is particularly important with annuals that are planted in containers, since container plantings are watered more often. This flushes out nutrients in the potting soil that will need to be replaced. Feed with Jack’s Blossom Booster fertilizer every couple of weeks to maintain the summer color show. 

For in-ground annuals, mix flower fertilizer into the soil at planting time. Reapply as needed following directions on the package or use Blossom Booster regularly during the season.

Pinch your annuals back if they become leggy. You will lose a few flowers for a while, but be rewarded with many more later in the season. For some annuals deadheading (pinching off old flowers as they fade) will keep the beds looking beautiful and encourage more flowers. Most of the new varieties of annuals have so much flower power bred into them that they will continue to flower through the season with minimal maintenance. Calibrachoa is a good example.

Go ahead and get creative with your landscape this summer! Have some fun with your plant selections and design layout. Since annuals only last for one growing season, they make it easy to experiment with bright hues, textures, and forms. Whatever your style, mood, or color preference, you can easily create a garden that is uniquely “you” with the abundance of different annuals available.

Small Space Gardening

Do you dream of stepping out the back door in the summer to harvest your own homegrown vegetables for meals? Maybe you visualize long rows of spinach, corn, beans, and squash. Or maybe your dream is a flower garden with plenty of colors, textures, and fragrance. If you’ve got more dreams than space, that doesn’t mean you can’t have a garden! With a little know-how and some creative thinking, you can still harvest fresh homegrown veggies this summer and have some beautiful flower combinations too!

The Advantages of Container Gardening

Simply put, container gardens are small, portable gardens that can be placed almost anywhere. They’re perfect for patios, porches, and balconies — even along stairs!

Even those who have larger garden areas can use containers to add a touch of color to areas where it may be difficult to grow flowers in the ground. You can easily add a few pots of flowers around your raised vegetable beds to attract more essential pollinators to your food crops too!

These small, portable gardens offer so many conveniences. For example, you might add a few containers of tomatoes, lettuces, or herbs to a handy sunny spot on the patio. It’ll save a trip out to the raised beds to harvest this summer’s salads.

Hate weeding? Container gardens are easily accessible, and they’ll require little, if any weeding! Summer storm or early/late season frosts threatening your garden? You can easily move your containers to a protected spot until the weather sorts itself out. Have problems with animals raiding your strawberry patch? Plant them in a hanging basket instead! With the exception of crops like larger pumpkins or corn, you’ll find you can grow nearly anything in a container!

Containers offer so much versatility to your gardening choices, and they’re easier to put together than you think! There are just a few steps to keep in mind, and then you’ll be up and growing in no time!

Step One – Determine the Available Sun in Your Space

Whether you’re gardening in a large space or a small one, every gardener starts in the same place — how much sun do have available? It’s important because that will determine what plants will grow best in the space you have.


You’ll want to keep sun requirements (especially for vegetables!) in mind. Full Sun means 6 or more hours of direct sun on your plants per day. Partial Sun/Partial Shade is 4-6 hours of direct sun per day, and Full Shade is less than 4 hours of direct sun a day.

Most veggies require 6-8 hours of sun per day. Look for a space that meets that sun requirement. Tomatoes, peppers, and cucumbers all want plenty of summer sun to produce their best. Flowers like geraniums, petunias, and African daisies will thrive in a sunny space too.

If your garden space only receives partial sun (4-6 hours per day), choose from a different plant palette. Veggies like lettuce, radishes, kale, and Swiss chard will grow fine with partial sun or filtered sun conditions. Flowers such as fuchsia, begonias, impatiens, and coleus need protection from midday sun and will provide plenty of bold color in your shadier garden spaces.

Step Two – Choose a Container

There is no shortage of choices for gardeners when it comes to containers for patios, decks, and porches. There are pots in everything from terracotta and recycled ocean plastics to glazed ceramics and even cloth! They’re all available in a seemingly unlimited number of colors and sizes.

Think about using vertical options like window boxes that fit over deck railings, or hanging baskets that will allow you to extend your gardening space upwards. Adding trellises to your pots will allow you to grow vining flowers and veggies in a smaller space.

Make sure whatever container you choose has drainage holes in the bottom, and will be large enough to provide adequate space for roots and soil, which will allow your container garden to grow and thrive.

Step Three – Add Soil

Good things grow from good soil! Like planting in a raised bed, container gardening requires a light, porous soil that will allow for good drainage.

We like Nature’s Yield Outdoor Planter Mix for containers. It’s blended with sphagnum peat moss for added moisture retention. To save on the amount of soil needed for a taller pot, use an Ups-A-Daisy insert (located in our indoor container area). It sits about 10-12″ from the top of the container, effectively raising the bottom of the pot. This reduces the weight of the containers, and helps ensure essential oxygen will reach to the lower plant roots.

Step Four – Choose Your Plants

Specialized varieties have been developed for small-space gardeners. When choosing plants look for terms like “compact,” “tidy plant habit,” or “short stature” on plant tags and seed pack descriptions.

We make it easy for you to choose plants. Our shade-loving plants are all on the north side of the greenhouse, while sun-lovers are on the south side. You can always find the sun requirement icons on our signs.

For a floral planter, follow the easy design “recipe” used by the pros: think thriller, filler, spiller. It makes plant choices easy! Choose a thriller, that is a tall plant such as dracaena spikes or maybe an ornamental grass. For your filler element, choose plants that mound like petunias, geraniums, or coleus. Finally, for something that “spills” out over the sides, think lobelia, sweet potato vine, or creeping Jenny.

For a container vegetable garden, tomatoes and peppers are favorites for patio pots, along with fresh herbs and salad veggies. Choose determinate varieties of tomatoes. They stay shorter. Add a trellis or stake to your container for growing peas, cucumbers, and mini pumpkins!

Step Five – Watering and Fertilizing Your Container Garden

When gardening in pots, remember that potted plants need a little different care than their counterparts in the ground.

The soil dries out more rapidly in containers, so keep an eye on them and make sure they’re well watered and fertilized. We like Jack’s Classic Blossom Booster for floral pots and Jack’s All Purpose or Tomato Feed for veggie containers.

 In the heat of summer, check your container gardens in the morning and the afternoon to see if they need watering. Adding a polymer like Soil Moist will help retain water in the soil.

Since container gardens are watered more often, fertilizer will get flushed from the soil faster than an in-ground garden. The nutrients your plants will need to grow and thrive should be added on a regular basis.

That’s it! In just a few simple steps you’ll be growing lush, vibrant container gardens of your own. A garden doesn’t have to cover a large area to be beautiful and enjoyable. It’s just a matter of making the best use of the space you have. Whether you decide to plant a few fresh veggies on the patio or create an abundant floral display for the front porch, get your hands in the soil and have fun with gardening in containers this summer!

Rose Classifications

It’s easy to be overwhelmed by the selection of roses in our rose house! So many beautiful blooms in a seemingly endless variety of sizes, shapes, and colors. These classic garden staples now number over 300 species and several thousand varieties! How can you begin to narrow down which rose will the best one for your garden?

Most rose specialists would divide them into three basic categories: Old Garden Roses, Wild Roses and Modern Garden Roses. Each of these categories has their advantages and drawbacks, not to mention countless gorgeous varieties to choose from.

Old Garden Roses
These are the predecessors of today’s hybridized roses. Often referred to as “antique” or “heirloom”, old garden roses have been around since before 1867. They’re known for their strong fragrance, hardiness, and resistance to disease. Unlike more modern roses, these only bloom once a year. They remain popular today though. The Queen Elizabeth rose is one of the most beloved vintage roses grown today and graces many a rose garden.

Wild Roses
These are the original species of roses that grow in the wild. These lack the cross-breeding and hybridization of modern varieties, and can be recognized by their single, five-petal blooms. Most true wild roses are pink! White or yellow wild roses are quite rare.

Modern Garden Roses
These are roses bred after 1867. Unlike the Old Garden Roses, they are not as fragrant, hardy, or disease-resistant. However, modern roses offer larger blooms and will bloom continuously throughout the season. Cross-breeding and hybridization are common and produce an abundance of colors, scents, and sizes.

There are many different types of roses within these three basic categories. Stroll through our rose house and you’ll see hybrid tea roses, grandiflora, floribunda, miniature, climbing roses, and shrub roses, just to name a few. Each can have a place in your garden. Spend some time talking with our rose experts. They can help you choose just the right rose for the right location!

Planting a Perennials Garden

It’s every gardener’s dream: a beautiful landscape that’s big on color & texture and low on maintenance. Perennial gardens fit the bill beautifully! Filled with plants that return faithfully year after year, perennials are an easy way to grow a long-lived landscape that will bloom throughout the entire growing season. One afternoon spent planting a well-designed perennial bed will give you years of colorful, low-maintenance enjoyment. Let’s get growing!

Start
with a Plan

Smart gardeners always begin with a well-thought-out plan. It’s easier to erase a mistake on paper than it will be later on in the garden with a shovel. Begin by measuring your area, then sketch in permanent structures like fences or porches. Next, take note of how many hours of sun your new perennial bed will receive in various seasons. That way, when it’s time to choose your plants, you can begin with a palette of plants that will naturally thrive in the conditions where they’ll be planted.

Continue by roughly drawing in your desired plant choices. You’ll want to plan your perennial beds with a variety of differing heights, textures, and bloom times. This helps ensure there will be color in your garden from early spring right through to late autumn. You might even consider adding some evergreens and ornamental grasses for winter interest. Use our handy Plant Finder Tool to help you research and choose.

Pay Attention to Plant Height

Choose tall, dramatic plants for the background, medium-sized plants to provide mass in the center section, and shorter plants for the front. When planning your plant locations, be sure to draw in plants at their final, mature size. This will ensure your plants will have plenty of room when they reach full size and avoid overcrowding in years to come. Overcrowding reduces the ability of air to circulate, which can lead to disease and pest problems.

Get Ready to Plant

Before you plant, the single most important thing you can do to get your dream garden off to a strong start is to give your plants good healthy soil to grow in! You’ll want to add plenty of organic material to the native soil. The organic materials will help loosen heavy clay soils and add bulk to sandy soils, allowing them to retain moisture better. Layer 2″ of compost, peat, or composted manure onto the planting area. Blend this with existing soil to a depth of 4-6 inches. This works out to about four cubic yards of organic amendments per 1,000 square feet of native soil. Once your soil is prepared, you’re ready to plant.

Now for the fun part — stop by Echter’s, choose your plants, and bring them home! Spring is a wonderful time to get started on a perennial garden. Planting in the cooler temperatures helps those new perennials get off to a healthy start before the heat of summer comes on. Once you have your plants in place, give your garden a finished look by adding a layer of mulch. It will help control weeds while also acting to conserve water.

That’s it! With just a little elbow grease, you’ll be able to sit back and enjoy the beauty of your very own perennial garden. These long-lived plants will keep pumping out beautiful flowers year after year.

Stop in and see us! We have hundreds of different types of perennial plants for every landscaping fantasy, and our knowledgeable experts can help make your garden dreams a reality!

Putting the Garden to Bed

In October, when the temperatures finally begin to cool, it’s a welcome sign that soon both gardens and gardeners will be able to settle in for a well-earned winter’s rest.

Those cozy evenings by the fireside will be here before we know it, but this month, there’s still plenty to be done to get the garden ready for its dormant period, and also to prepare for next year’s busy growing season!

BEGIN BY CLEANING UP THE BEDS
Start the winterizing process with a good cleanup! A proper cleanup this fall will improve overall plant health for the following year. Begin by removing any weeds. They’re sending their energy into their roots just like all the other plants at this time of year. You’ll want to get them out, so they don’t spread seed or dig deeper roots over the winter.

You’ll also want to clean up dropped fruit under fruit trees. Fruits and vegetables left out all winter will only rot, attract animals, and set seed. Remove all vegetable plants that are finished producing for the season. Dispose of plants which had insects or disease. You don’t want to put those in the compost pile. The same goes for weeds. Pull out all dead plant material. This helps keep your garden healthy through the winter and helps protect against pests.

CUTTING BACK & PRUNING
Many perennials and ornamental grasses add seasonal interest to the garden with attractive seed heads and plumes. Choose what you would like to remain intact and tidy up others by cutting tall stems back to the base foliage.

Cutting old and diseased foliage in the fall can help perennials jump right into new growth come spring. However, do not prune early-flowering shrubs such as lilac, forsythia, certain varieties of hydrangea, or rhododendron. These have already set next spring’s flower buds. Pruning now would remove next spring’s blooms! Spring bloomers like these can get a haircut right after they finish flowering next year.

AMEND THE SOIL — Autumn is a great time to amend your soil by working in organic matter. The addition of compost now will improve the soil next spring. Rototilling, or turning the soil over, will reduce insect and disease problems next year. Be sure to do this while the soil is dry.

ADD MULCH — Renewing all mulches in the autumn will yield several benefits. It helps maintain a consistent soil temperature, retains moisture, and prevents exposure of roots — which is a common cause of winter damage. Apply mulch around perennial plants — especially those that have been recently planted — as well as around trees and shrubs.

PREPARE FOR THOSE EARLY FROSTS — Keep an eye on those weather apps for nighttime temps dipping to or below freezing, and keep the frost blankets handy. A little protection for the first frost or two ensures your plants will continue to thrive in the warm autumn days that invariably follow a frost. If you run out of frost blankets, be sure to cover with a similar breathable material. Plastic is not recommended for frost protection because condensation beneath the plastic may lead to ice formation, which can damage the foliage.

TO HARVEST, OR NOT TO HARVEST — THAT IS THE QUESTION!

Though you may be able to extend the season by using floating row covers and frost blankets for the first autumn frost or two, generally it’s time to pull the warm-season veggie plants and put any harvests on the table for dinner. Here is a brief list of what to protect and when to call it a season:

Beans will not tolerate frost. Harvest and put them on the dinner menu.

Corn is frost sensitive and also should be harvested rather than covered.

Harvest all unprotected tomatoes and peppers. Unripened tomatoes can be placed in a paper bag or between sheets of newspaper to continue ripening indoors. Be sure to check on them often throughout their ripening process.

Cucumbers and summer squash should be harvested and thoroughly wiped dry before storing. Thin-skinned cucumbers do not store well and those should be eaten within a few days.

WHAT NOT TO
HARVEST … YET
Not all crops need to be hurriedly harvested before an autumn frost. Some cool-season vegetables are actually improved by the cold!

– Root crops like carrots and beets can remain in the ground until there’s a danger of the soil freezing. The soil acts as their protection from frost.
Celery and late cabbage can be harvested after you notice the frost has slowed their growth.
– Don’t harvest winter squash or pumpkins yet! Wait until their vines are frost-killed and their skins are hard to the thumbnail.
Kale and collards can be left in the garden until long after the first fall frost. Continue to harvest as needed until the foliage finally succumbs to the cold weather.
Potatoes should be harvested after the vines die down, so the potato skin has a chance to mature. This makes them less susceptible to bruises, cuts, and moisture loss during storage.
Lettuces and salad greens can be covered with frost cloth.
Onions should be harvested only after the frost has stopped their growth.

For a deeper dive into methods of storing vegetables for the winter, the Colorado State University Extension provides this handy fact sheet.

TO RAKE, OR NOT TO RAKE? Rake! Although some fallen leaves can be mulched back into the soil with your lawn mower, most turf grasses will not tolerate a thick mat of leaves over the winter. Soggy mats of leaves on turf can lead to disease problems. You can add dry leaves to the compost pile, or shred & dig directly into your vegetable beds to improve the soil over the winter.

Aerate your lawn to loosen compacted soil, and apply Green Thumb Winterizer in mid-October. Your lawn will be nice and green in the spring. For the final mowing of the season, leave your grass at a height of 2½”.

Bindweed, dandelion, and other perennial weeds will be moving food reserves down to their roots now. This is a great time to use Weed Free Zone to kill these invasive weeds, roots and all.

Before you drain your sprinkler system for the year, give your lawn a good watering. Continue to hand water as long as temperatures remain above freezing.

Put a trip to Echter’s on your autumn to-do list! We’ll help you tackle putting your garden to bed. Then you can feel free to settle back and enjoy the season knowing that your garden is well-prepared for a long winter’s nap!

Garden Smart with Xeric & Native Plants

Colorado gardeners are portrayed with a wide range of descriptive terms: enthusiastic, resilient, tenacious, optimistic and persistent come to mind. We learn by experience, and all of us — novice or veteran gardener, have enjoyed success and have also been disappointed with failure. What we all share is our sense of place and region, with all of its gardening advantages and challenges. Our sunny skies and dry climate provide the perfect palette for plants native to the region as well as those from other areas of the world that thrive in similar conditions.

What are Xeric plants? Xeric is a term that applies to plants that grow well with minimal irrigation once they are established. They are eagerly sought by the gardener who is looking for plants that demand less water and adapt to the soils of the region. The xeriscape gardening concept uses seven basic design and planting fundamentals.

Why Choose Native & Xeric Plants for Your Home Landscape?
There are plenty of good reasons to fill your garden with water-wise native plants. It makes sense to use plants that are naturally adapted to Colorado’s unique climate, soils, and environment. When they’re correctly sited, native species require less water & fertilizer, and they’re more pest & disease resistant.

By choosing native plants, you’ll be working with nature, instead of trying to work with plants that aren’t suited to our local conditions. Another great reason to choose native plants is to restore habitat and biodiversity in our rapidly-growing urban areas. Gardens with native plants provide food, shelter, and other important resources for our wildlife — including our native pollinators!

Where Can You Find Xerics & Natives?
It’s not hard to find xeric or native plants for your garden! Many plants that are native to our region are also xeric. These water-wise plants include favorites such as Blue Flax, Blanket Flower, Penstemon, Apache Plume, Kinnikinnick, Boulder Raspberry, Hackberry, Hawthorn and Serviceberry. The true natives — such as the Desert Four O’clock and Purple Poppy Mallow — also play very well with immigrants from abroad including Russian Sage, Ice Plant, Torch Lily and many more. These are just a few of the many interesting choices that will happily settle in and make themselves right at home in your garden.

At Echter’s, we carry a wide variety of drought-resistant and xeric plants that are especially suited for Colorado’s dry climate. Our knowledgeable staff will help you choose just the right plants for your landscape.

You’ll find that xeric and native plants are resilient, tenacious and persistent. They will inspire enthusiasm and optimism in your gardening adventures. So celebrate your sense of place, and welcome native and xeric plants to your garden where they will feel right at home!

Beat the Heat in the Summer Garden!

We’ve experienced some very warm weather this last week, and it looks like there is going to be more of it next week!  Some of your plants may be showing signs of heat stress. Leaves may wilt. Vegetables like lettuce and spinach may bolt (flower prematurely) or in the case of plants you want to blossom, like peppers or watermelon, they may drop blossoms, reducing yield. Here are a few tips to help your garden withstand the hottest part of the summer.

Watch Your Plants
Plants will often tell you when they are needing water. Lawns will turn a bluish green and show footprints that don’t rebound. Bean leaves will turn a darker green and begin to wilt. Most plants will perform better if you don’t allow them to wilt before watering, so check your garden every day and observe their needs.

Water When Necessary
It’s true that you need to water more often during hot weather, but first check the soil. The surface may look dry even though there is plenty of moisture in the root zone. Over-watering can be just as harmful as under-watering, so don’t over do it. Slow, deep watering will ensure that water soaks down to the roots. Soaker hoses and drip irrigation systems work well.  If using a hose that has been laying in the sun, be sure to let it run for a minute or two, until cool water comes out.

Mulch to Keep
Things Cool!
A couple of inches of organic mulch like compost, grass clippings, or bark mulch will help reduce moisture loss as well as cool the soil temperature. A side benefit is that it prevents most weeds from germinating, too!

Shade
Cover cool-weather veggies like lettuce and spinach with shade cloth. It won’t totally prevent bolting, but it might delay it a bit.  Also, raise your lawn mower blade up so that you have 3 inches of grass left standing after you mow.  This will provide shade for the roots of your lawn keeping them cool and much happier (which means a greener lawn).

Don’t Spray Chemicals
During Heat
Avoid spraying garden chemicals when temperatures are above 85 degrees. Weed killers can volatilize (evaporate and become air borne) and drift onto desirable plants. Insecticides can burn leaves of plants when temps are above 85. Spray early in the morning when temps are cooler and the air is still, or wait.

Summer is just getting started! With a little extra attention and a little extra know-how, your garden can come through this summer’s heat waves with flying colors, and keep right on blooming!