The Resilient Tree: Why Late-Summer Crispy Leaves Aren’t a Dealbreaker

As the heat of the summer starts to wane and the cool breeze of autumn begins to hint at its arrival, many gardeners find themselves drawn to the garden center, seeking new additions to their landscapes. However, one common sight that might give pause is a tree with crispy, dry leaves. While it might seem like a sign of distress, it’s important to understand what causes this condition and why a tree with crispy leaves might still be a great purchase.

Why Do Trees Get Crispy Leaves?
In Colorado, our summers can be particularly harsh on trees, especially those that are still in nursery pots. These pots can limit the root system’s access to water, and combined with intense sunlight and high temperatures, it’s no surprise that some trees may develop crispy leaves.

The primary culprit is often water stress. In a pot, even the most diligent watering might not keep up with the tree’s needs during the peak of summer. The roots can only pull from the limited soil available, and if that soil dries out too quickly, the leaves can suffer. However, while crispy leaves may look unattractive, they don’t necessarily indicate a sick tree. In most cases, the tree itself remains healthy and ready to thrive once planted in the ground.

Choosing a Tree in Late Summer
When selecting a tree with crispy leaves, it’s essential to look beyond the foliage. Check the trunk and branches for signs of health. The bark should be firm, without any cracks or peeling. Gently scratch a small area of the bark with your fingernail; if you see green beneath, the tree is alive and well. Also, inspect the roots if possible. Healthy roots are white or light brown and flexible, not mushy or brittle.

Late summer and early autumn are excellent times to plant trees in Colorado. The soil is still warm from the summer, which encourages root growth, but the air temperatures are cooler, reducing the stress on the tree. Additionally, many garden centers offer discounts on their remaining stock, allowing you to purchase high-quality trees at a fraction of the cost.

Watering Needs of Newly-Planted Trees
Watering is the most critical factor in the success of a newly-planted tree. Once your tree is in the ground, it’s essential to keep the root zone consistently moist. Water deeply, ensuring that the moisture reaches the full depth of the root ball and into the surrounding soil. In the first few weeks after planting, you may need to water every few days, depending on the weather.

As the tree establishes, you can gradually reduce the frequency of watering, but continue to water deeply. In Colorado, it’s also a good idea to water your trees during dry spells in winter. Even when the tree is dormant, its roots need moisture to survive.

Tips for Caring for Your New Tree
In addition to proper watering, mulching around the base of the tree can help retain moisture and regulate soil temperature. Apply a 2-3 inch layer of mulch, but keep it a few inches away from the trunk to prevent rot. Pruning is not usually necessary for newly-planted trees unless there are broken or crossing branches. Allow the tree to focus its energy on establishing roots before encouraging new growth.

Advantages of Planting in Early Autumn
Planting in early autumn gives your tree the best chance to establish itself before the ground freezes. The cooler temperatures reduce stress, and the tree can focus on root growth without the pressure of supporting a full canopy of leaves. Plus, the discounts available at this time of year mean you can invest in more plants or upgrade to larger specimens without breaking the bank.

So, don’t let a few crispy leaves deter you. With the right care, a late-summer tree can become a thriving, beautiful addition to your landscape. Take advantage of the seasonal discounts and plant your trees with confidence this autumn!

Embrace the Benefits of Autumn Planting in Colorado

When gardening in a challenging climate like Colorado’s, the timing of planting can impact the success of our gardens. While spring is often hailed as the prime season for gardening, and summer might seem tempting, there’s a quieter, less celebrated time that offers significant advantages: early autumn. Planting trees, shrubs, and perennials in the fall can lead to healthier, more resilient plants, and a garden that’s ready to thrive come spring. Here’s why autumn should be your go-to season for planting.

Cooler Temperatures = Happier Plants
Colorado’s summers can be scorching, with temperatures frequently reaching highs that stress plants—especially newly planted ones. In contrast, early autumn brings cooler days and nights, which are much gentler on young roots. This milder weather reduces the risk of transplant shock, allowing plants to establish themselves more comfortably. With the intense heat of summer behind us, your new trees, shrubs, and perennials can focus on root development without the added burden of extreme temperatures.

Extended Root Growth Period
One of the most significant advantages of fall planting is the extended period for root growth. In the fall, soil temperatures remain warm enough to encourage root development even as air temperatures drop. This allows plants to develop strong, deep roots before winter sets in. By the time spring arrives, your plants are already well-established and better equipped to handle the growing season’s demands. In contrast, plants set in the ground during summer may struggle to establish roots while also trying to maintain top growth.

Reduced Watering Needs
In Colorado, water conservation is always top of mind, and fall planting offers a water-wise solution. Cooler temperatures mean less evaporation and reduced water stress for your plants. Additionally, autumn rains can help provide consistent moisture, reducing the need for supplemental watering. Newly planted trees, shrubs, and perennials will still need regular watering to get established, but the amount required is typically much less than what’s needed during the hot, dry summer months.

Fewer Pests and Diseases
Summer gardens are often plagued by pests and diseases, which can make establishing new plants a challenge. However, many of these issues begin to wane as the weather cools in autumn. This reduction in pest and disease pressure means your new plants are less likely to face immediate threats, allowing them to settle in and grow without the need for constant vigilance or treatment. It’s a natural way to give your plants a healthier start.

Enjoy Better Selection at Nurseries
While spring and summer might be the busiest time at nurseries, autumn often brings a more curated selection of hardy plants that are well-suited to Colorado’s climate. Many nurseries, like ours, offer sales or discounts as they clear out inventory before winter, so you might find high-quality trees, shrubs, and perennials at a great price. Plus, with fewer customers around, you’ll have more time to browse and get advice from knowledgeable staff without feeling rushed.

Get a Head Start on Spring
By planting in the fall, you’re essentially giving your garden a head start on the next growing season. Come spring, when everyone else is just starting to dig, your fall-planted trees, shrubs, and perennials will already be settled, ready to burst into growth and bloom. This can lead to earlier flowering, stronger plants, and a garden that looks more mature and vibrant from the get-go.

If you’re looking to create a resilient, thriving garden in Colorado, consider making early autumn your prime planting season. The cooler temperatures, extended root growth period, reduced watering needs, fewer pests, and the chance to get a head start on spring all make fall an excellent time to invest in your garden’s future. So, as summer winds down, don’t pack away your gardening tools just yet—embrace the benefits of autumn planting, and watch your garden flourish.

Protecting Your Vegetable Garden from Rabbit Damage: Effective Strategies for Colorado Gardeners

They’re furry, they’re cute, and in the garden … they’re a real problem! These critters can be one of a gardener’s most despised pests, capable of wiping out entire crops overnight. They seem to have an insatiable appetite for young, tender shoots and leaves, which makes a vegetable garden one of their favorite targets.

Rabbits are attracted to a wide variety of plants, especially in the early spring when tender new growth is abundant. They can quickly decimate rows of lettuce, spinach, carrots, and they’ll even nibble on fruiting plants like tomatoes and peppers. Their feeding habits not only stunt plant growth but can also leave plants vulnerable to diseases and pests.

Protecting your vegetable garden from rabbit damage requires a combination of strategies tailored to your specific garden layout and local rabbit population. While physical barriers like fencing are among the most effective methods, integrating natural repellents, strategic planting, and vigilant maintenance can significantly enhance your garden’s defenses against these persistent pests.

SIGNS OF RABBITS IN THE GARDEN
If you suspect these furry marauders may be visiting your garden, there are a few ways to detect their presence. If you see your plants completely disappear overnight — especially when they’re young tender shoots such as peas, Swiss chard, or pepper seedlings — it’s a pretty good bet that rabbits are responsible. Look for their pea-sized droppings, tufts of hair on fences, and spots that look like a small animal may have been digging. You’ll find plant damage that looks like it’s been trimmed with pruners rather than nibbled or chewed. Rabbits have both upper and lower incisors, so when they feed, they create a clean cut.

There are a number of strategies that can be employed to discourage rabbits and make your veggie garden a much less attractive buffet option. Many gardeners have found one, or a combination of several, of the strategies below worked for them.

CREATING PHYSICAL BARRIERS
One of the most reliable and effective ways to protect your vegetable garden from rabbits is by using physical barriers like fencing.

A sturdy fence around your garden perimeter, preferably made of hardware cloth or chicken wire with holes no larger than 1 inch, can effectively keep rabbits out. Make sure the fence is at least 2 feet high to keep rabbits from jumping over, and you’ll need to extend fencing at least 6 inches below ground to prevent them from burrowing under.

For individual plants or smaller areas, construct barriers from chicken wire or hardware cloth to form cylinders around each plant. Planting small crops like lettuce in a hanging basket is another creative way to put them safely out of reach of the local rabbit population.

Raised beds (if they’re at least 2 feet high) can be another effective way to lift enticing plants off the ground and keep them out of sight and out of reach for rabbits.

TRY INTIMIDATING OBJECTS
Rabbits may feel less welcome in your garden if they think there are predators nearby. Try placing artificial snakes or owls within sight of favorite vegetable crops to discourage rabbits.

Moving objects like pinwheels may help deter a rabbit. Try motion activated sprinklers that will spray when rabbits hop by. Whatever objects you try, be sure to move them around to different places in the garden now and then, or swap them out for new and unfamiliar objects.

SMART GARDEN DESIGN & PLANT SELECTION
Another helpful strategy is to plan your garden with rabbit-resistant plants in mind. While no plant is completely rabbit-proof, some are far less appealing to rabbits than others. Try interplanting susceptible crops with more rabbit-resistant plants to confuse their noses and discourage them from feasting on your prized vegetables.

Rabbits will tend to stay away from plants that have a pungent scent, so planting highly-aromatic herbs such as rosemary, mint, thyme, and sage will act as a deterrent. The same is true for anything in the onion family: chives, onions, garlic, allium, etc., tend to act as a natural repellent.

TRY RABBIT REPELLENTS
Some gardeners swear by repellents to deter rabbits. Rabbit repellents work either by releasing an unpleasant odor or by making desirable plants taste bad.

I Must Garden’s rabbit repellent is a spray which combines both of these strategies, and is biodegradable and completely safe for people, pets, and the environment. Bonide’s Go Away Deer & Rabbit Repellent works by using strong scents combined with white pepper (rabbits don’t like anything spicy!) which works as an irritant without causing harm.

While these methods can be effective, they will need to be reapplied after rain or irrigation, and their effectiveness can vary based on local rabbit populations. It’s always a good idea to alternate repellents so that rabbits do not get used to any scent or flavor. Rabbits do most of their feeding in the evening and into the night, so to be most effective, you’ll want to apply deterrents at the end of the day.

MAINTENANCE AND MONITORING
Regular garden maintenance is crucial in deterring rabbits. Keep your garden tidy by removing weeds, tall grasses, and any debris where rabbits might hide or nest. Check your fences and barriers regularly for any signs of damage or places where rabbits might be able to squeeze through.

By implementing these strategies and staying proactive throughout the growing season, you can enjoy a bountiful harvest of vegetables without sharing it all with the local rabbit population.

Growing Grapes in Colorado Gardens: A Comprehensive Guide

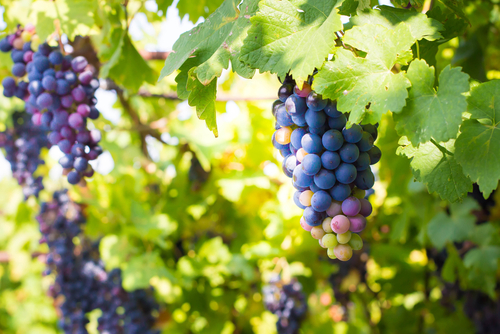
Growing grapes in Colorado can be a rewarding experience, whether you’re aiming for fresh table grapes, juice, or even homemade wine. This guide will walk you through the essential steps for successful grape cultivation, from choosing the right cultivars to planting, trellising, pruning, and general care.

Types and Cultivars

Types of Grapes:

  • Table Grapes: Ideal for fresh eating, with popular seedless varieties like Himrod, Interlaken, Canadice, St. Theresa, and Reliance.
  • Juice and Jelly Grapes: Popular cultivars include Concord, Valiant, Niagara, and St. Croix.
  • Wine Grapes
  • Raisin Grapes

Cultivars:

  • American Cultivars (Vitis labrusca): Known for their strong “foxy” (musty) flavor and aroma, these are used for juice, fresh eating, and some wines.
  • European Cultivars (Vitis vinifera): With tight clusters and thin skins, these grapes are used for wines and require more heat units for maturity, making them less suitable for Colorado.
  • French-American Hybrids: Popular for wine, with characteristics that vary depending on parentage.

Planting Grapes

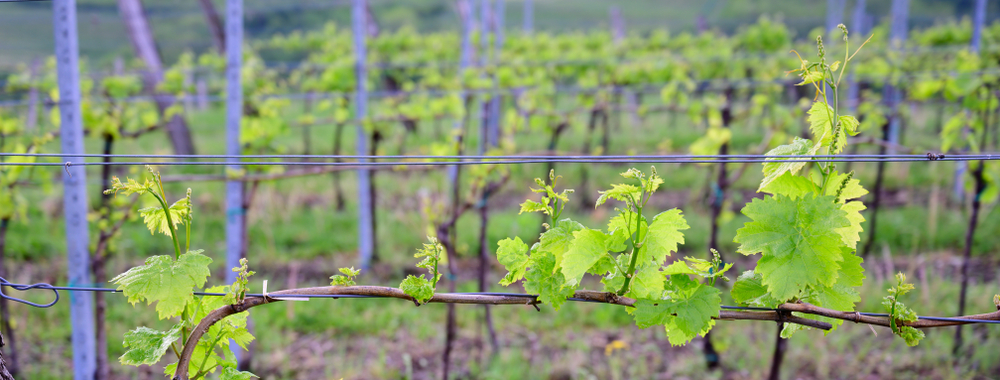
Grapes need full sun and protection from wind. Space plants 6 to 8 feet apart, in rows 6 to 10 feet apart, depending on your trellising system. Strong trellising systems are necessary to support the heavy vines and fruit. Use treated posts and 12-gauge or heavier wire.

Trellising and Pruning

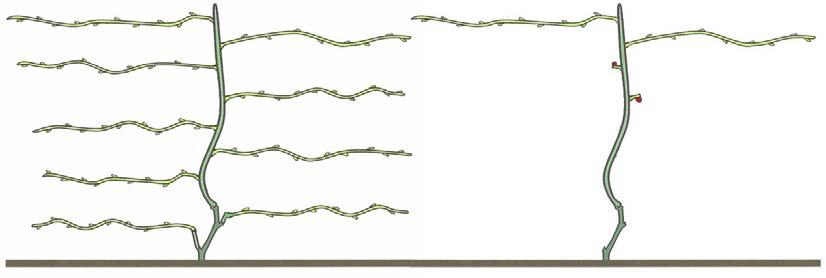
Grapes fruit on one-year-old wood, making pruning a balance between fruit production and renewing wood. Proper pruning is essential for high yields and large clusters of grapes. Unpruned or under-pruned grapes will produce many small clusters of tiny grapes, while over-pruning reduces yield.

Single Curtain System:

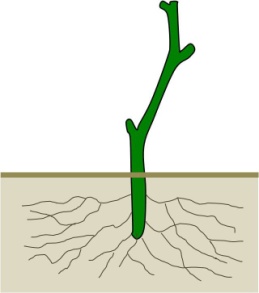
  1. Pruning at Planting: Cut back to two to three buds to encourage the growth of a strong primary trunk.
    • Image provided by CSU extension
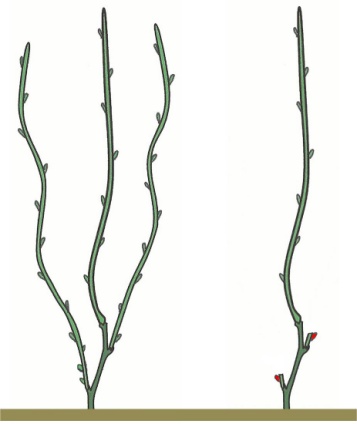
  2. Second Spring Pruning: Select one cane to become the trunk and remove others, leaving one or two renewal spurs.
    • Image provided by CSU extension
  3. Third Spring Pruning: Select two one-year-old canes to become fruiting canes and cordon arms along the trellis. Prune two other canes back to two buds each to serve as renewal spurs.
    • Image provided by CSU extension
  4. Fourth Spring and Beyond: Continue selecting new fruiting canes and renewal spurs each spring, maintaining the balance between fruit production and new wood growth.
    • Image provided by CSU extension
General Care of Grapes

  • Mulching: Use a four-foot-wide weed-free bark/wood chip mulch strip under the trellis to help retain moisture and reduce weed competition.
  • Watering: Avoid over-watering, as it can lead to iron chlorosis.
  • Fertilization: Go light on fertilization. Apply one-fourth cup of 21-0-0 (or equivalent) per established plant, broadcast under the trellis, and water in.
  • Harvest: Flavor is the best indicator for home gardeners to determine harvest time.

Common Grape Pests

Fruit:

  • Birds: Bird netting may be necessary to protect the fruit.
  • Botrytis Bunch Rot: Often a problem with heavy canopies due to inadequate pruning and poor air circulation.
  • Spotted Wing Drosophila Flies: These can affect ripe grapes.

Plants:

  • Powdery Mildew: Refer to CSU Extension Fact Sheet #2.902 for management.
  • Iron Chlorosis: Typically a symptom of over-watering. Refer to CSU Extension CMG GardenNotes #223 for more information.
  • Root Rots: Poor soil drainage can lead to root rot issues.
  • Weeds and Diseases: Grapes do not tolerate competition well, so adequate control is necessary.

By following these guidelines, you can enjoy a bountiful grape harvest in your Colorado garden. Happy gardening!

For more detailed information, call or visit Echter’s Garden Center or contact your local CSU Extension office.

Growing and Pruning Raspberries in Colorado: A Comprehensive Guide

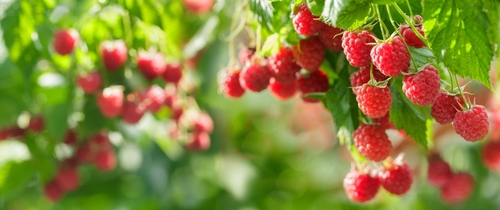
Raspberries are a delightful addition to any home garden, providing delicious fruit and vibrant foliage. In Colorado, only selected varieties of red and yellow raspberries are recommended due to the state’s unique climate. This guide covers everything from choosing the right varieties to effective pruning techniques, ensuring you enjoy a bountiful raspberry harvest.

Suitable Raspberry Varieties for Colorado

Red and Yellow Raspberries:

  • Best for general cultivation in Colorado.
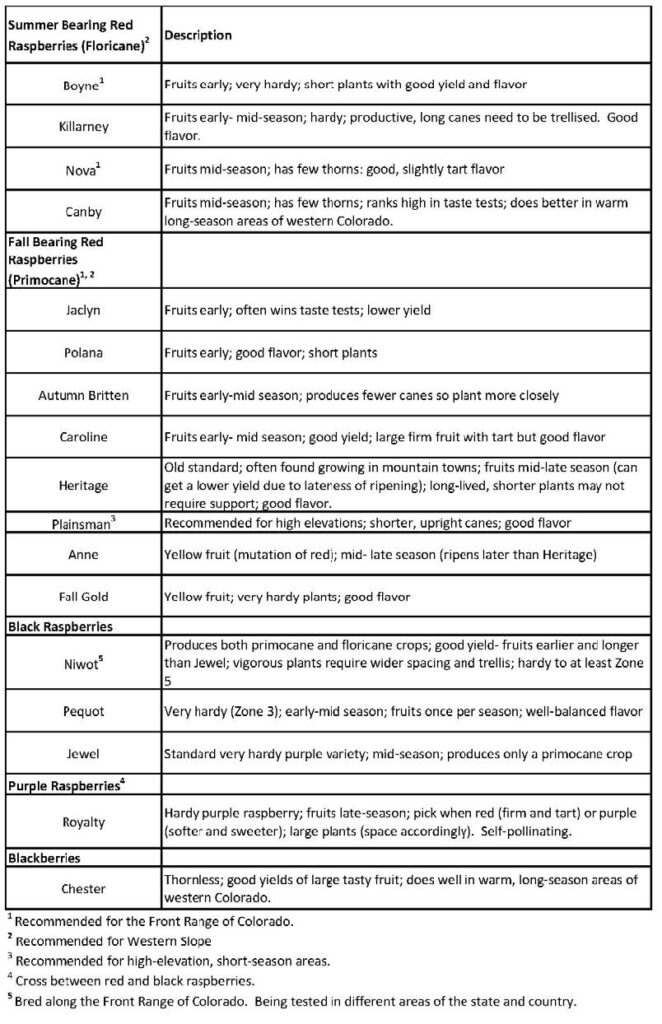
  • Recommended varieties include summer-bearing types like ‘Nova’ and ‘Boyne,’ and fall-bearing types suitable for the Front Range and Western Slope.

Black Raspberries:

  • Hardy varieties such as Niwot and Pequot can thrive in some Colorado areas.

Other Varieties:

  • Blackberries, purple raspberries, boysenberries, loganberries, and dewberries require special winter protection and are less recommended.

Types of Raspberries

Summer-Bearing (Floricane):

  • Produce flowers and fruit on second-year canes.
  • Fruit once per season.

Fall-Bearing (Primocane or Everbearing):

  • Produce flowers and fruit on first-year canes.
  • Can provide two harvests: one in fall and a lighter one in summer on the lower parts of the canes.
Chart Provided by CSU Extension

Soil Preparation and Planting

Soil Requirements:

  • Well-drained garden soil rich in organic matter.
  • Conduct a soil test to determine nutrient needs, especially nitrogen, zinc, iron, and manganese.

Planting:

  • Plant red and yellow raspberries as rooted suckers in spring.
  • Space plants 2-3 feet apart with rows 5-10 feet apart.
  • Cut tops to 4-6 inches above ground after planting.

Pruning Techniques

Red Raspberries:

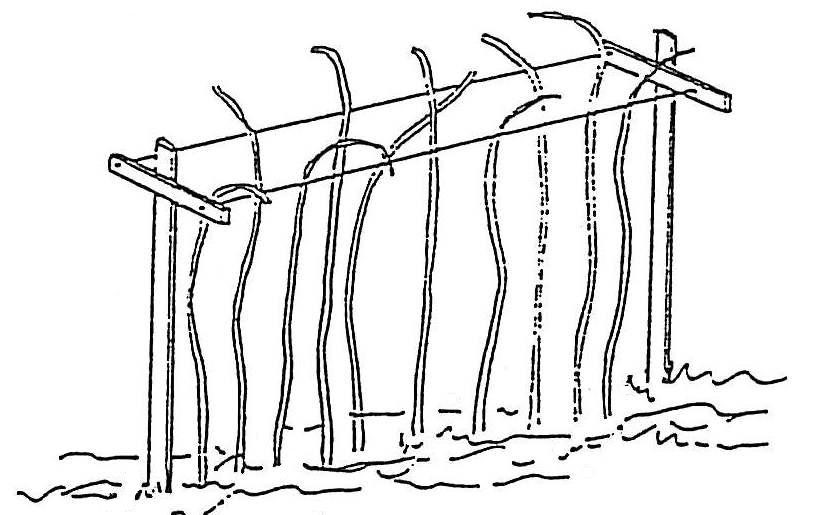
  • Can be trained to a single stake or supported by horizontal wires 18” apart.
  • Freestanding canes should be headed back below 4.5 feet to prevent bending.

Black and Purple Raspberries:

  • Less vigorous and pruned heavily.
  • Often left freestanding.

General Pruning Tips:

  • Remove spent floricanes after fruiting to prevent disease.
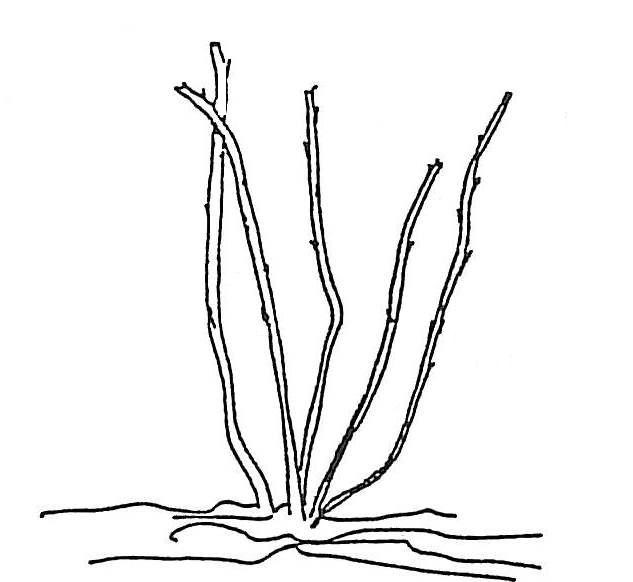
  • In spring, remove dead, weak, and small canes.
  • For fall-bearing varieties, either mow all canes to ground level after harvest or remove the fruited cane parts, leaving the lower portions for summer fruit.

Trellising and Support

  • Trellising is advisable to keep canes erect and simplify harvesting.
  • Use wires 3 feet above ground to confine canes to the hedge row.
  • Larger fruit can be achieved by tipping canes at a convenient height.

Watering and Fertilization

Watering:

  • Maintain moderate moisture in the root zone.
  • Increase watering during flowering and fruiting periods.
  • Withhold water after the first frost to harden off plants.

Fertilization:

  • Apply nitrogen fertilizer as needed based on soil tests and cane growth.
  • Fall-bearing raspberries require more nitrogen than summer-bearing varieties.

Winter Protection

For Summer-Bearing Varieties:

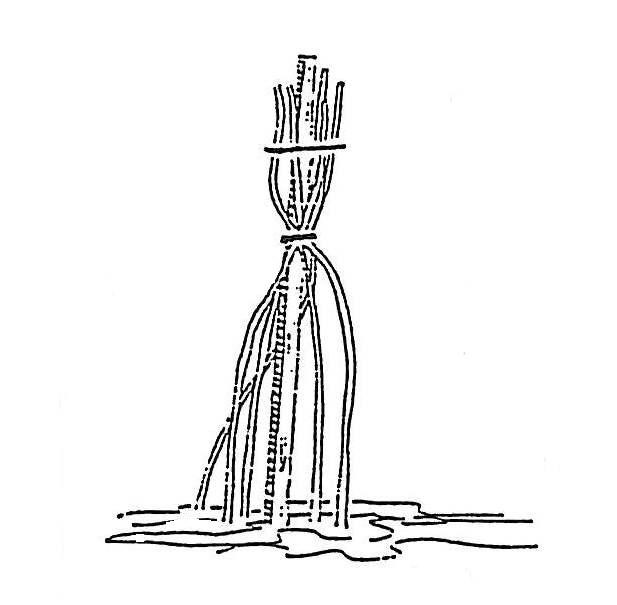
  • Lay canes down and cover with soil or mulch after November 1.
  • Lift canes in early April and return the soil to the furrow.

For Fall-Bearing Varieties:

  • Mow canes after harvest to avoid winter damage.
  • If a summer crop is desired, protect canes similarly to summer-bearing types.

Yield and Longevity

  • Expect 15-20 pounds of fruit per year from a 25-foot hedge row by the third year.
  • Productivity may decline after 8-10 years, necessitating relocation of the raspberry bed.

Disease and Pest Management

Common Pests:

  • Spider mites, which can be managed by maintaining healthy, well-watered plants.
  • Raspberry cane borers, identified by wilting cane tips, can be controlled by removing affected canes.
  • Spotted wing drosophila, managed through refrigeration, cleanup of dropped fruit, and trapping.

Preventative Measures:

  • Purchase disease-free stock from reputable sources.
  • Regularly thin canes to improve light and air circulation.

By following these guidelines, you can successfully grow and enjoy raspberries in your Colorado garden. For more detailed information and expert advice, contact Echter’s Garden Center or refer to resources from Colorado State University Extension. Happy gardening!

Navigating Colorado Soils: A Gardener’s Guide to Success

Growing healthy plants begins with healthy soil. With its diverse landscapes and elevations, Colorado presents a unique set of challenges for gardeners. Understanding the various soils across the state is essential for cultivating a successful garden. In this blog post, we’ll explore the different soil types in Colorado and provide valuable insights on how to overcome the challenges they pose.

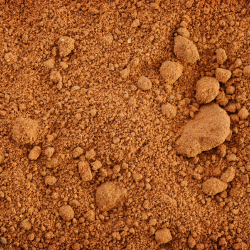
Clay soils are prevalent in various regions of Colorado and are characterized by their fine particles and ability to retain water. If you notice that water tends to puddle on the surface of your soil rather than soak in, it’s likely you’re dealing with clay soil.

While water retention can be advantageous with clay soil, it can also mean poor drainage and soil compaction. This makes it difficult for plant roots to penetrate and receive essential nutrients from the soil.

Amending the soil with organic matter (compost, aged manure, peat moss, etc.) will help break up the clay and improve both soil structure and drainage. After planting, you can apply a layer of organic mulch to help regulate soil temperature, prevent water evaporation, and reduce soil compaction.

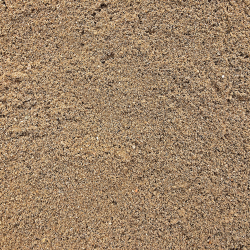
Sandy soils are characterized by their gritty texture and rapid drainage. While this prevents waterlogging and soil compaction, it poses other challenges.

The large soil particles of sandy soils dry out quickly and are often low in nutrients. Both water and fertilizer have a tendency to leach out of the soil before the plants can use them.

This soil can also benefit from added organic amendments. Well-rotted manure and organic compost can help fill in the spaces between the sandy particles and improve both water and nutrient retention. Soil Pep is an excellent amendment for sandy soils. It increases water retention and provides organic nutrients. Applying a top layer of mulch helps sandy soils retain moisture and prevent rapid evaporation, supporting plant growth.

Rocky soils are prevalent in the mountainous areas of Colorado. This type of soil poses challenges for both root development and nutrient absorption.

In most areas of our Rocky Mountains, soil is not soil at all, but mainly decomposed granite. To compensate for this, add sphagnum peat moss to new beds and work it into existing beds as part of spring cleanup and planting. Start with 3 inches of sphagnum peat moss over an area and work it down as far as the rocks in the area permit (hopefully 8–12 inches deep). Then, as you actually plant, add Nature’s Yield Compost to the area in a ratio of 1/3 compost to 2/3 soil.

How to Amend Your Soil
It’s pretty simple. You’ll want to add four cubic yards per 1,000 square feet of unamended soil. This is about 1½” thick on the ground. Then rototill to a depth of six inches. Each year, add organic materials about ½” thick and till them in to keep your soil in shape for a healthy growing season.

Choosing a Soil Amendment
There are a wide variety of soil amendments on the market, and it can be confusing to know which one would be best for your particular needs. If you need help choosing a soil amendment, just ask one of our garden experts. They’re more than happy to help you solve any soil problems. Below, we’ve listed a few of our recommended favorites.

Soil Pep loosens heavy soils and increases retention of water in sandy soils. It is commonly used as an amendment to add organic nutrients to the soil. It can also be used as mulch or a top dressing.

Nature’s Yield Compost is a 100% organic, premium soil conditioner. It improves soil structure, helps retain soil moisture, and is biologically active with microbes, which revitalizes the soil.

Earth Essentials Cow & Compost provides both dairy cow manure and compost, organic matter that will increase the fertility of the soil. It improves the drainage of heavy clay soils and increases the moisture retention of sandy soils.

Black Gold Garden Compost is an organic, ready-to-use compost that is OMRI-listed. It helps your garden grow plants that are strong, healthy, and productive all season long.

Successfully navigating Colorado soils involves understanding the unique characteristics of each type and implementing strategic gardening practices. By amending the soil, gardeners can overcome the challenges posed by clay, sandy, and rocky soils. With a bit of knowledge and effort, anyone can cultivate a thriving garden in the diverse and beautiful landscapes of Colorado.


Seed Starting 101

“To plant a seed is to
believe in tomorrow”

~ Audrey Hepburn

If you’re impatiently counting the days until spring arrives so you can start working on this year’s garden, there might be a way to get started on it a little sooner. Mid-February to early March is an ideal time to start your garden indoors by planting from seed. It’s easy, it’s fun, and it’ll make waiting for spring’s arrival a little easier. Ready to get started? Let’s dig in!

WHAT CROPS CAN YOU START NOW?
Most annual flowers and vegetable plants should be sown indoors about six weeks before planting outside. Leaf crops like spinach, lettuce, Swiss chard as well as cabbage, cauliflower, broccoli, peppers, eggplant and tomatoes can all be started indoors in late February and early March.

Different seed types require differing numbers of days to sprout and grow to transplant size. To be certain, consult the seed packet and then count backwards to figure out the date to sow your seed. Our Frost Hardiness List will help you find the best dates to plant in your particular area.  (Some crops are fussy about having their roots disturbed by transplanting. You may want to sow seeds for root crops like radishes, carrots, and beets directly outdoors after the last frost date has passed for your area.)

START WITH CLEAN SEED STARTING CONTAINERS
Seed starting flats are a popular choice for starting seeds that will help maximize the number of plants you can grow per tray. Some come with domes that help keep the soil surface moist while germinating. If you will be using previously used containers, be sure to clean and sanitize them thoroughly before you begin. Biodegradable fiber pots and trays can be another good choice, and peat pellets are a fun alternative to use — especially with children.

CHOOSE THE RIGHT SOIL
The right soil is critical to success. You’ll want to choose a soil that’s specifically formulated for starting seeds. Seeds need just the right amount of moisture, warmth, and air to germinate, and these specialty soils are light enough to support fledgling root systems to give your plants a healthy start. Don’t use outdoor garden soil, as it’s far too dense and heavy for delicate root systems.

PLANTING TIPS
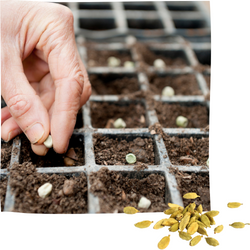
Fill your containers with the seed starting media. Then, using a spray bottle, mist to moisten the soil evenly. Sprinkle the seeds about 1/4″ apart on the soil surface and barely cover them with soil. Water with a very gentle spray. It’s important not to let the soil dry out before the seeds sprout. A plastic dome cover helps keep the soil surface moist without disturbing the seeds. (TIP: Young seedlings look pretty much the same until they begin to develop “true” leaves. Do yourself a favor and label the seed flats from the beginning. It’s also a good idea to include the date you planted the seeds.)

KEEP THINGS COZY
Seeds also need warmth to germinate. Most seeds will germinate at room temperature, but some warm-season crops like peppers prefer it warmer. A propagation heating mat underneath the seed tray will help with quicker germination, more seedlings, and greater uniformity. After the seeds have sprouted, take them off the heat mat, remove the dome cover, and put them under fluorescent grow lights to keep them from becoming spindly. You can also place your brand new seedlings in a sunny window if you have room.

POTTING UP
When your seedlings are a couple inches tall, you’ll want to thin them by removing some of them. Then gently dig the remaining seedlings out with a fork, so as not to harm the roots. Carefully transplant them into slightly larger containers, so they’ll have more room to grow. Don’t step them up to a too large container too soon though! Choose a container that’s about twice the size of the seed cells (a 3″– 4″ pot size usually works great). Always be sure any plastic containers you choose have drainage holes in the bottom. If the leaves fade to pale green or yellow, feed the seedlings with a water-soluble fertilizer when watering.

GET READY TO PLANT OUTDOORS
Your pampered indoor seedlings will need to be properly acclimated to their new outdoor life! Before transplanting outdoors, begin the process of “hardening off” your plants. On a warm spring day, move the seedling containers to a protected place (such as a porch) for just a few hours, then bring them back indoors. Each day gradually increase your fledgling plants’ exposure to the outdoor environment. After several days, transplant them to their final growing space in the garden.

Starting plants from seed can be a great way to get a jump on Colorado’s all-too-short growing season, and it can give you more choices in growing heirloom or hard-to-find varieties of veggies and flowers. More than that, it can evoke a sense of wonder to start from a dry seed and watch it grow into a big beautiful plant for your garden. Try it!

Cool Season Vegetable Gardens

“It was such a pleasure to sink one’s hands into the warm earth, to feel at one’s fingertips the possibilities of the new season.”

~ Kate Morton

You might think of the growing season as the time between spring’s last frost and autumn’s first frost, but all vegetable gardening doesn’t wait for warm weather to be in the forecast. Cool season vegetables are hardier varieties that tolerate — and even thrive — in the cold soil of early spring.

When Can You Plant?
What’s really important is soil temperature — it must be in the 40°F range for cool season vegetable seeds to germinate. Simply go by the general rule that soil is warm enough when you can easily turn it with a shovel.

What Can You Plant?
Cool-season crops include the salad vegetables: lettuces, kales, chard, onions, peas, and radishes. Everything in the cabbage family (cabbage, broccoli, cauliflower) also grows well in the cool spring air. In fact, their flavor often depend on harvesting before the heat of summer sets in.

Planning
To get the most vegetables throughout the year, plan for two “shoulder” seasons of cool-season crops. Plant spring vegetables in April, then follow with warm-season veggies like tomatoes, peppers, and corn in the summer. Then you can plan on planting a second crop of cool-season vegetables in the autumn after the weather cools down.

Location
For your cool-season beds, choose a well-drained spot that gets as much sun as possible. Add some organic matter such as compost or sphagnum peat moss and spade or till it into the soil. You can water less frequently in the cooler seasons since plants will dry slower in cooler temperatures.

Making the Transition from Greenhouse to Garden
Many bare-root vegetables and cool-season crops can make the transition into the outdoor garden — but only after going through a process known as hardening off. This process reduces stress and is essential to the success of your tender plants.

Plants that start life in a greenhouse or under lights in your home spend their time in pampered comfort. The temperature is perfect, the wind doesn’t’ blow, water is always gently and carefully applied, the sun never scorches, and rain never pounds. To prepare them for the harsher realities of life outdoors, they’ll need to gradually acclimate.

For one to two weeks, move the plants outside during the day while temperatures are warm. Then bring them back inside at night when the temperatures chill down. Place them in an area that’s protected from sun and wind. The third week, as long as night temperatures aren’t going to drop below freezing, you can leave the plants in a protected area overnight. After this adjustment period, you should be able to safely leave your plants outside for the season.

Always be Prepared for Frosts
Most cool-weather vegetables can tolerate a light frost, but you’ll want to keep the frost cloths handy for sudden cold snaps and those inconvenient late-spring and early autumn frosts.

You can also protect planted veggies with a Season Starter. These transparent “walls of water” are simple solar shelters that allow the soil to warm to a temperature suitable for plant growth.

Keep the Harvest Going
You can keep the supply of spring veggies going with succession planting. Plant your fast-growing crops in two-week intervals to prolong the availability of lettuce, spinach, peas, and radishes. When the weather gets too warm for these vegetables, you can plant more of them in the shade of taller plants like pole beans and corn. This system is also good for gardeners with limited space.

Growing your own food has always been one of the healthiest (and tastiest!) ways to feed your family. If you can’t wait to get your hands dirty in the garden, give cool-season crops a try!

Early Spring Garden Tips

“I love spring anywhere,
but if I could choose,
I would always greet it
in a garden.”

~ Ruth Stout ~

We all look forward to the spring season with delight each year. The promise of warmer weather, more daylight, and all of those beautiful spring flowers is a welcome reward after a long winter of grey days, icy air, and shoveling snow. Soon trees and shrubs will be budding, bulbs and perennials will begin emerging from the ground, and our gardens will slowly come back to life once again. Though it’s still too early to plant, there’s plenty to do in the garden. Grab your garden tools, and let’s get started!

CARE OF GARDEN TOOLS — Speaking of garden tools, early spring is a good time to make sure they’re ready for the upcoming season. Check your gardening supplies so that you’ll have what you need in the spring. Gives your garden gloves a good wash and dry, or replace worn ones. Take time to clean all tools thoroughly, removing any residual soil, then inspect for damage or rust. If you do find rust, give those areas a good scrub with steel wool. It will be a long season of work for your garden tools, so it’s a good idea to have them sharpened at the beginning of the season. Echter’s can do that for you! Simply bring in your tools (and lawn mower blades), and for a nominal fee, we’ll sharpen them. If you need to replace or add to your garden tool arsenal, stop by. We’re well stocked with all kinds of garden implements — especially at the beginning of the year.

EARLY SPRING CLEANUP — Winter can be hard on your garden! Take a walk around your garden to assess any winter damage. Remove debris leftover from winter storms, and tidy up the garden beds and boxes. Clean up any dead annual or vegetable plants that remained over the winter. Trim back the tattered foliage or old bloom stalks of perennials to encourage new growth to come in. Cut back ornamental grasses as low as possible, so the old foliage won’t detract from the new growth. Don’t be in too big a hurry to remove mulches though. There are plenty of beneficial pollinators overwinter in gardens by hibernating in dried leaf piles and last-season’s perennial plants, and March can still be one of our snowiest months!

PREPARE YOUR SOIL — Now is a good time to add organic amendments like compost and peat moss. Rototill or spade into your garden soil to a depth of 6 inches.

PLAN YOUR VEGETABLE GARDEN — A great vegetable garden starts with a great plan! Make a list of what you’d like to grow, how much area you have, and how many of each plant you’d like to grow. Check seed packets for plants’ mature sizes, sunlight and watering needs, and the yield of the veggies when planning. Then have fun mapping out and designing your planting areas!

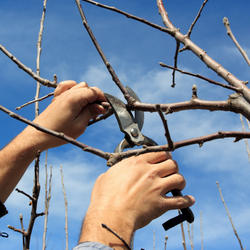
IT’S TIME TO PRUNE — If you didn’t get to it in February, you can still do pruning of deciduous trees and shrubs in March. Some exceptions would be birch, maple, walnut, and elm. These should be pruned in mid-summer. In early spring, you can still easily see the branching structure of trees and shrubs before the leaves start coming in. Begin by removing the three Ds: anything dead, damaged, or diseased. Then move on to any crossed branches (branches that rub against another), water sprouts (branches that grow straight up from the branch), and suckers (branches that spring up from the base of the tree or shrub). Generally speaking, remove young branches that are growing inwards towards the center of the tree as opposed to outwards. Use a pole pruner to reach branches up to about 15 ft. off the ground. Pruning paints and wound dressings are not recommended on the pruning cuts. If you missed it, here’s a deeper dive into late-winter pruning.

GET STARTED ON SOME EARLY LAWN CARE — As in other areas of the garden, begin by checking for any problems that may have developed. Once the snow has melted off your lawn, check the turf in shaded areas for snow mold, a fungus that is white to pink in color and grows on the surface of the grass blades. If you see evidence of snow mold, lightly rake the affected areas and dispose of the debris. Any remaining mold should dissipate on its own after that.

LAWNS SHOULD BE CORE AERATED once or twice each year. That’s done by poking holes in the ground and pulling out plugs. This reduces soil compaction and helps control thatch in lawns while also helping water and fertilizer move into the root zone. Schedule your lawn for an aeration in March, and prepare by marking your sprinkler heads to avoid having them damaged. Water the lawn the day before aerating, so it will be softer and easier to pull plugs. Then water again after aeration to help the lawn recover. Leaving the plugs on the surface will help break down the thatch that has accumulated.

GET A HEAD START ON WEEDS — You can begin to get ahead of weeds by choosing a lawn fertilizer with a pre-emergent as your first feeding of the year. This will prevent annual weed seeds from germinating, and give your lawn a chance to thicken up and discourage weeds on its own. It’s best to apply these after aerating the lawn. This is important because aerating after a pre-emergent will greatly reduce its effectiveness!

OVERSEEDING — As the weather begins to reliably warm up in March, you can begin overseeding thin areas of lawn. Rake areas to be seeded to expose and loosen the soil, then apply a thin layer of Nature’s Yield Compost . Use a high-quality seed blended for your conditions. Echter’s has many different blends to choose from. A hand spreader will help to apply the seed evenly. After seeding, be sure to keep the surface area moist until the seed is well germinated.

PLANT COLD-HARDY CROPS — While it’s too early to plant tender, warm-season plants, it is time to plant some early cold-hardy crops. Things like onion sets, bare-root strawberries, asparagus roots and seed potatoes can be sowed directly into the vegetable garden in March. Be sure to keep a frost blanket handy for any late-season frosts, just to be on the safe side.

START SEEDS INDOORS — Now is the time to start broccoli, Brussels sprouts, cauliflower, kohlrabi, alyssum, lobelia, pansy, and geranium seeds inside for planting out later in the spring. Start tomatoes and peppers inside now, then they’ll be ready to transfer to the garden beds in late May.

PREPARE BIRDHOUSES FOR THE BUSY SPRING SEASON — Returning birds will be looking for real estate soon! In preparation for the new arrivals, clean out and sterilize last year’s birdhouses, or put up new ones. Make sure any older birdhouses are still firmly mounted as well. It’s a good time to perform bird feeder maintenance too. Clean out all feeders and fill with fresh seed. You may also want to consider creating a pile of nesting materials to make your yard extra inviting for this year’s visitors.

Late Winter Pruning Checklist

Pruning allows what’s left to grow into something beautiful.

Late winter is an ideal time for pruning deciduous trees and shrubs. There’s no foliage growth yet, so the shape of the tree is easy to see — and so are any problems that need to be corrected through pruning! Pruning doesn’t need to be an overwhelming chore though. If you follow a simple checklist each year, you can keep up with this winter gardening task and keep your trees healthy. Gather your pruning tools, and let’s get started!

The three Ds: Dead, Diseased, Damaged

Begin your pruning by removing any of the three Ds — anything that’s diseased, damaged, or dead. Broken and damaged branches are more than just unsightly. They open the tree up to pests and disease. Prune back to at least 6 inches below the diseased area into healthy wood.

Removing dead branches is an obvious pruning task, but how do you know if a branch is dead or just dormant? Scrape away a small part of the bark, If it’s alive, it will be green underneath. If it’s dead, it will be hard and brown inside. You can also try the “bend test.” Bend the branch gently. A live branch will bend, but a dead branch will snap.

Water Sprouts and Suckers

Next, look for suckers and water sprouts and remove them. Water sprouts are newer branches growing straight upwards through the tree, whereas suckers are new growth springing up around the base of the tree.

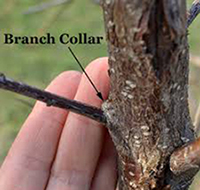
Water sprouts are caused by heavy pruning in previous years, or by stress to the tree. To prune them away, cut at the base making sure to preserve the branch collar. The branch collar is a swollen area at the base of the water sprout. Prune to about 1/2″ away from the branch collar.

Crossing & Competing Branches

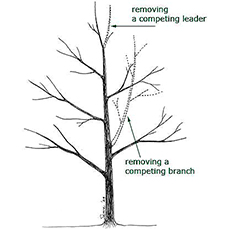
Look for branches that are not growing out from the center of the tree. These may be branches that, like water sprouts, grow straight upwards through the canopy. Also look for branches that are growing inwards towards the trunk. These branches are called competing branches because they compete for space, sun, and nutrients with healthier branches. Cut these away, so what remains are only healthy branches that are growing outwards from the main trunk.

Crossing branches are branches that grow across another. If left in place, these can rub against another branch causing damage. Removing a crossing branch ensures you won’t have to removed a damaged branch next winter!

The overall shape of the tree should be clearly visible now. Step back and look at the overall structure of the tree. If it still seems a little overcrowded in spots, prune until the shape is more even. You might want to raise the canopy a bit — that is, prune away any branches that are just too low. If there are branches that are in the way each time you mow in the summer, go ahead and remove them.

Renew an Overgrown Shrub

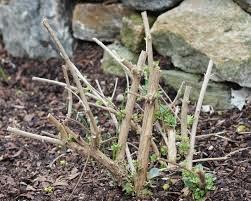
For shrubs that may have become overgrown and leggy through the years, a late-winter pruning can be done to improve shape, vigor, and blooming. Prune away the oldest and weakest canes at or near the ground level. This will improve the overall height & shape and should result in more foliage and better flower quality.

NOTE: It’s crucial to do a little homework before you begin pruning. If you prune spring-blooming shrubs (think lilac, forsythia, etc.) in late winter, you’ll be cutting off this spring’s blooms! Some shrubs (like hydrangea macrophylla) bloom on “old wood,” which means last year’s new canes. If you prune out the old wood on these shrubs, you’ll cut off the canes that would be blooming this year! So, a little judicious research will ensure you’re pruning the right shrub at the right time of year.

That’s it! If you keep up with this pruning checklist each winter, it should never become an overwhelming chore, and your trees and shrubs will be much healthier when springtime arrives.