“To plant a seed is to
believe in tomorrow”
~ Audrey Hepburn
If you’re impatiently counting the days until spring arrives so you can start working on this year’s garden, there might be a way to get started on it a little sooner. Mid-February to early March is an ideal time to start your garden indoors by planting from seed. It’s easy, it’s fun, and it’ll make waiting for spring’s arrival a little easier. Ready to get started? Let’s dig in!
WHAT CROPS CAN YOU START NOW?
Most annual flowers and vegetable plants should be sown indoors about six weeks before planting outside. Leaf crops like spinach, lettuce, Swiss chard as well as cabbage, cauliflower, broccoli, peppers, eggplant and tomatoes can all be started indoors in late February and early March.
Different seed types require differing numbers of days to sprout and grow to transplant size. To be certain, consult the seed packet and then count backwards to figure out the date to sow your seed. Our Frost Hardiness List will help you find the best dates to plant in your particular area. (Some crops are fussy about having their roots disturbed by transplanting. You may want to sow seeds for root crops like radishes, carrots, and beets directly outdoors after the last frost date has passed for your area.)
START WITH CLEAN SEED STARTING CONTAINERS
Seed starting flats are a popular choice for starting seeds that will help maximize the number of plants you can grow per tray. Some come with domes that help keep the soil surface moist while germinating. If you will be using previously used containers, be sure to clean and sanitize them thoroughly before you begin. Biodegradable fiber pots and trays can be another good choice, and peat pellets are a fun alternative to use — especially with children.
CHOOSE THE RIGHT SOIL
The right soil is critical to success. You’ll want to choose a soil that’s specifically formulated for starting seeds. Seeds need just the right amount of moisture, warmth, and air to germinate, and these specialty soils are light enough to support fledgling root systems to give your plants a healthy start. Don’t use outdoor garden soil, as it’s far too dense and heavy for delicate root systems.
PLANTING TIPS
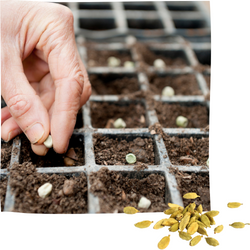
Fill your containers with the seed starting media. Then, using a spray bottle, mist to moisten the soil evenly. Sprinkle the seeds about 1/4″ apart on the soil surface and barely cover them with soil. Water with a very gentle spray. It’s important not to let the soil dry out before the seeds sprout. A plastic dome cover helps keep the soil surface moist without disturbing the seeds. (TIP: Young seedlings look pretty much the same until they begin to develop “true” leaves. Do yourself a favor and label the seed flats from the beginning. It’s also a good idea to include the date you planted the seeds.)
KEEP THINGS COZY
Seeds also need warmth to germinate. Most seeds will germinate at room temperature, but some warm-season crops like peppers prefer it warmer. A propagation heating mat underneath the seed tray will help with quicker germination, more seedlings, and greater uniformity. After the seeds have sprouted, take them off the heat mat, remove the dome cover, and put them under fluorescent grow lights to keep them from becoming spindly. You can also place your brand new seedlings in a sunny window if you have room.
POTTING UP
When your seedlings are a couple inches tall, you’ll want to thin them by removing some of them. Then gently dig the remaining seedlings out with a fork, so as not to harm the roots. Carefully transplant them into slightly larger containers, so they’ll have more room to grow. Don’t step them up to a too large container too soon though! Choose a container that’s about twice the size of the seed cells (a 3″– 4″ pot size usually works great). Always be sure any plastic containers you choose have drainage holes in the bottom. If the leaves fade to pale green or yellow, feed the seedlings with a water-soluble fertilizer when watering.
GET READY TO PLANT OUTDOORS
Your pampered indoor seedlings will need to be properly acclimated to their new outdoor life! Before transplanting outdoors, begin the process of “hardening off” your plants. On a warm spring day, move the seedling containers to a protected place (such as a porch) for just a few hours, then bring them back indoors. Each day gradually increase your fledgling plants’ exposure to the outdoor environment. After several days, transplant them to their final growing space in the garden.
Starting plants from seed can be a great way to get a jump on Colorado’s all-too-short growing season, and it can give you more choices in growing heirloom or hard-to-find varieties of veggies and flowers. More than that, it can evoke a sense of wonder to start from a dry seed and watch it grow into a big beautiful plant for your garden. Try it!