January & February Green Thumb Tips

“Anyone who thinks that gardening begins in the spring and ends in the fall is missing the best part of the whole year — for gardening begins in January with the dream.”

~ Josephine Nuese

Flower Gardens

Don’t worry if you see evidence of leaves of your fall-planted bulbs popping up out of the ground. This is quite normal and there is no way to stop them. Keep the soil moist, which will cool it and keep the bulbs hydrated.  

To prevent sparrows and finches from shredding crocus blossoms, place a piece of Bird Scare Tape tied to a stick every few feet among the flowers. The flashing will frighten away the birds.

Check your gladiolus, dahlia and canna bulbs you have stored to make sure the media in which they are stored is still moist.

Perennials & Roses

When planning your flower bed, whether it is planted in annuals or perennials, don’t overlook ornamental grasses for a beautiful contrasting texture. 

Be sure that the winter mulch around your perennials, roses and bulb beds is still in place. Replace mulch that has been blown away by heavy winds. 

Cut the seed heads from your ornamental grasses and use them to make very attractive dried flower arrangements in your house. 

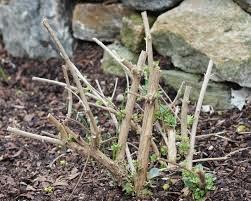
Cut back last year’s growth from ornamental grasses now before this year’s new growth begins.

Lawns

When snow and ice are gone from shady areas of lawn (especially on the north side of structures) rake the grass to prevent snow mold. 

Water your lawn with a sprinkler during long stretches of mild dry weather. Be sure to disconnect the hose and put it away before the weather drops below freezing again. 

If you see “trails” in your lawn, you may have voles, a common rodent in Colorado. We carry products to eliminate this pest. Voles have been known to chew on bark of trees and shrubs, especially junipers. You may notice dead branches on junipers later in the spring.  Look deep inside the shrub and you will see where the bark is missing.
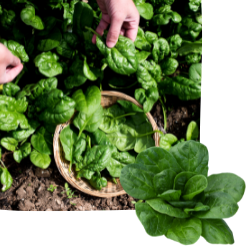
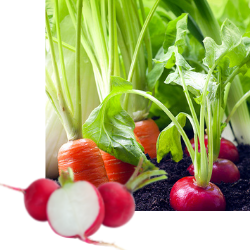
Vegetable Gardens

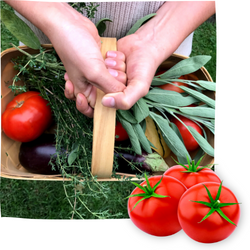
January is a good month for gardening, at least on paper, as you start planning for this year’s garden. Although you’ll want to include many of your family’s favorites, why not try something you’ve never grown before? 

February is the best time to prune grape vines. By waiting until just before growth begins in spring, you can recognize and remove any dead or damaged wood.

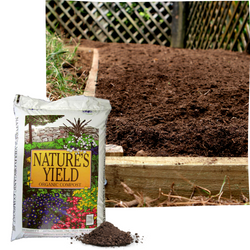
Your spring crop of asparagus will benefit greatly from the addition of manure to the bed.

January and February are the best months to purchase your flower and vegetable seed. The best availability and selection is early. 

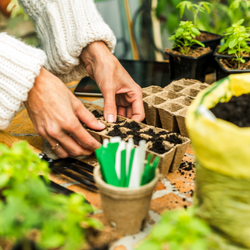
Take inventory of your seed starting supplies, such as pots, soil, and flats. Sterilize any that you have used before or purchase new supplies. Be ready so that you will have everything you need for a successful project. 

When starting seeds indoors, use a propagation mat. It keeps the soil in the trays at a constant warm temperature. You will get quicker germination, more seedlings and more uniformity.
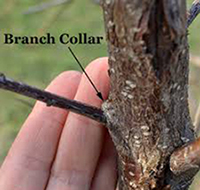
Trees & Shrubs

Knock down heavy snows from your shrubs and tree branches by gently pushing up with a broom. Start with the lower branches and work your way up the tree or shrub.

It is very important to keep your lawns, trees, shrubs, perennial and bulb beds watered once a month throughout the winter as weather permits. You will reduce the chance of root damage on perennials, trees and shrubs and reduce insect population and disease problems in your lawn next year.

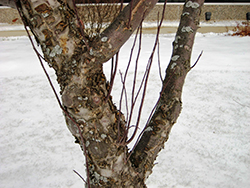
Get an early taste of spring. Prune branches of forsythia, quince, spirea, dogwood, viburnum, pussy willow and crabapple and plum trees. Bring them indoors to bloom. Cut the branches at an angle and place them in a vase of water. Change the water twice a week and in about 3 weeks the stems will bloom. Don’t prune the rest of the shrub until after they have flowered in spring.

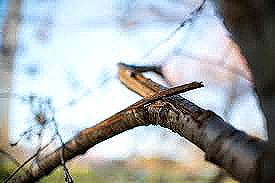
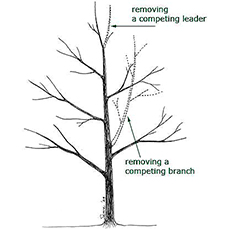
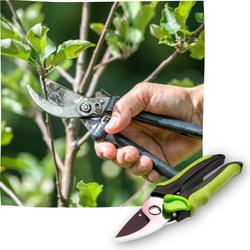
Prune summer and fall blooming shrubs in February. This is the time to shape up your trees as well. Remove dead, dying, or unsightly parts of the tree. Your pruning arsenal should include bypass pruners, a compound action lopper, a tree saw and a pole pruner at minimum. Bring in your tools for sharpening if they have become dull.  

If you have large trees that need pruning, call us for the name of a tree service. The sooner you call, the more likely you will get your trees pruned at the best time of year. 

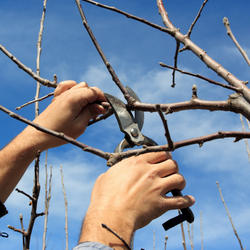
February into early March is the best time to prune fruit trees. Prune out any dead or diseased branches, any branch that is crossing and rubbing another and any “water sprouts” (those weak “branches” that shoot straight up). 

On a nice warm day, spray Bonide All-Seasons Dormant Oil on trees, shrubs, roses, vines or most anything else you had insect or disease problems on last year. It kills overwintering insect eggs and will help reduce the problem this year. Avoid spraying blue spruce or you will have a green spruce. 

When shoveling snow from your sidewalks and driveways, pile the snow around trees, shrubs and perennial plants instead of out in the street as long you have not used chemicals or salt to melt the ice. These plants will benefit from the added moisture.
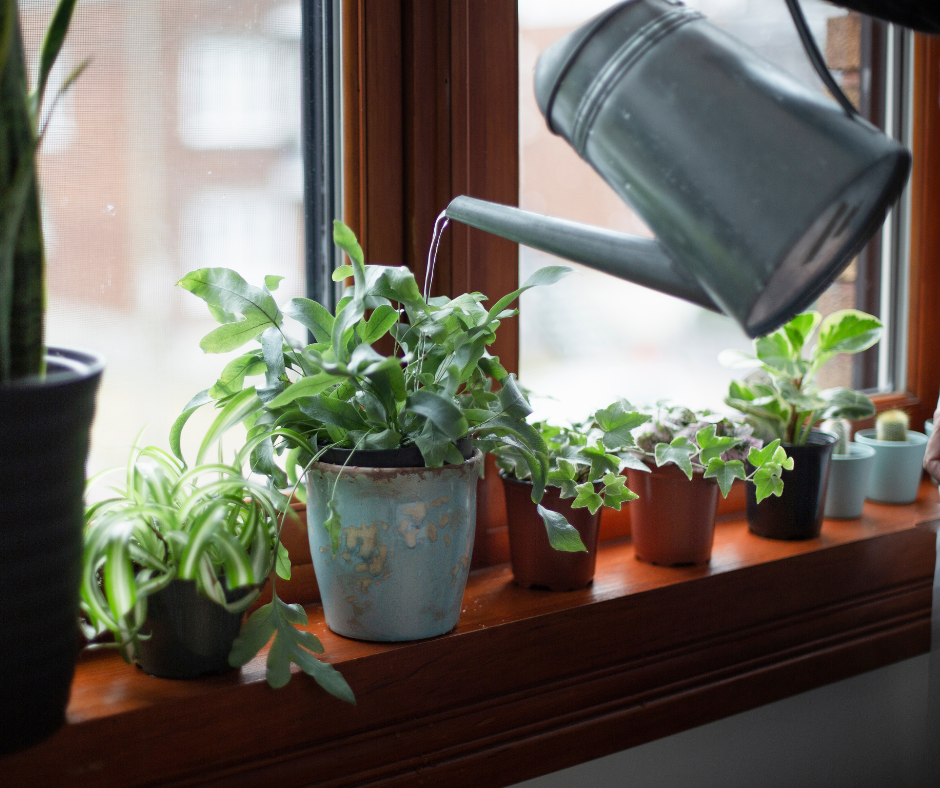
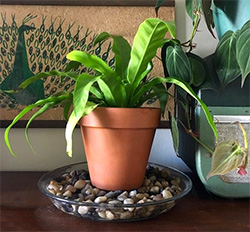
Indoor Plants

If a houseplant is not doing well, check these five growing factors: light, temperature, nutrients, moisture, and humidity. They must be favorable to provide good growth. Bring the plant in to our plant doctors if you need help with a diagnosis. 

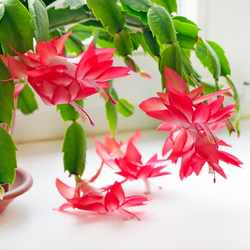
Keep holiday cacti blooming by keeping them in a cooler location with bright sun. You can move them outdoors in summer in a semi-shaded location. Then bring them in next fall for reblooming. 

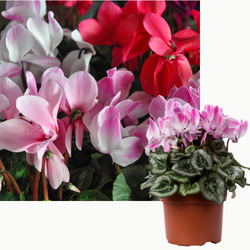
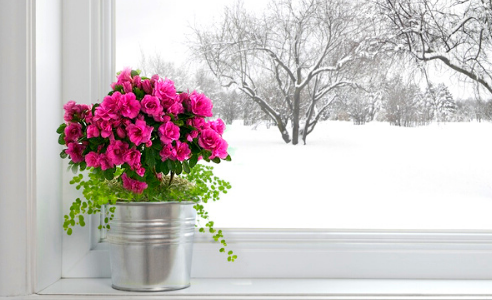
Cyclamen are great plants for brightening your home in winter. They prefer a cool, dry and bright place. The pink, red, white or maroon flowers will continue for weeks.

Try growing a citrus tree in your house. If is best to have a tree which has been grafted, as opposed to trying to grow them from seed. The fragrance of the blossoms is wonderful and after pollinating the flowers with a cotton swab or artist’s brush, you should eventually have fruit. Choose the sunniest window in your house for citrus. 

Grow your own herbs inside. Either from seeds or plants, there is nothing like fresh herbs for all kinds of winter dishes, like soup, stews, and many other comfort dishes for those cold winter days.   

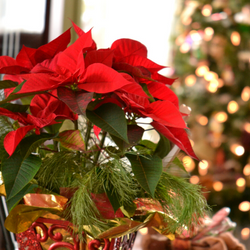
Keep your poinsettia blooming after the holidays by providing proper care. Poinsettias need good drainage, so if the pot is still wrapped in foil, remove the foil or make a hole in the bottom to allow the water to drain out. Keep the soil moist, but don’t overwater. Place your plant in a cool, (60 to 65 degrees F.) location that gets plenty of light. Keep out of warm or cool drafts, and fertilize once a month. 

Children are fascinated by “garbage gardening”. Carrot tops can be grown in a dish with a small amount of water. This results in a delicate fern. Sweet potatoes, pineapple tops, avocado seeds, orange or grapefruit, and peach seeds can also be started.

If you are overwintering your geraniums inside, be sure to cut them back 1/3 of their height before February 1. 

If you have a problem with those very annoying fungus gnats coming from the soil under your houseplants, let your plants dry out down to at least 1 inch before watering them. Gnats thrive in moist soil and multiply. Quick Kill Mosquito Bits with Bti, a biological pesticide will control them in the larval stage. Applying a pyrethrum or permethrin to the soil will reduce their numbers. Whitefly sticky traps will also catch those that come out of the soil. 

African violets bloom better when surrounded by other African violets. The more the merrier.
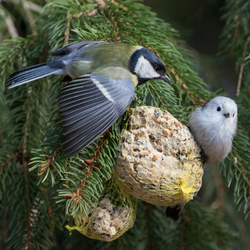
Birds

Echter’s offers many seed mixes for all types of birds who are seed eaters. Individual types of seed are also popular and there is a great selection to choose from. Sunflower seed, safflower seed and nyjer seed are among the favorite choices. Insect-eating birds such as flickers and nuthatches have a taste for suet and peanut butter rather than seed, so be sure to consider their needs as well.


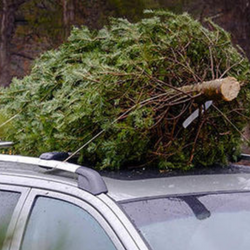
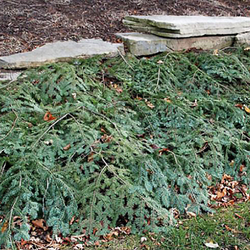
Put your leftover Christmas tree outside and decorate it with strings of popcorn and cranberries to feed the birds. Add pine cones which have been spread with peanut butter and rolled in bird seed. The birds will love you. 

Ever wonder about how the birds protect themselves in the freezing cold weather? First of all, they need clean feathers, so an unfrozen water source is essential for birds to bathe. They need water in the winter as well as spring and summer. By placing a birdbath de-icer in your birdbath, the birds will stay happy all winter. 

Another requirement is shelter. You will often find a lot of birds in dense shrubs, spruce and pine trees. Any protection you can offer would be appreciated very much by our feathered friends. If squirrels are a nuisance, use a squirrel-proof feeder. 

Home & Patio

Urea is a safer ice melt around lawns, plants and pets, but it only melts ice down to about 15 degrees. If you need to use calcium chloride for cold-temperature ice melting, try to avoid pushing it onto desirable plants. Only use as much ice melt as is necessary and try to keep it in the center of the walk.

Dried herbs for cooking taste better when dried on paper towels or a wire screen. Hanging them upside down can deplete their essential oils.

We can sharpen your mower blade for a nominal fee. Bring in your lawn mower blade on or off the mower. 

Miscellaneous

Gardening is a great way to exercise. You can burn as much as 300 to 400 calories per hour by digging, raking, or turning compost. Besides, gardening is fun and fruitful! Be sure to start with short spurts and ease into longer periods of gardening time.

Echter’s Plant Doctors are available during store hours seven days a week to answer your gardening questions. For accurate diagnosis, it helps to bring in a sample.

Early Spring Garden Tips

“I love spring anywhere,
but if I could choose,
I would always greet it
in a garden.”

~ Ruth Stout ~

We all look forward to the spring season with delight each year. The promise of warmer weather, more daylight, and all of those beautiful spring flowers is a welcome reward after a long winter of grey days, icy air, and shoveling snow. Soon trees and shrubs will be budding, bulbs and perennials will begin emerging from the ground, and our gardens will slowly come back to life once again. Though it’s still too early to plant, there’s plenty to do in the garden. Grab your garden tools, and let’s get started!

CARE OF GARDEN TOOLS — Speaking of garden tools, early spring is a good time to make sure they’re ready for the upcoming season. Check your gardening supplies so that you’ll have what you need in the spring. Gives your garden gloves a good wash and dry, or replace worn ones. Take time to clean all tools thoroughly, removing any residual soil, then inspect for damage or rust. If you do find rust, give those areas a good scrub with steel wool. It will be a long season of work for your garden tools, so it’s a good idea to have them sharpened at the beginning of the season. Echter’s can do that for you! Simply bring in your tools (and lawn mower blades), and for a nominal fee, we’ll sharpen them. If you need to replace or add to your garden tool arsenal, stop by. We’re well stocked with all kinds of garden implements — especially at the beginning of the year.

EARLY SPRING CLEANUP — Winter can be hard on your garden! Take a walk around your garden to assess any winter damage. Remove debris leftover from winter storms, and tidy up the garden beds and boxes. Clean up any dead annual or vegetable plants that remained over the winter. Trim back the tattered foliage or old bloom stalks of perennials to encourage new growth to come in. Cut back ornamental grasses as low as possible, so the old foliage won’t detract from the new growth. Don’t be in too big a hurry to remove mulches though. There are plenty of beneficial pollinators overwinter in gardens by hibernating in dried leaf piles and last-season’s perennial plants, and March can still be one of our snowiest months!

PREPARE YOUR SOIL — Now is a good time to add organic amendments like compost and peat moss. Rototill or spade into your garden soil to a depth of 6 inches.

PLAN YOUR VEGETABLE GARDEN — A great vegetable garden starts with a great plan! Make a list of what you’d like to grow, how much area you have, and how many of each plant you’d like to grow. Check seed packets for plants’ mature sizes, sunlight and watering needs, and the yield of the veggies when planning. Then have fun mapping out and designing your planting areas!

IT’S TIME TO PRUNE — If you didn’t get to it in February, you can still do pruning of deciduous trees and shrubs in March. Some exceptions would be birch, maple, walnut, and elm. These should be pruned in mid-summer. In early spring, you can still easily see the branching structure of trees and shrubs before the leaves start coming in. Begin by removing the three Ds: anything dead, damaged, or diseased. Then move on to any crossed branches (branches that rub against another), water sprouts (branches that grow straight up from the branch), and suckers (branches that spring up from the base of the tree or shrub). Generally speaking, remove young branches that are growing inwards towards the center of the tree as opposed to outwards. Use a pole pruner to reach branches up to about 15 ft. off the ground. Pruning paints and wound dressings are not recommended on the pruning cuts. If you missed it, here’s a deeper dive into late-winter pruning.

GET STARTED ON SOME EARLY LAWN CARE — As in other areas of the garden, begin by checking for any problems that may have developed. Once the snow has melted off your lawn, check the turf in shaded areas for snow mold, a fungus that is white to pink in color and grows on the surface of the grass blades. If you see evidence of snow mold, lightly rake the affected areas and dispose of the debris. Any remaining mold should dissipate on its own after that.

LAWNS SHOULD BE CORE AERATED once or twice each year. That’s done by poking holes in the ground and pulling out plugs. This reduces soil compaction and helps control thatch in lawns while also helping water and fertilizer move into the root zone. Schedule your lawn for an aeration in March, and prepare by marking your sprinkler heads to avoid having them damaged. Water the lawn the day before aerating, so it will be softer and easier to pull plugs. Then water again after aeration to help the lawn recover. Leaving the plugs on the surface will help break down the thatch that has accumulated.

GET A HEAD START ON WEEDS — You can begin to get ahead of weeds by choosing a lawn fertilizer with a pre-emergent as your first feeding of the year. This will prevent annual weed seeds from germinating, and give your lawn a chance to thicken up and discourage weeds on its own. It’s best to apply these after aerating the lawn. This is important because aerating after a pre-emergent will greatly reduce its effectiveness!

OVERSEEDING — As the weather begins to reliably warm up in March, you can begin overseeding thin areas of lawn. Rake areas to be seeded to expose and loosen the soil, then apply a thin layer of Nature’s Yield Compost . Use a high-quality seed blended for your conditions. Echter’s has many different blends to choose from. A hand spreader will help to apply the seed evenly. After seeding, be sure to keep the surface area moist until the seed is well germinated.

PLANT COLD-HARDY CROPS — While it’s too early to plant tender, warm-season plants, it is time to plant some early cold-hardy crops. Things like onion sets, bare-root strawberries, asparagus roots and seed potatoes can be sowed directly into the vegetable garden in March. Be sure to keep a frost blanket handy for any late-season frosts, just to be on the safe side.

START SEEDS INDOORS — Now is the time to start broccoli, Brussels sprouts, cauliflower, kohlrabi, alyssum, lobelia, pansy, and geranium seeds inside for planting out later in the spring. Start tomatoes and peppers inside now, then they’ll be ready to transfer to the garden beds in late May.

PREPARE BIRDHOUSES FOR THE BUSY SPRING SEASON — Returning birds will be looking for real estate soon! In preparation for the new arrivals, clean out and sterilize last year’s birdhouses, or put up new ones. Make sure any older birdhouses are still firmly mounted as well. It’s a good time to perform bird feeder maintenance too. Clean out all feeders and fill with fresh seed. You may also want to consider creating a pile of nesting materials to make your yard extra inviting for this year’s visitors.

Late Winter Pruning Checklist

Pruning allows what’s left to grow into something beautiful.

Late winter is an ideal time for pruning deciduous trees and shrubs. There’s no foliage growth yet, so the shape of the tree is easy to see — and so are any problems that need to be corrected through pruning! Pruning doesn’t need to be an overwhelming chore though. If you follow a simple checklist each year, you can keep up with this winter gardening task and keep your trees healthy. Gather your pruning tools, and let’s get started!

The three Ds: Dead, Diseased, Damaged

Begin your pruning by removing any of the three Ds — anything that’s diseased, damaged, or dead. Broken and damaged branches are more than just unsightly. They open the tree up to pests and disease. Prune back to at least 6 inches below the diseased area into healthy wood.

Removing dead branches is an obvious pruning task, but how do you know if a branch is dead or just dormant? Scrape away a small part of the bark, If it’s alive, it will be green underneath. If it’s dead, it will be hard and brown inside. You can also try the “bend test.” Bend the branch gently. A live branch will bend, but a dead branch will snap.

Water Sprouts and Suckers

Next, look for suckers and water sprouts and remove them. Water sprouts are newer branches growing straight upwards through the tree, whereas suckers are new growth springing up around the base of the tree.

Water sprouts are caused by heavy pruning in previous years, or by stress to the tree. To prune them away, cut at the base making sure to preserve the branch collar. The branch collar is a swollen area at the base of the water sprout. Prune to about 1/2″ away from the branch collar.

Crossing & Competing Branches

Look for branches that are not growing out from the center of the tree. These may be branches that, like water sprouts, grow straight upwards through the canopy. Also look for branches that are growing inwards towards the trunk. These branches are called competing branches because they compete for space, sun, and nutrients with healthier branches. Cut these away, so what remains are only healthy branches that are growing outwards from the main trunk.

Crossing branches are branches that grow across another. If left in place, these can rub against another branch causing damage. Removing a crossing branch ensures you won’t have to removed a damaged branch next winter!

The overall shape of the tree should be clearly visible now. Step back and look at the overall structure of the tree. If it still seems a little overcrowded in spots, prune until the shape is more even. You might want to raise the canopy a bit — that is, prune away any branches that are just too low. If there are branches that are in the way each time you mow in the summer, go ahead and remove them.

Renew an Overgrown Shrub

For shrubs that may have become overgrown and leggy through the years, a late-winter pruning can be done to improve shape, vigor, and blooming. Prune away the oldest and weakest canes at or near the ground level. This will improve the overall height & shape and should result in more foliage and better flower quality.

NOTE: It’s crucial to do a little homework before you begin pruning. If you prune spring-blooming shrubs (think lilac, forsythia, etc.) in late winter, you’ll be cutting off this spring’s blooms! Some shrubs (like hydrangea macrophylla) bloom on “old wood,” which means last year’s new canes. If you prune out the old wood on these shrubs, you’ll cut off the canes that would be blooming this year! So, a little judicious research will ensure you’re pruning the right shrub at the right time of year.

That’s it! If you keep up with this pruning checklist each winter, it should never become an overwhelming chore, and your trees and shrubs will be much healthier when springtime arrives.

Why Start Seeds Indoors?

“All the flowers of all the tomorrows are in the seeds
of today.”

~ Indian Proverb

Why should you consider starting this year’s garden indoors? Why not just wait until the last frost date passes, and plant seeds directly in the garden beds? There are lots of reasons — especially in Colorado — why getting a head start on the season is such a good idea. 

Get a Jump on the Growing Season
Besides just being a lot of fun, one of the best reasons to start seeds indoors is that here in Colorado, the growing season tends to be rather short — even more so in the mountain communities! Being able to set young plants out (as opposed to sowing seed directly) allows your crops to be a few weeks ahead at the beginning of the season, and that means earlier harvests of those tasty spring and summer veggies!

Grow a Warm-Season Crop in a Short-Season Climate
Everyone’s favorite summer vegetables usually have a long growing season. Beans, corn, and tomatoes can require anywhere from 60-100 days from seed to maturity, and those bright October pumpkins require 120 days! If you have to wait for the outdoor soil to reach the optimal temperature for growing, you’ll miss out on valuable growing days. Considering Colorado’s growing season is only an average of 150 days, getting started earlier sure can be an advantage. Start these popular summer crops weeks earlier by seeding indoors, and start enjoying those juicy tomatoes a little sooner!

When it comes to starting perennial flowers from seed, you may be able to get first-year blooms on flowers that usually don’t flower until their second year in the garden. Varieties that benefit from a head start indoors are: Asters, Black-eyed Susans, Coleus, and Lavender.

Grow a Variety That Isn’t Offered as a Starter Plant
You might also consider starting from seed if you’d like to try varieties of veggies that your local garden center doesn’t offer as “starts” or young plants in the spring. By growing your own vegetables from seed, you have more varieties available to you. For example, while we grow more than 200 different types of vegetable plants each year here at Echter’s, we can’t offer every variety of every crop. Sometimes there may be something you’d like to grow in your garden that we don’t offer. Seed gardening is a great way to grow those extra-special varieties that may not be commonly available.

Fun for kids
If you’ve got little gardeners around the house, the process of planting a dry, dead looking seed into soil, then watching it sprout and grow into a live plant is nothing less than magic! It can also provide a valuable lesson in where our food comes from. One small seed can grow a lot more than a plant. It just might grow a lifelong love of gardening.

A Word of Caution
With some crops, it can be beneficial to just wait until after the last spring frost and sow directly into the garden. This tends to be true of root vegetables like radishes and carrots. Root crops are fussy about being transplanted because no matter how careful you are during the transplanting process, there’s bound to be some minor root damage, and that will show up in the final vegetable. Direct sowing produces better results in those plants.

There’s so much satisfaction that comes from starting your garden from seed. You control what’s going into your food crops, you can save money, and you have access to a greater variety of plants. One of the nicest things about seed gardening is having something green and growing during the grey days of winter. Pay us a visit, and be inspired by all the crops and varieties that are available this year!

Caring for Your Fresh Christmas Tree

Never worry about the size of your Christmas tree. In the
eyes of children, they
are all 30 feet tall.
~Larry Wilde

Nothing says Christmas like the spicy scent of a fresh-cut Christmas tree — a real tree. Keeping your tree fresh through the holiday season can be tricky though! Here are a few tips from the pros on how to make that forest freshness last.

BRINGING THE TREE HOME
When purchasing your fresh Christmas tree, be sure to bring a blanket or tarp to cover the tree if you are tying it to the top of your car. This will protect your tree from drying out on the way home. Be certain your vehicle can safely transport the tree you purchase to your home. Bring rope or bungee cords to secure the load adequately. 

GIVE IT A FRESH CUT
Begin by cutting 1-2″ off the trunk of your tree, and immediately place it in water. Why? When trees are cut, pitch oozes out and seals the pores. By sawing a bit off the base, you’ll open up the pores, and the tree will be able to absorb water. Then add tree preservative to the water.

WATER, WATER, WATER!
The best way to keep your Christmas tree fresh is to keep it hydrated. It’s the single most important thing you can do for your tree. A Christmas tree may “drink” a gallon or more of water each day, so check the reservoir often! Making sure your tree has enough to drink each day will prevent needles from drying, boughs from drooping, and will help to keep the tree fragrant.

Never let the water level go below the tree’s base! A seal of dried sap can form over the cut stump in just four-to-six hours if the water drops below the base of the tree. If the reservoir goes dry — even once — the tree cut will seal and may not take up water again.

LOCATION IS KEY
A Christmas tree may look beautiful next to a fireplace, but heat sources will only serve to dry out your tree. Place your tree away from fireplaces, wood stoves, heating vents, and direct sunlight. The lights on the tree produce drying heat as well. Always turn the tree lights off when leaving home or going to sleep for the night.

KEEP IT COOL
Lower the temperature in the room with your tree. It’s another way to slow down the drying process. The lower the temperature of the room, the better the tree will do.

WHEN IN DOUBT,
DO WHAT THE PROS DO
!
Professionals use products like Wilt Stop to prolong the freshness of Christmas greenery. It’s a natural, non-toxic product derived from the resin of pine trees. It has the unique ability to form a soft, clear flexible film on plants, and it’s what the pros count on to extend the life of fresh-cut Christmas trees. It’s a great way to prevent moisture from escaping and drying the branches out!

AFTER CHRISTMAS
The end of Christmas doesn’t have to be the end of life for your Christmas tree! Fresh-cut trees are useful in the garden in a number of ways.

You can use the pine needles for mulch. Pine needles are full of nutrients that enhance the pH of your soil and can prevent soil compaction in the winter.

Put your leftover Christmas tree outside, and decorate it with strings of popcorn and cranberries to feed the birds. Add pine cones which have been spread with peanut butter and rolled in bird seed. The birds will love you!

Use branches as extra insulation. Cut off the branches of your tree and lay them on your garden bed, the boughs will protect your plants from winter freezes and spring thaws. By laying them on your garden you’re giving your plants an even, steady temperature through the coldest months of the year.

A fresh-cut Christmas tree can be an easy and enjoyable part of your holiday celebrations. With just a little know-how, attention, and maintenance, your tree can provide that forest-fresh scent throughout the holiday season.

Caring for Holiday Bloomers

Poinsettias

It’s just not the holiday season without these bright, festive classic plants! You can’t go wrong with rich red poinsettias, but they’re available in everything from a snowy white to candy pink — even speckled and marbled varieties! They’re easy to care for, and with a few tricks, they’ll last through the holiday season and beyond.

Poinsettias prefer a bright area away from cold drafts, fireplaces, radiators, or heat vents. Keep them from direct sun. Never expose the plant to cold temperatures for more than a few minutes; a chilled or frozen plant will begin to drop leaves very quickly. Never allow the soil of you poinsettias to dry out completely, but be sure they are not constantly wet or sitting in water inside the foil wrap. Water the plant thoroughly only when the soil surface is dry to the touch. Remember to discard excess water from the saucer.

Be careful of locations where the hot afternoon sun may shine directly on the colorful bracts and cause the color to fade. Temperatures ideally should not exceed 70° during the day, or fall below 65° at night. To prolong the bright color of the bracts, temperatures should not exceed 72 degrees Fahrenheit during the day or 60 degrees Fahrenheit at night.

Amaryllis

These statuesque bloomers are a Christmas tradition for many! Their large, colorful blooms bring life to the darkest days of winter. They offer a variety of brilliant festive colors, and are extremely easy to grow.

Amaryllis bulbs will bloom 7-10 weeks after planting. Choose a pot about 2″ wider than the bulb and one that is heavy enough to keep from tipping. Fill the pot part way with potting mix. Set the bulb so that the top 1/3 of the bulb will be above the top of the soil when you fill the pot to 1″ below the top edge of the pot. Give the plant about 4 hours of bright light a day. Plant every 2 weeks for a spectacular color show all winter.

Once the blooms have faded, the plants are not dead! You can rebloom the same bulb the following year. Just cut back the flower stalks to 1-2″ above the bulb, and allow the leaves to continue growing into spring and summer, watering and rotating regularly. Around mid-August, allow the bulb to go dry and allow the foliage to naturally die back. The bulb can then be stored in a cool, dark spot for 8-12 weeks of dormancy. Once the dormancy period is met, the bulb can be repotted in fresh soil, watered, and set in a sunny spot to bring life to another holiday season.

Cyclamen

These are wonderful plants for brightening your home during the holidays. The pink, red, white or maroon flowers will continue for weeks. They prefer a cool, dry and bright place.   Choose a plant with plenty of unopened buds to get the most flowers this season. 

With proper care, cyclamen will bloom indoors for several months and can be kept through the summer to provide another display of blossoms next winter. This plant does best in a cool room and in bright light, but away from direct sunlight.  A north or east-facing windowsill is ideal. General Care:  Remove faded flowers and old leaves.  After the plant has stopped blooming, reduce watering and stop feeding.  Place the pot in a cool spot and keep it dry until July.  Then repot the cyclamen tuber in fresh compost, burying the tuber to half its depth.  Place the pot in a cool, well-lit spot and water to keep the soil moist.

Christmas Cactus

Holiday cacti make a great addition to your holiday décor. Their intensely colored blooms droop gracefully at the end of bright green branches. They’re available in an array of different colors, and can continue to bloom long after the holidays are over.

They prefer cooler rooms. Keep the soil on the dry side in November. Only water when the soil feels dry about an inch below the surface. To ensure flowers for Christmas, keep your plant in a room with bright daylight hours and no light after sunset.  Flower buds should set and the plants will be in flower by late December.

Fragrant Herbs

To bring fragrance into your home during the holidays don’t forget herbs! Rosemary, lavender and thyme along with many other herbs will add a delightful aroma to the home. Use the wonderful scent of fresh greens and pine trees to add to the traditional holiday atmosphere.

Don’t wait until spring to enjoy fresh flowers. Keep the bloom going, and add color and life to your winter season with these popular indoor plants.

Nurturing Houseplants in Winter

Now that our doors and windows are closed for the winter, houseplants provide a welcome splash of life and color in our indoor landscape.

Fresh, vibrant, and green, those innocent looking houseplants contribute much more than just a touch of color though. They play a significant role in keeping stale, recirculated air clean. Plants create fresh oxygen, filter dangerous toxins out of the air, and add a bit of fresh air to any room they live in. For the most part, houseplants are pretty easy to care for, but the winter season can present some special challenges for them. Here are a few quick tips to make your indoor garden a successful one.

BUMP UP THE AVAILABLE LIGHT
Adequate light is one of the most important environmental factors in successfully growing plants indoors. Too little light may make your plant leggy with spindly new growth. Let your plants receive as much light as possible during the darker winter days. As the angle of the sun changes and the days get shorter, you may want to rearrange your plants to ensure they’re getting sufficient light in the winter months.

If you don’t have a sunny windowsill to house your indoor garden, grow lights can be especially useful. The proper lighting can supplement sunlight, or replace it entirely in the winter! Echter’s carries everything from full-spectrum bulbs to fluorescent grow tubes that fit in standard fixtures. Add some digital timers, and getting enough hours of light for your houseplants becomes effortless!

CHOOSE PLANT LOCATIONS CAREFULLY
Place your plants well away from winter’s chill. Don’t put them near entry doors where they will be exposed to cold drafts. Make sure the leaves of your plants living in window areas don’t actually touch the window. Minimize exposing plants to temperature extremes by placing them well away from your heating system’s air vents and also away from your fireplace.

DECREASE WATER & FOOD
Remember that indoor plants need less water & fertilizer during the short days of winter. Shorter days mean less growth, so you’ll want to water only when your plants require it.

Overwatering is the number one killer of houseplants! Frequent watering forces air from the soil and opens the door for root-killing bacteria and fungus to move in. Surface soil can dry out more quickly during winter months, but that’s not a good indicator that the plant needs water. Push your finger into the soil to determine if it is dry an inch or two below the surface—that’s when it’s time to bring out the watering can. Avoid shocking your plants’ roots by using room-temperature water in the winter. Use fertilizer at half strength every other time you water until about mid-March.

INCREASE THE HUMIDITY
Houseplants will benefit from added humidity. Humidifiers are great, but you can also use a simple-to-make pebble tray. Take an oversized saucer, add pebbles, and fill halfway with water. Then place your plant on the pebbles. As the water evaporates, add more, but don’t let the plant sit in water. 

KEEP A SHARP EYE
OUT FOR PESTS
Dry air in our winter-warm homes can create a favorable environment for pests. Keep a close eye on your plants’ leaves for signs of problems. Periodically check your plants with a magnifying glass.

Thoroughly check the undersides of leaves, stems, and branch axils. Look for common plant pests such as spider mites, mealybugs, whiteflies, & fungus gnats. Spotting problems and responding to them early can keep populations from exploding.

Just as winter is a season of rest for the outdoor garden (and the gardener!), consider it an off season for your houseplants, and give them a season of rest too. Give them the essentials, but leave things like repotting and propagation until spring when your plants begin growing actively again. Next spring, after a long winter’s nap, your plants will be ready to get growing again!

Putting the Garden to Bed

In October, when the temperatures finally begin to cool, it’s a welcome sign that soon both gardens and gardeners will be able to settle in for a well-earned winter’s rest.

Those cozy evenings by the fireside will be here before we know it, but this month, there’s still plenty to be done to get the garden ready for its dormant period, and also to prepare for next year’s busy growing season!

BEGIN BY CLEANING UP THE BEDS
Start the winterizing process with a good cleanup! A proper cleanup this fall will improve overall plant health for the following year. Begin by removing any weeds. They’re sending their energy into their roots just like all the other plants at this time of year. You’ll want to get them out, so they don’t spread seed or dig deeper roots over the winter.

You’ll also want to clean up dropped fruit under fruit trees. Fruits and vegetables left out all winter will only rot, attract animals, and set seed. Remove all vegetable plants that are finished producing for the season. Dispose of plants which had insects or disease. You don’t want to put those in the compost pile. The same goes for weeds. Pull out all dead plant material. This helps keep your garden healthy through the winter and helps protect against pests.

CUTTING BACK & PRUNING
Many perennials and ornamental grasses add seasonal interest to the garden with attractive seed heads and plumes. Choose what you would like to remain intact and tidy up others by cutting tall stems back to the base foliage.

Cutting old and diseased foliage in the fall can help perennials jump right into new growth come spring. However, do not prune early-flowering shrubs such as lilac, forsythia, certain varieties of hydrangea, or rhododendron. These have already set next spring’s flower buds. Pruning now would remove next spring’s blooms! Spring bloomers like these can get a haircut right after they finish flowering next year.

AMEND THE SOIL — Autumn is a great time to amend your soil by working in organic matter. The addition of compost now will improve the soil next spring. Rototilling, or turning the soil over, will reduce insect and disease problems next year. Be sure to do this while the soil is dry.

ADD MULCH — Renewing all mulches in the autumn will yield several benefits. It helps maintain a consistent soil temperature, retains moisture, and prevents exposure of roots — which is a common cause of winter damage. Apply mulch around perennial plants — especially those that have been recently planted — as well as around trees and shrubs.

PREPARE FOR THOSE EARLY FROSTS — Keep an eye on those weather apps for nighttime temps dipping to or below freezing, and keep the frost blankets handy. A little protection for the first frost or two ensures your plants will continue to thrive in the warm autumn days that invariably follow a frost. If you run out of frost blankets, be sure to cover with a similar breathable material. Plastic is not recommended for frost protection because condensation beneath the plastic may lead to ice formation, which can damage the foliage.

TO HARVEST, OR NOT TO HARVEST — THAT IS THE QUESTION!

Though you may be able to extend the season by using floating row covers and frost blankets for the first autumn frost or two, generally it’s time to pull the warm-season veggie plants and put any harvests on the table for dinner. Here is a brief list of what to protect and when to call it a season:

Beans will not tolerate frost. Harvest and put them on the dinner menu.

Corn is frost sensitive and also should be harvested rather than covered.

Harvest all unprotected tomatoes and peppers. Unripened tomatoes can be placed in a paper bag or between sheets of newspaper to continue ripening indoors. Be sure to check on them often throughout their ripening process.

Cucumbers and summer squash should be harvested and thoroughly wiped dry before storing. Thin-skinned cucumbers do not store well and those should be eaten within a few days.

WHAT NOT TO
HARVEST … YET
Not all crops need to be hurriedly harvested before an autumn frost. Some cool-season vegetables are actually improved by the cold!

– Root crops like carrots and beets can remain in the ground until there’s a danger of the soil freezing. The soil acts as their protection from frost.
Celery and late cabbage can be harvested after you notice the frost has slowed their growth.
– Don’t harvest winter squash or pumpkins yet! Wait until their vines are frost-killed and their skins are hard to the thumbnail.
Kale and collards can be left in the garden until long after the first fall frost. Continue to harvest as needed until the foliage finally succumbs to the cold weather.
Potatoes should be harvested after the vines die down, so the potato skin has a chance to mature. This makes them less susceptible to bruises, cuts, and moisture loss during storage.
Lettuces and salad greens can be covered with frost cloth.
Onions should be harvested only after the frost has stopped their growth.

For a deeper dive into methods of storing vegetables for the winter, the Colorado State University Extension provides this handy fact sheet.

TO RAKE, OR NOT TO RAKE? Rake! Although some fallen leaves can be mulched back into the soil with your lawn mower, most turf grasses will not tolerate a thick mat of leaves over the winter. Soggy mats of leaves on turf can lead to disease problems. You can add dry leaves to the compost pile, or shred & dig directly into your vegetable beds to improve the soil over the winter.

Aerate your lawn to loosen compacted soil, and apply Green Thumb Winterizer in mid-October. Your lawn will be nice and green in the spring. For the final mowing of the season, leave your grass at a height of 2½”.

Bindweed, dandelion, and other perennial weeds will be moving food reserves down to their roots now. This is a great time to use Weed Free Zone to kill these invasive weeds, roots and all.

Before you drain your sprinkler system for the year, give your lawn a good watering. Continue to hand water as long as temperatures remain above freezing.

Put a trip to Echter’s on your autumn to-do list! We’ll help you tackle putting your garden to bed. Then you can feel free to settle back and enjoy the season knowing that your garden is well-prepared for a long winter’s nap!

Spring-Flowering Bulb Planting 101

It just wouldn’t be spring without the bright, cheery blooms of tulips, daffodils, and crocus emerging from the ground to usher in the season! If you’ve never tried planting bulbs before, you’ll find it’s both fun and easy to create a beautiful spring display right in your own yard. Surprisingly, the time to plant them is in the autumn!

Why do you plant spring-flowering bulbs in the autumn? It’s because they require a long period of cool temperatures to spark the biochemical process that causes them to flower next spring. Because of that, it’s important to get them into the ground in the autumn before the ground freezes.

What is a bulb?
It’s really a self-contained flower factory! Each bulb has nearly everything the future flower needs to survive the winter and come to life in the spring. If you were to look inside the bulb, you would see a baby flower bud, leaves, roots, stem, and a food supply.


Plan Carefully for Color All Season Long!
With a little planning, you can have blooms starting before the snow melts and continuing into early summer. For an entire season of color, you’ll need to stagger bloom times. Check the packaging to see whether the bulbs are early, middle, or late spring bloomers. Begin by choosing some early bloomers like snowdrops and crocus. Then pick out some colorful tulips, hyacinths, & daffodils. These will provide mid-season color. Lastly, follow up with some of the late-season bloomers like Dutch iris and alliums. Mix or match your color scheme, it’s up to you!

Pay attention to the final height of each flower at maturity. Be sure to plant taller flowers at the back of a bed with shorter blooms in the front. This information is available on the bulb packaging as well. Armed with this information, all that’s left to do is plant them in the ground and wait for spring.

When to plant
You can plant spring flowering bulbs in the autumn after the temperatures cool down, but before the ground freezes. Visit your garden center early in the autumn for the best selection. If you can’t plant your spring bulbs right away, be sure to keep them in a cool, dry location (like a garage or basement) until you can get them in the ground. Warm storage conditions will signal the bulb to begin growing!

Where Should I Plant Them?
There are several factors to consider. First, look for a sunny location. Bulbs prefer full sun to rejuvenate for future years, so look for a part of your garden where they’ll receive at least six hours of sun each day. Also, look for a location with good drainage. Bulbs do not like “wet feet,” so you won’t want to place them anywhere water tends to collect in your yard. Lastly, consider planting your earliest blooming bulbs in a location you’ll be able to enjoy from inside your home! They’ll be a welcome splash of color on those still-chilly early-spring days, and you won’t have to step outside to enjoy them.

How Deep Should Bulbs be Planted?
You’ll want to dig a hole that’s three to four times the height of the bulb being planted. This means most large bulbs like tulips & daffodils will be planted about six to eight inches deep, while smaller bulbs like crocus will be planted 3-4″ deep.

Preparing to Plant
Your Color Show
After digging a hole to the proper depth, be sure to remove any weeds, rocks or other debris. Bulbs prefer humus-rich soils, so it’s important to add soil amendments like compost or sphagnum peat moss when planting in order to improve both drainage and moisture retention. Add a handful of bulb food or bone meal at the bottom of the hole, then place the bulb into the hole with the pointed tip upwards, and the flatter root end down.

No Yard? No Problem!
You can successfully grow bulbs in containers! Hold your bulbs indoors until mid-October before planting. Then fill your container part way with Echter’s Outdoor Container mix. Then plant lasagna style, beginning with the largest bulbs at the lowest level. Then add more soil and place the next level of bulbs. Continue to the top of the pot, then add a final layer of soil.

Water thoroughly, and place your container in an unheated garage or shed for the winter. In March, bring it out, and place it in a nice sunny location again. Water as needed, and your spring bulbs will be blooming in just a few weeks!

Bulbs are among the easiest flowers to grow. They require so little of the gardener — just a sunny spot and a few inches of well-drained soil. Water them occasionally, and let them work their magic over the winter. You’ll find this is one autumn garden task that pays big rewards the following spring!

Extending the Harvest

With the summer harvest season in full swing, the last thing you may be thinking about is planting more vegetables. But why give up popping out the back door to harvest fresh veggies just because summer is drawing to a close? Smart gardeners know that late summer is the ideal time to plant another round of crisp, fresh, cool-season veggies to extend the harvest just a little longer.

Late summer is prime time for sowing seeds! The soil is still warm from summer temperatures, so seeds germinate more easily. By the time seedlings are up and growing, the air temperatures will have begun to cool as autumn weather settles in. Warm soil & cool air —you couldn’t ask for better growing conditions!

Autumn gardening offers a few advantages over spring & summer as well. Spring planting problems (like bolting because of heat and pesky garden pests) aren’t an issue in the autumn. Even though frost is a necessary consideration, some vegetables are even sweeter after a light frost. So if you’re thinking of squeezing in a little more gardening before the season truly ends, grab your favorite cool-season veggie seeds and a calendar, and get sowing!

Successfully extending the vegetable season depends on a little careful planning. Begin by learning the average date of the first autumn frost in your area. Once you know this, consult the seed packet to find the days to maturity for each particular crop. For the peas in the seed packet to the left, it will be 62-75 days from sowing seed to mature peas. Armed with this information, count backwards on the calendar to find the date you should sow the seed. Simple!

TIP: You may want to pad your planting estimates with an extra couple of weeks. As the days grow shorter, there will be less sunlight for growing, and daytime temperatures will also be cooler. What may have grown quickly in the warming soil and lengthening days of spring, may take just a little longer in the autumn.

As you remove fading summer vegetable crops from your garden, it’s easy to plug in a frost-tolerant, cool-season crop in its place. Begin by adding a soil amendment to replenish essential micro-organisms, provide nutrients, and improve the overall condition of the soil. It takes healthy soil to grow healthy plants!

Lastly, be prepared for those early autumn frosts! Though there are a number of frost-tolerant crops that will laugh at a light frost, sometimes Mother Nature does something unexpected! It’s wise to be ready to give your plants an extra bit of help if necessary. Make sure to keep frost cloths & blankets, fleece tunnels & jackets, etc. at hand and ready to go on short notice. Keep a close eye on weather forecasts and forecasted overnight low temps. Protect your plants, and they’ll be able to keep right on growing in the Indian Summer that inevitably follows a first frost event.

Now … what to plant and when? With an average frost date of mid-October for our Zone 5 Colorado gardens, try planting these popular cool-weather loving crops in late August to early September. They are reliable favorites.

Go ahead and enjoy another round of leafy greens like spinach, chard, watercress, kale, and lettuces. Peas are another favorite for the autumn garden.

Root vegetables like carrots, beets, turnips, and radishes are popular choices that also do well in cool-season Colorado gardens.

Broccoli, cauliflower, cabbage, and kohlrabi will enjoy sunny days and cool nights in the autumn garden. They can all tolerate a light frost.

Autumn gardening can be rewarding and fun as long as you’re knowledgeable and prepared. Why not get just one more vegetable harvest in before winter arrives? Those late-season veggies will taste mighty good in soups & stews come January!